In this guide we will show you how to setup your WooCommerce store to post automatic Slack notifications whenever a new order is completed. Get notified in real-time whenever a sale is made and processed.
We use Slack for our day-to-day communication and receiving a notification every time a sale has been placed is a great motivator factor and it helps us streamline our after sales support and follow up with customers that much quicker.
Prerequisites
- Admin control of a free (or higher) Slack channel.
- A Zapier account.
- Latest version of WP Zapier plugin for WordPress.
Setting up WP Zapier for WooCommerce and Slack Notifications
Login to your WordPress dashboard and navigate to WP Zapier and select Outbound Events and create a new event. Name your event something that is unique such as “WooCommerce Slack Notifications” or something similar.
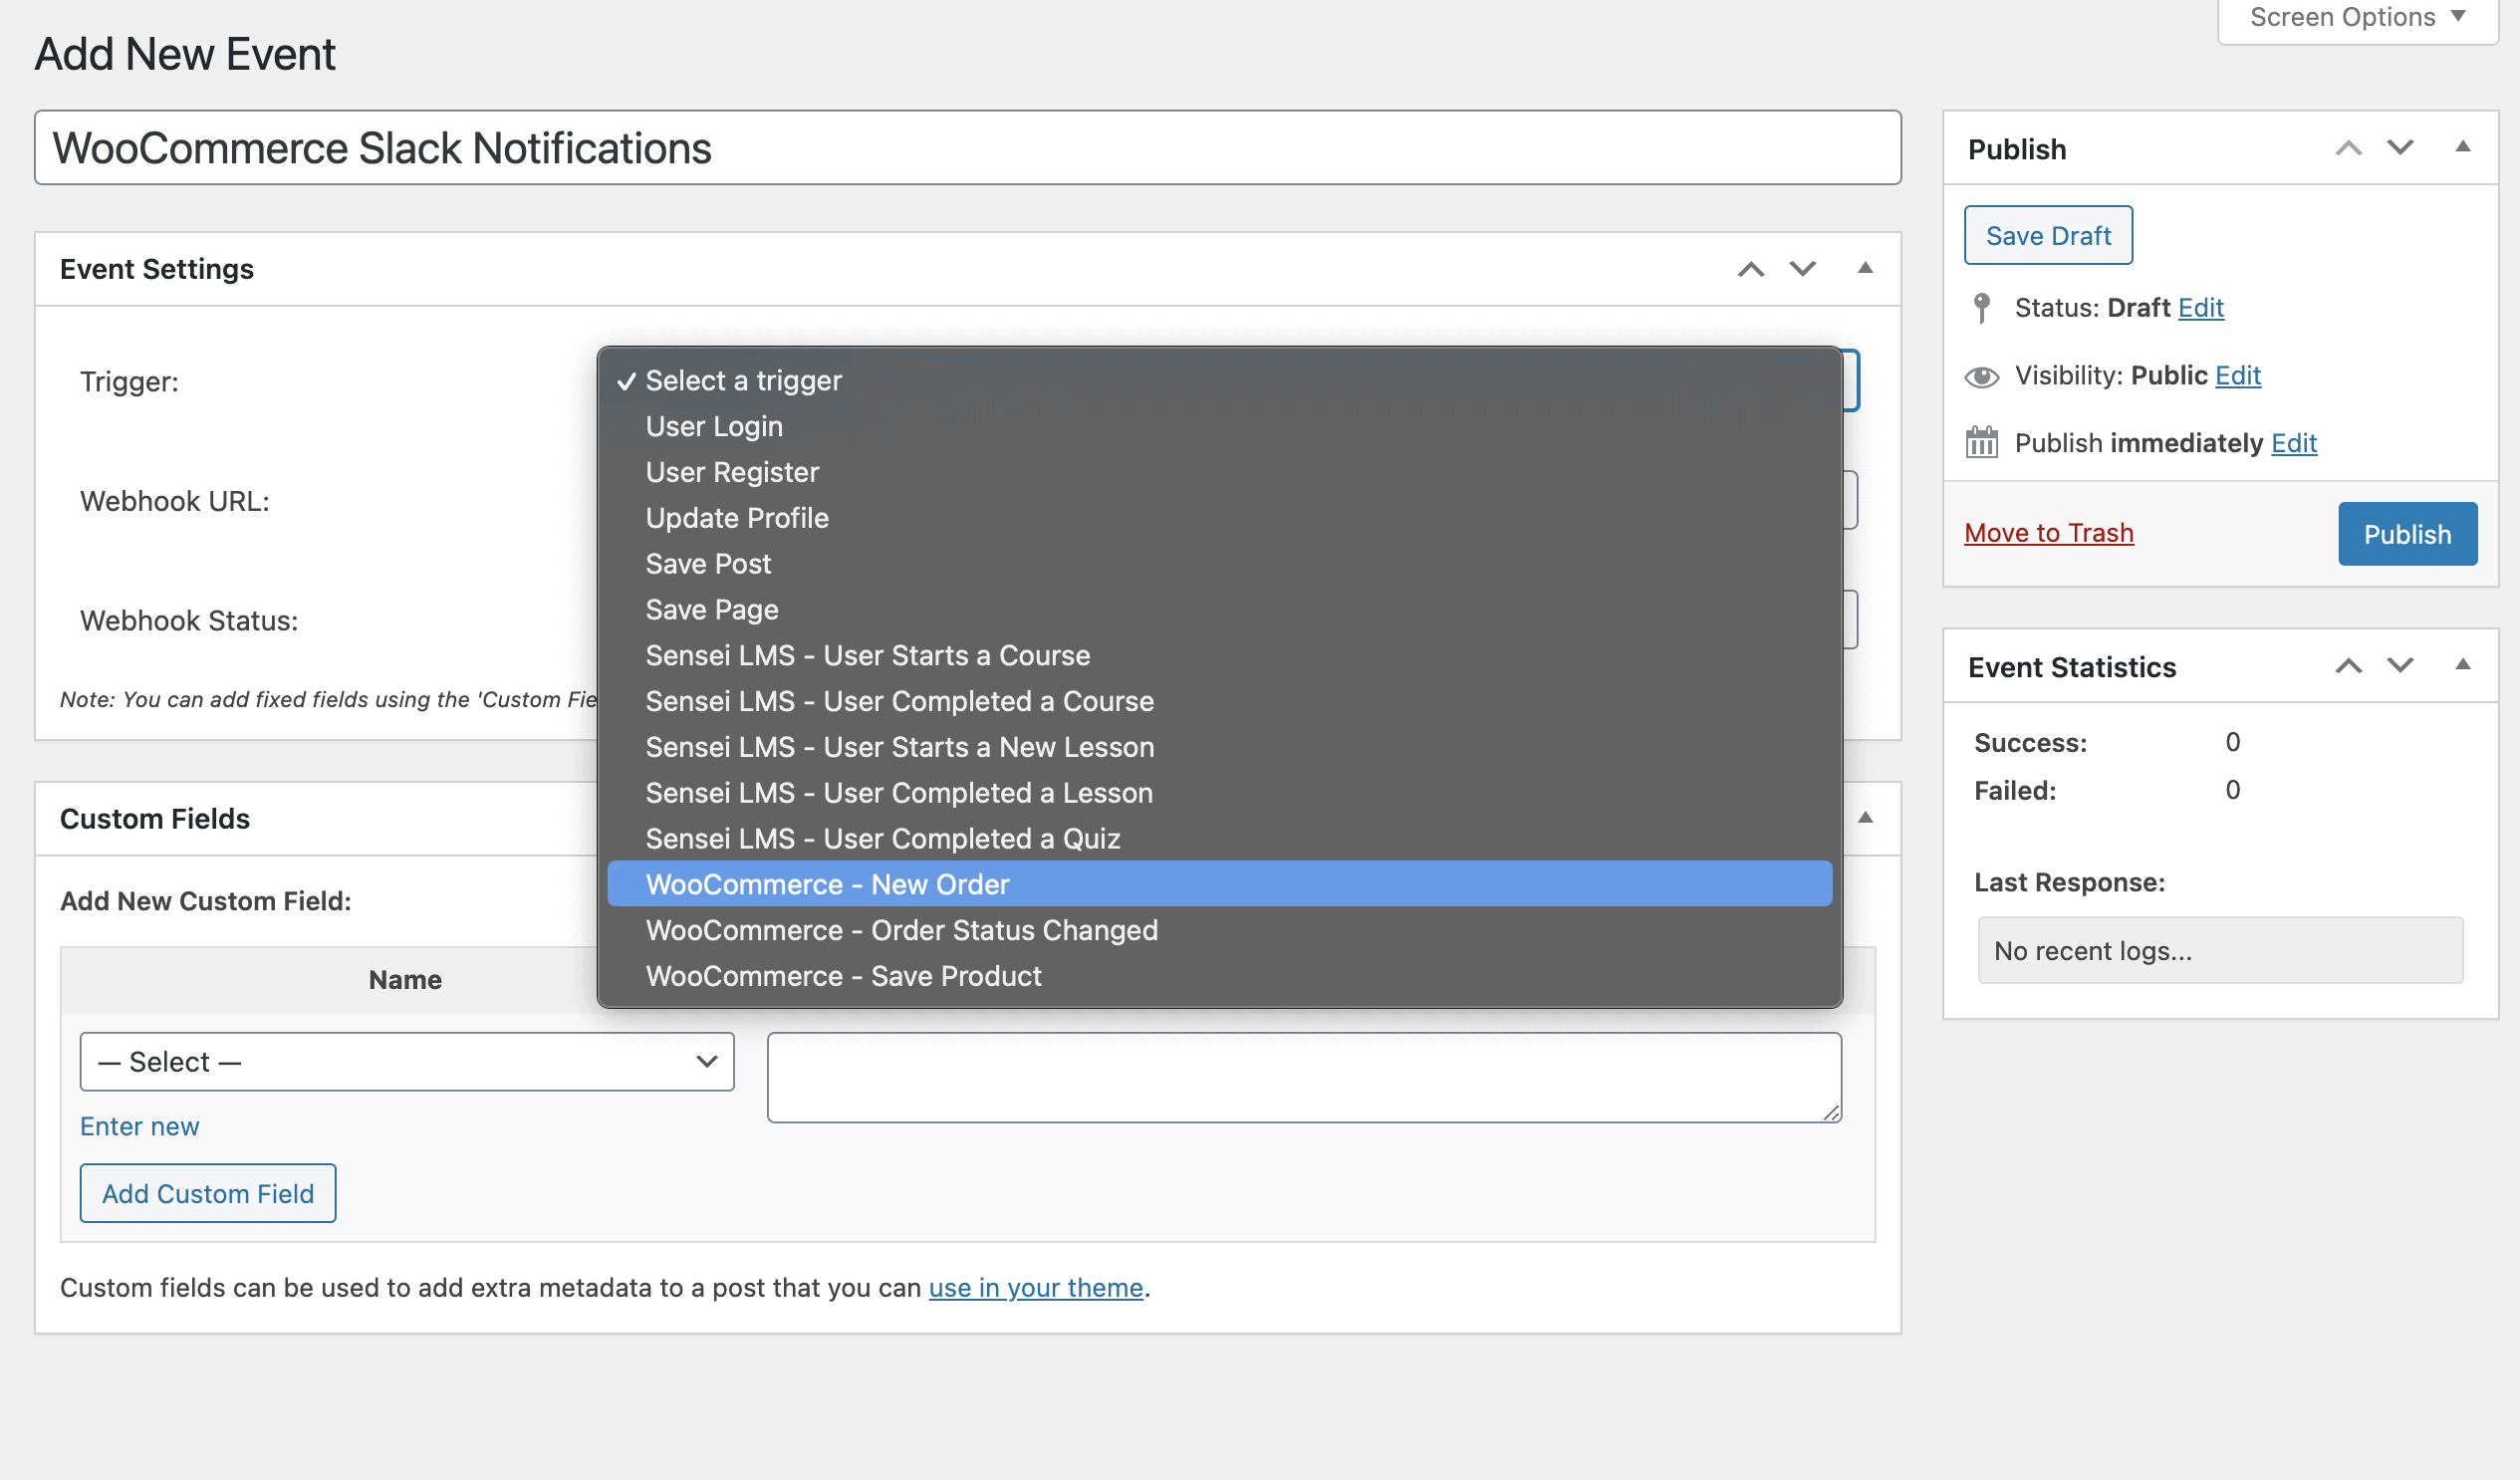
Under the Event Settings option set your trigger to WooCommerce – New Order. This trigger will run whenever a new order is placed and pass information to Zapier. Don’t save your settings just yet, in a new tab login to your Zapier account and select Webhooks by Zapier as your Zapier trigger.
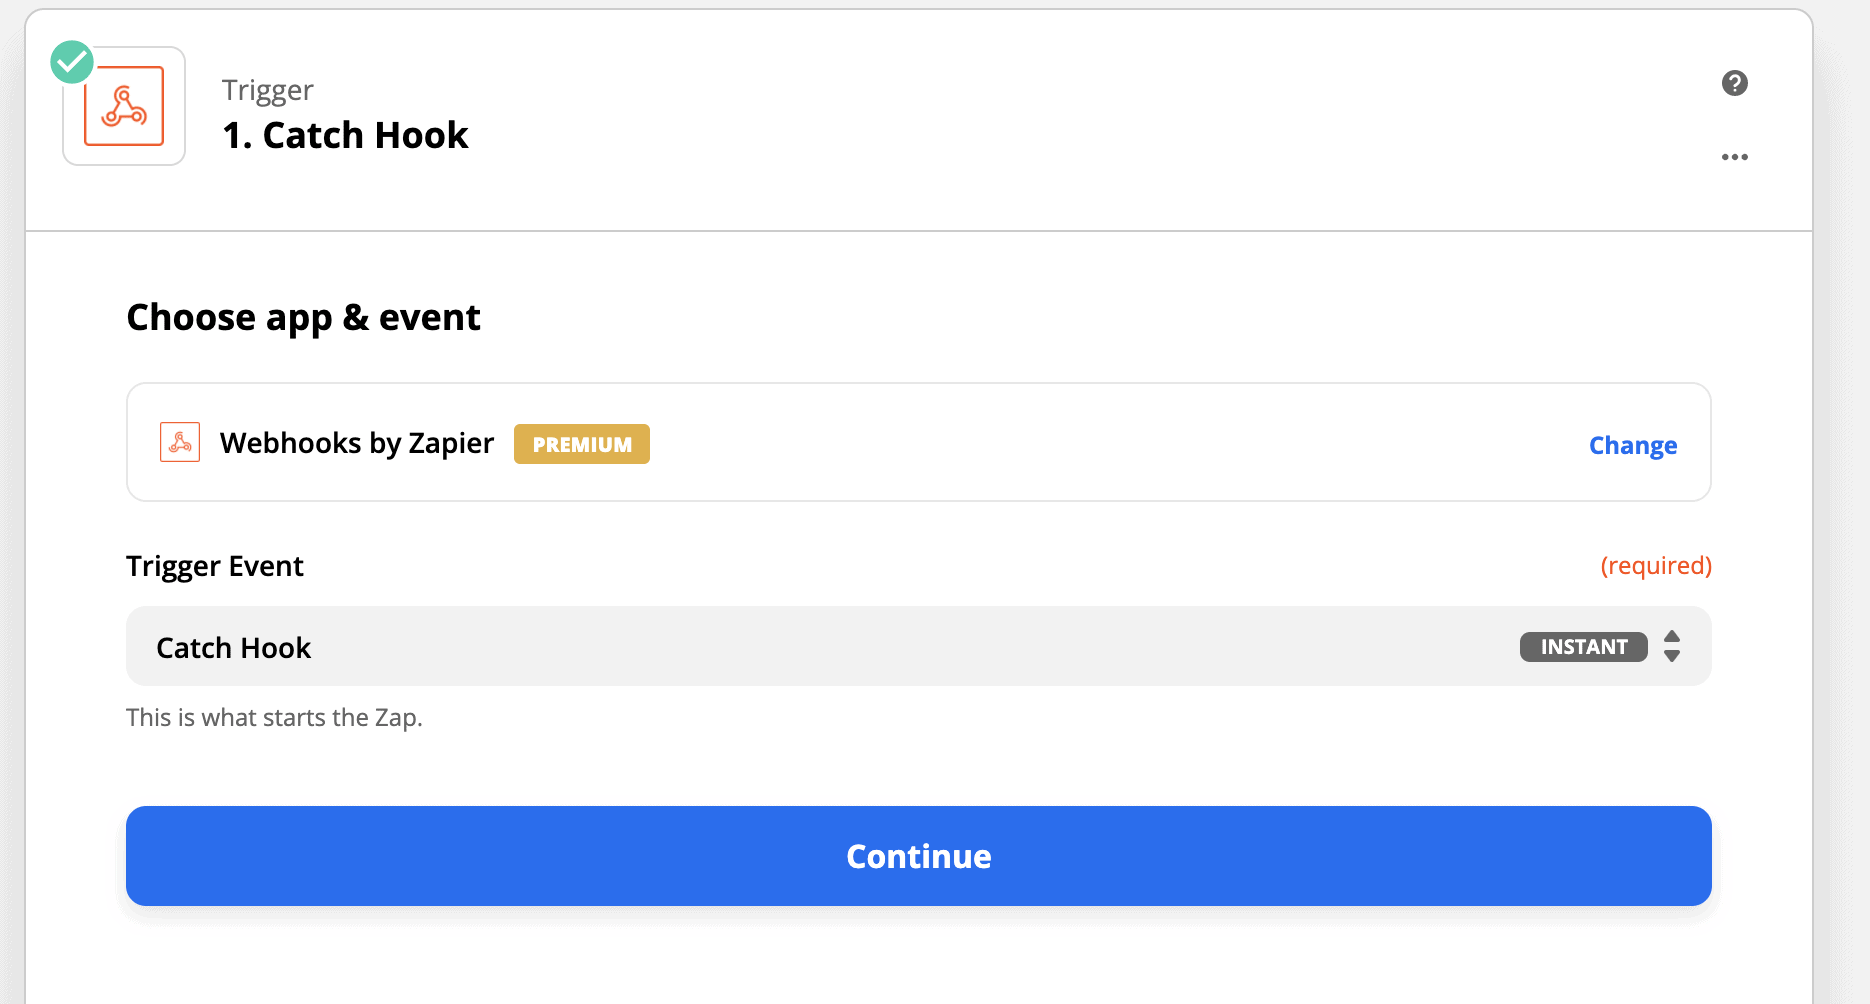
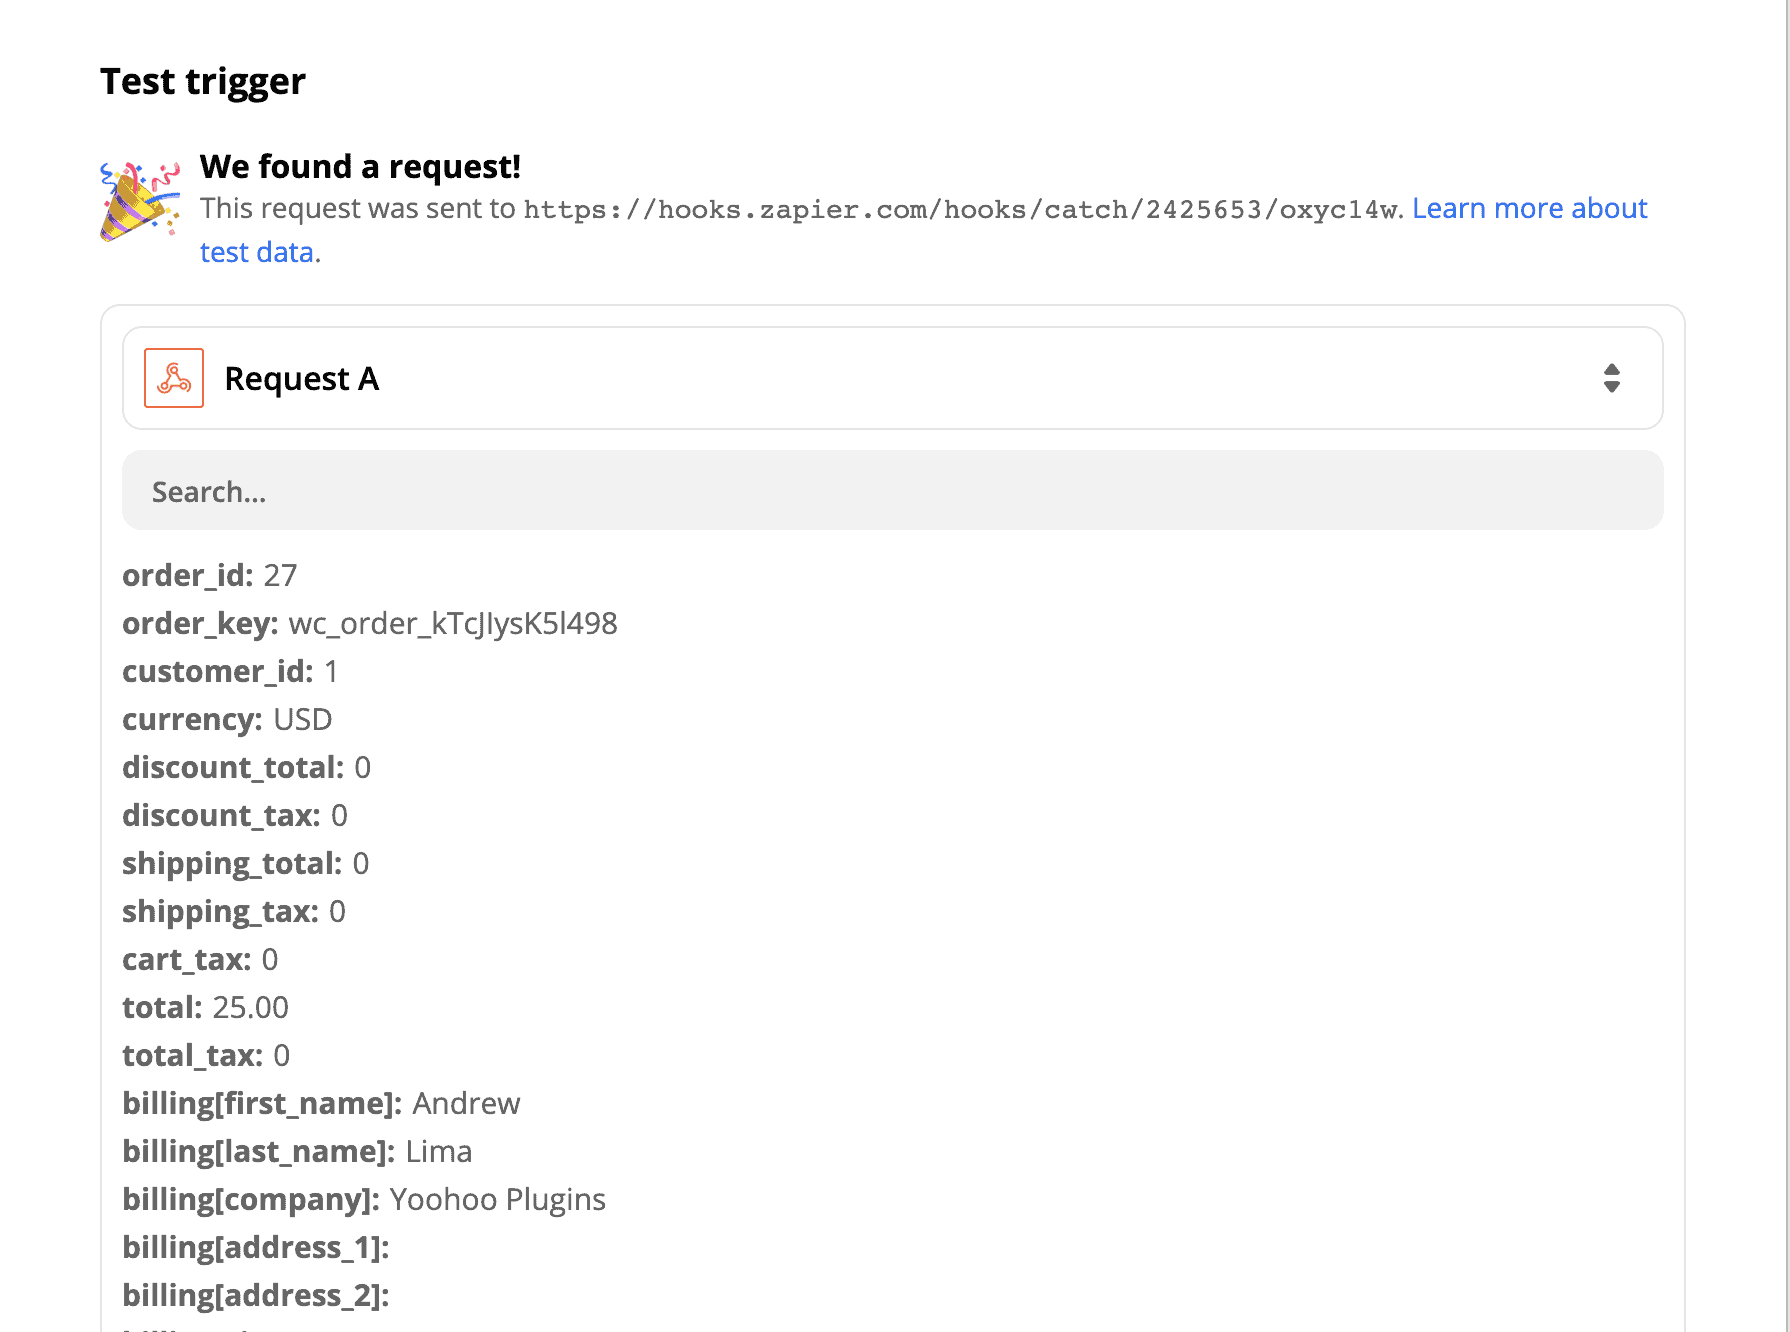
Choose Catch Hook as the Zap’s trigger event. This will instantly send data to Zapier whenever an order is placed in WooCommerce. In the second step of your Zap, under Set up trigger copy the custom webhook URL and navigate back to WP Zapier and paste it into the webhook URL field and save your outbound event.
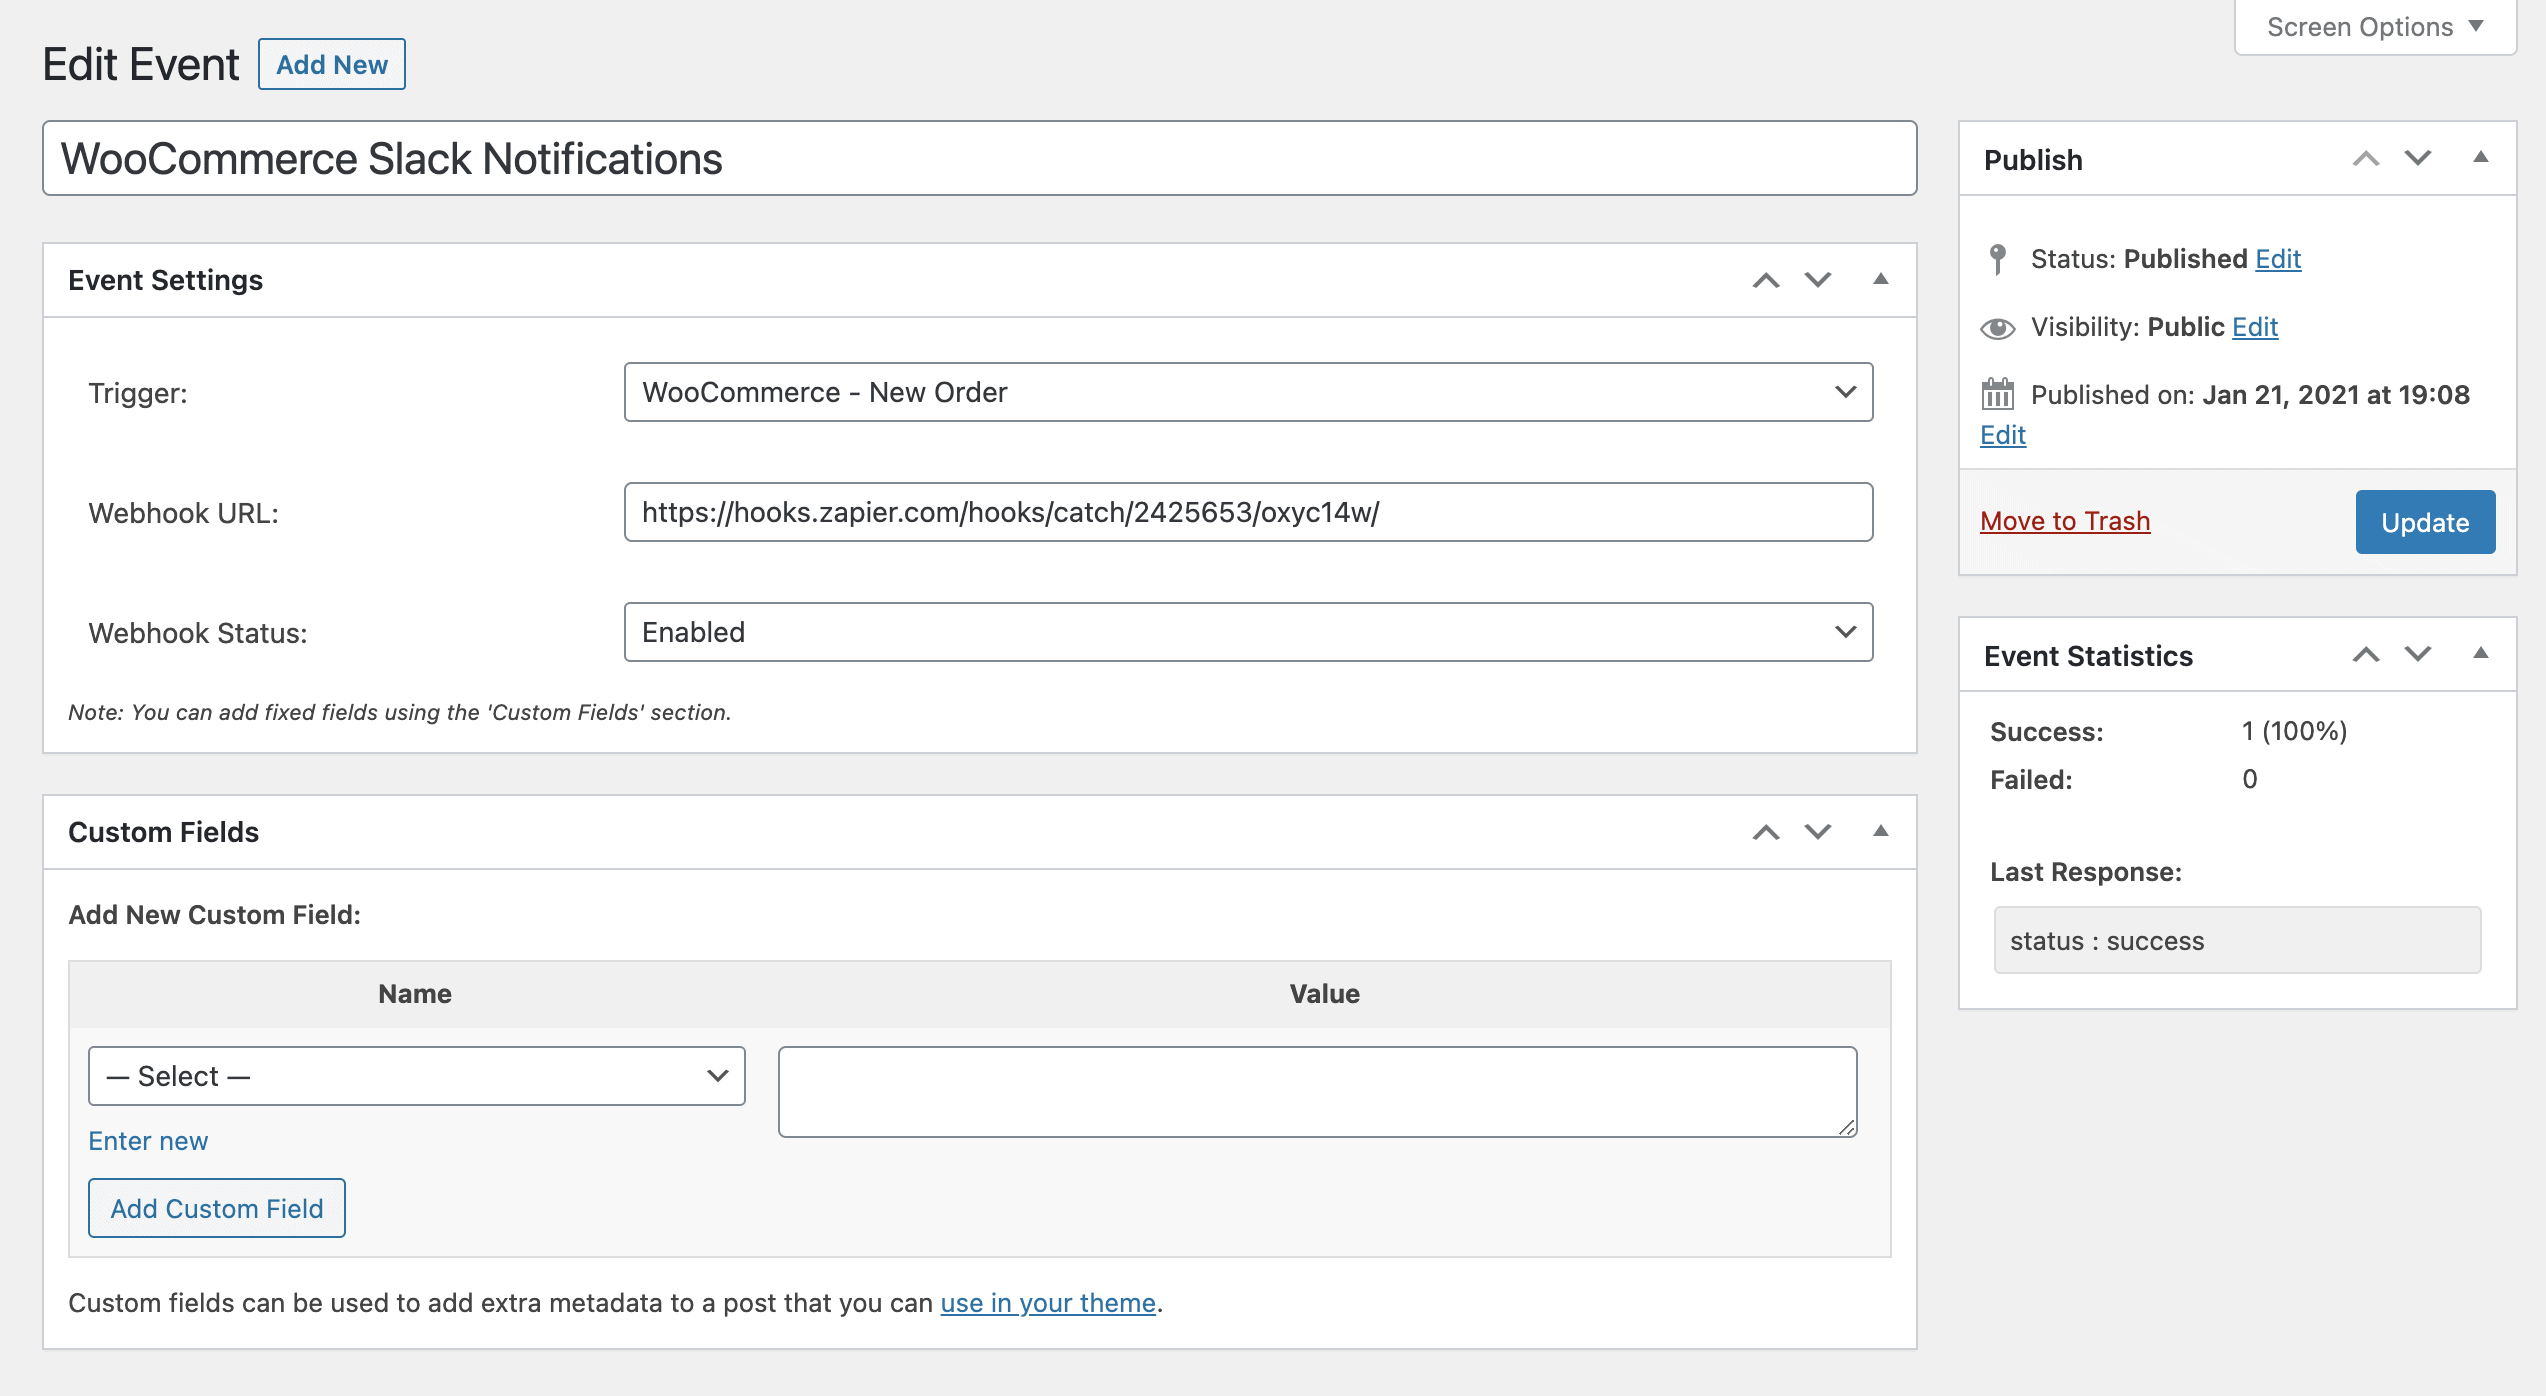
Once your Outbound Event is setup and active, navigate back to Zapier and continue to setup your Zap. To test your trigger, be sure an order was recently created in WooCommerce to ensure WP Zapier is communicating correctly with Zapier. In this case I manually created an order and assigned it to a user. You can delete this test order once your Zap is live.
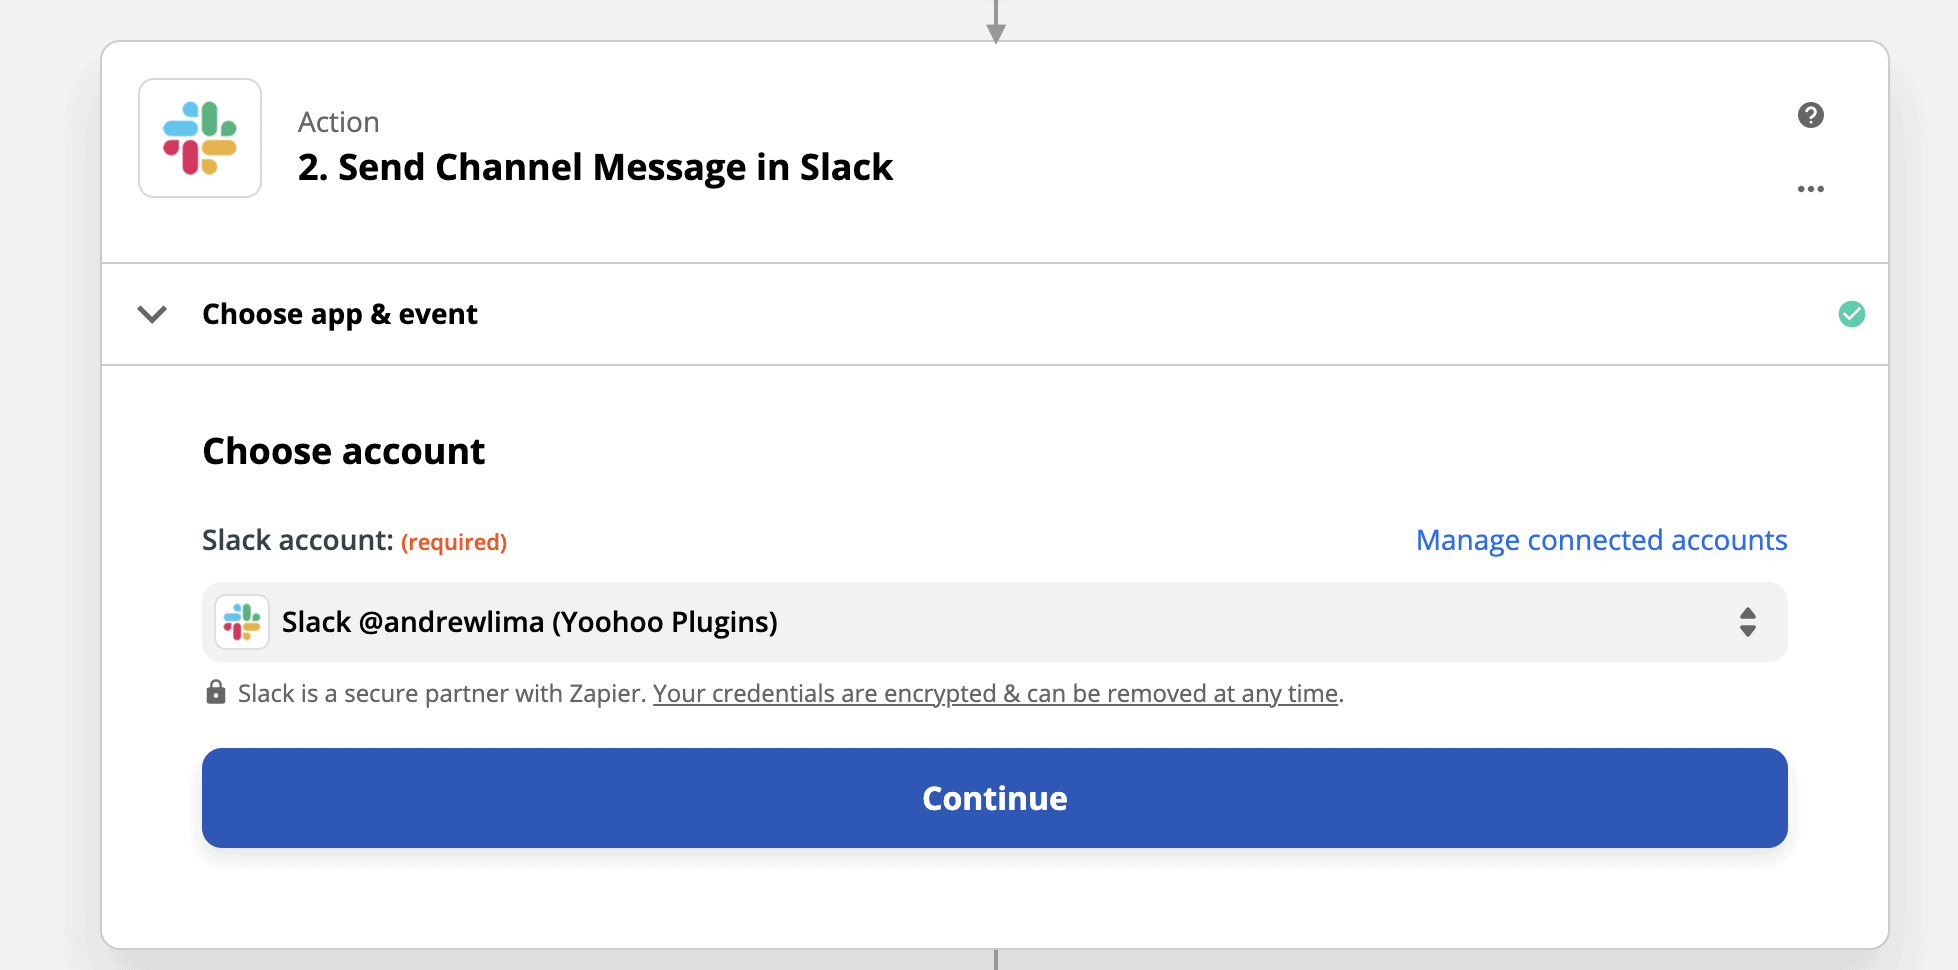
Now to setup the action in Zapier, choose Slack from the available applications Zapier supports. Choose send channel message (or an event that you’d like to use in Slack) and continue. Follow the steps to authenticate your privileges for your Slack workspace by signing into your Slack account and choosing your desired workspace if you belong to more than one team.
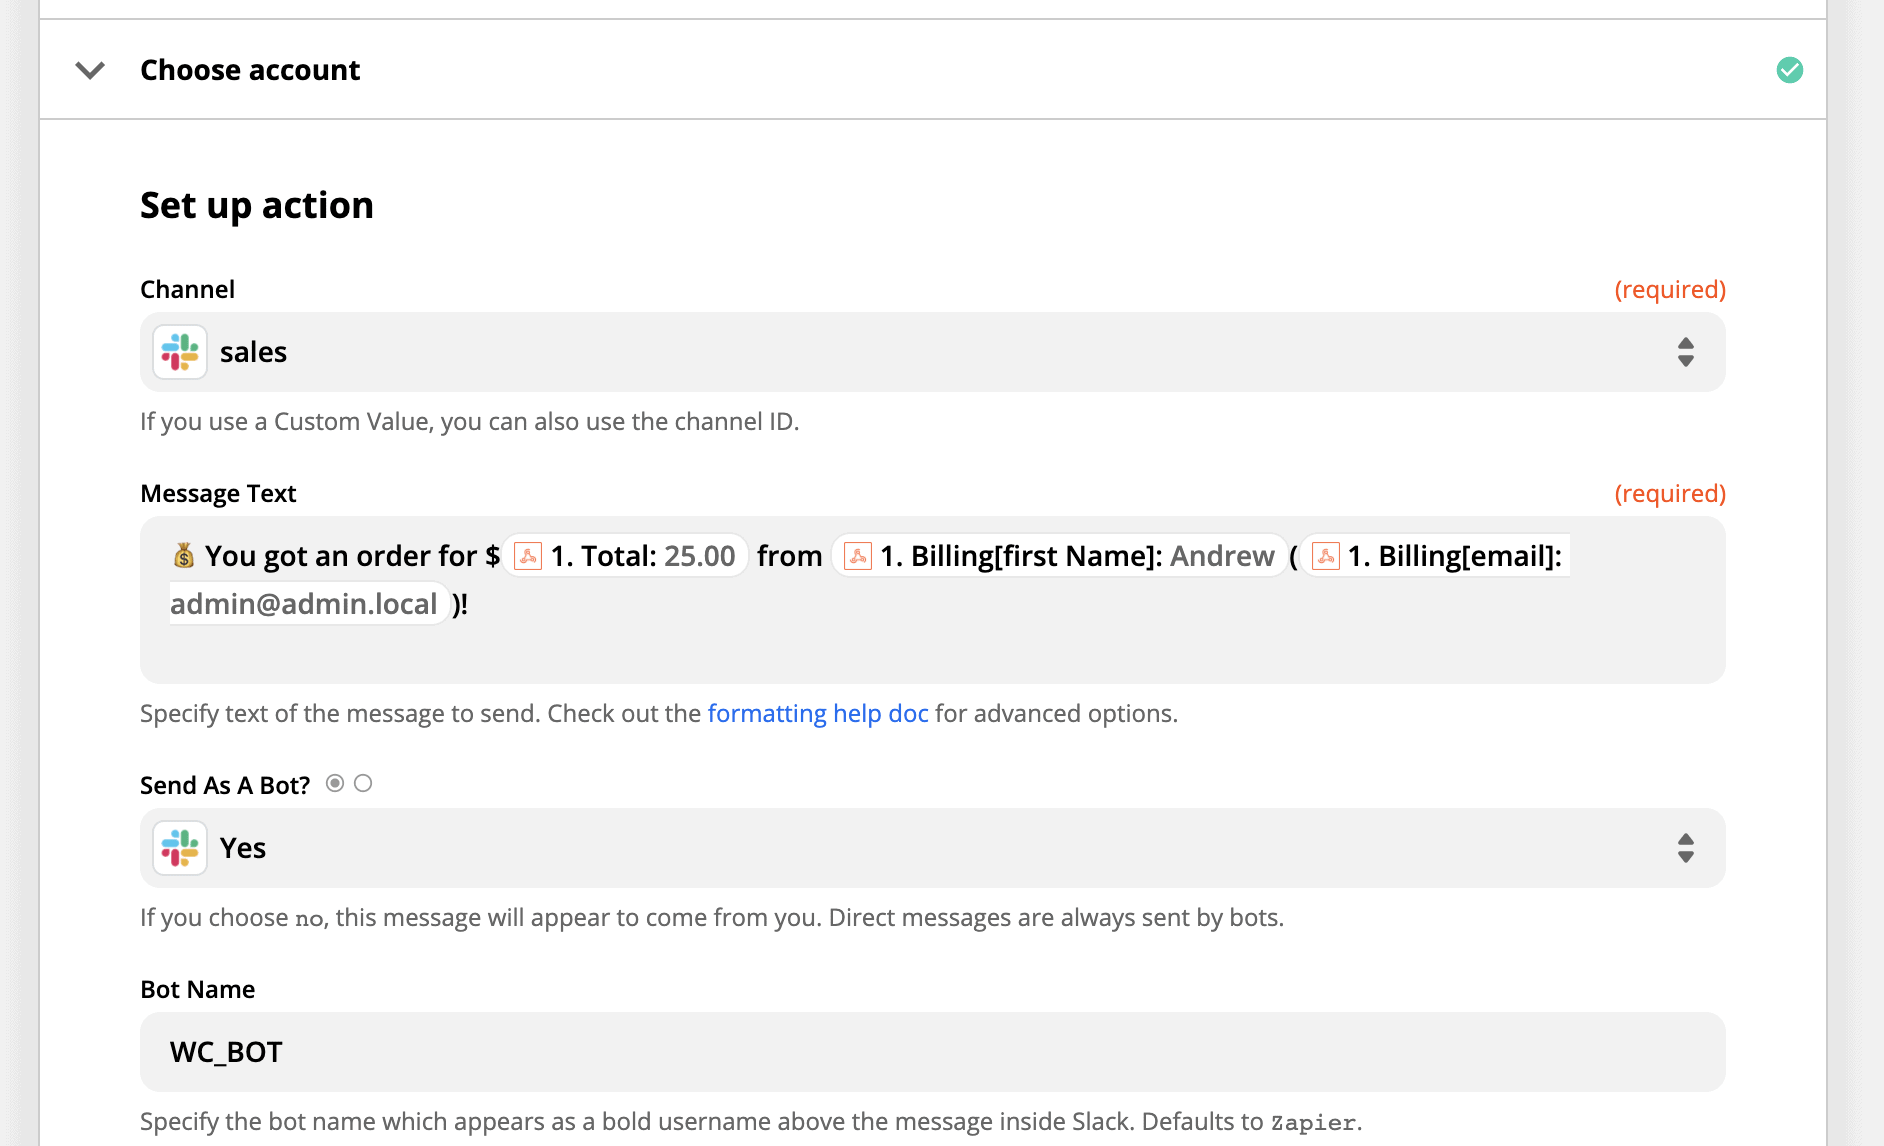
Once authenticated you can setup your channel to send these messages to, the bot’s name, the message the bot should send. Be sure to use data from your trigger to make it dynamic as per the screenshot below.
Finish setting up your Zap and now you will receive a Slack message whenever a sale occurs on your WooCommerce store!

Photo by Stephen Phillips on Unsplash
