
Adding an announcement bar to your WooCommerce store is great for telling your visitors important things about your store. Such as an ongoing sale, limited stock or delivery estimates during peak buying periods. In this guide we will show you how to setup an announcement bar.
Why Announcement Bars are Great for WooCommerce Stores
- It removes uncertainty. Potential customers may be “on the fence” about purchasing a product or service from your store. An announcement bar is a great way to convert more customers that were considering from purchasing from your store, by adding a reassuring message such as a money back guarantee; a promise to deliver before a big holiday etc.
- It can create urgency. We’ve all seen those countdown timers of a sale ending, or limited stock quantity. These are great conversion tips, and may help you convert more visitors into customers.
- Eye catching. A WooCommerce announcement bar often shows a striking caption to let visitors know something important. These notification bars often are the first things that catch a visitors attention – remember, too much can also have a negative effect on your site and sales. Here’s an article that explains the pros and cons of using pop-ups on your website.
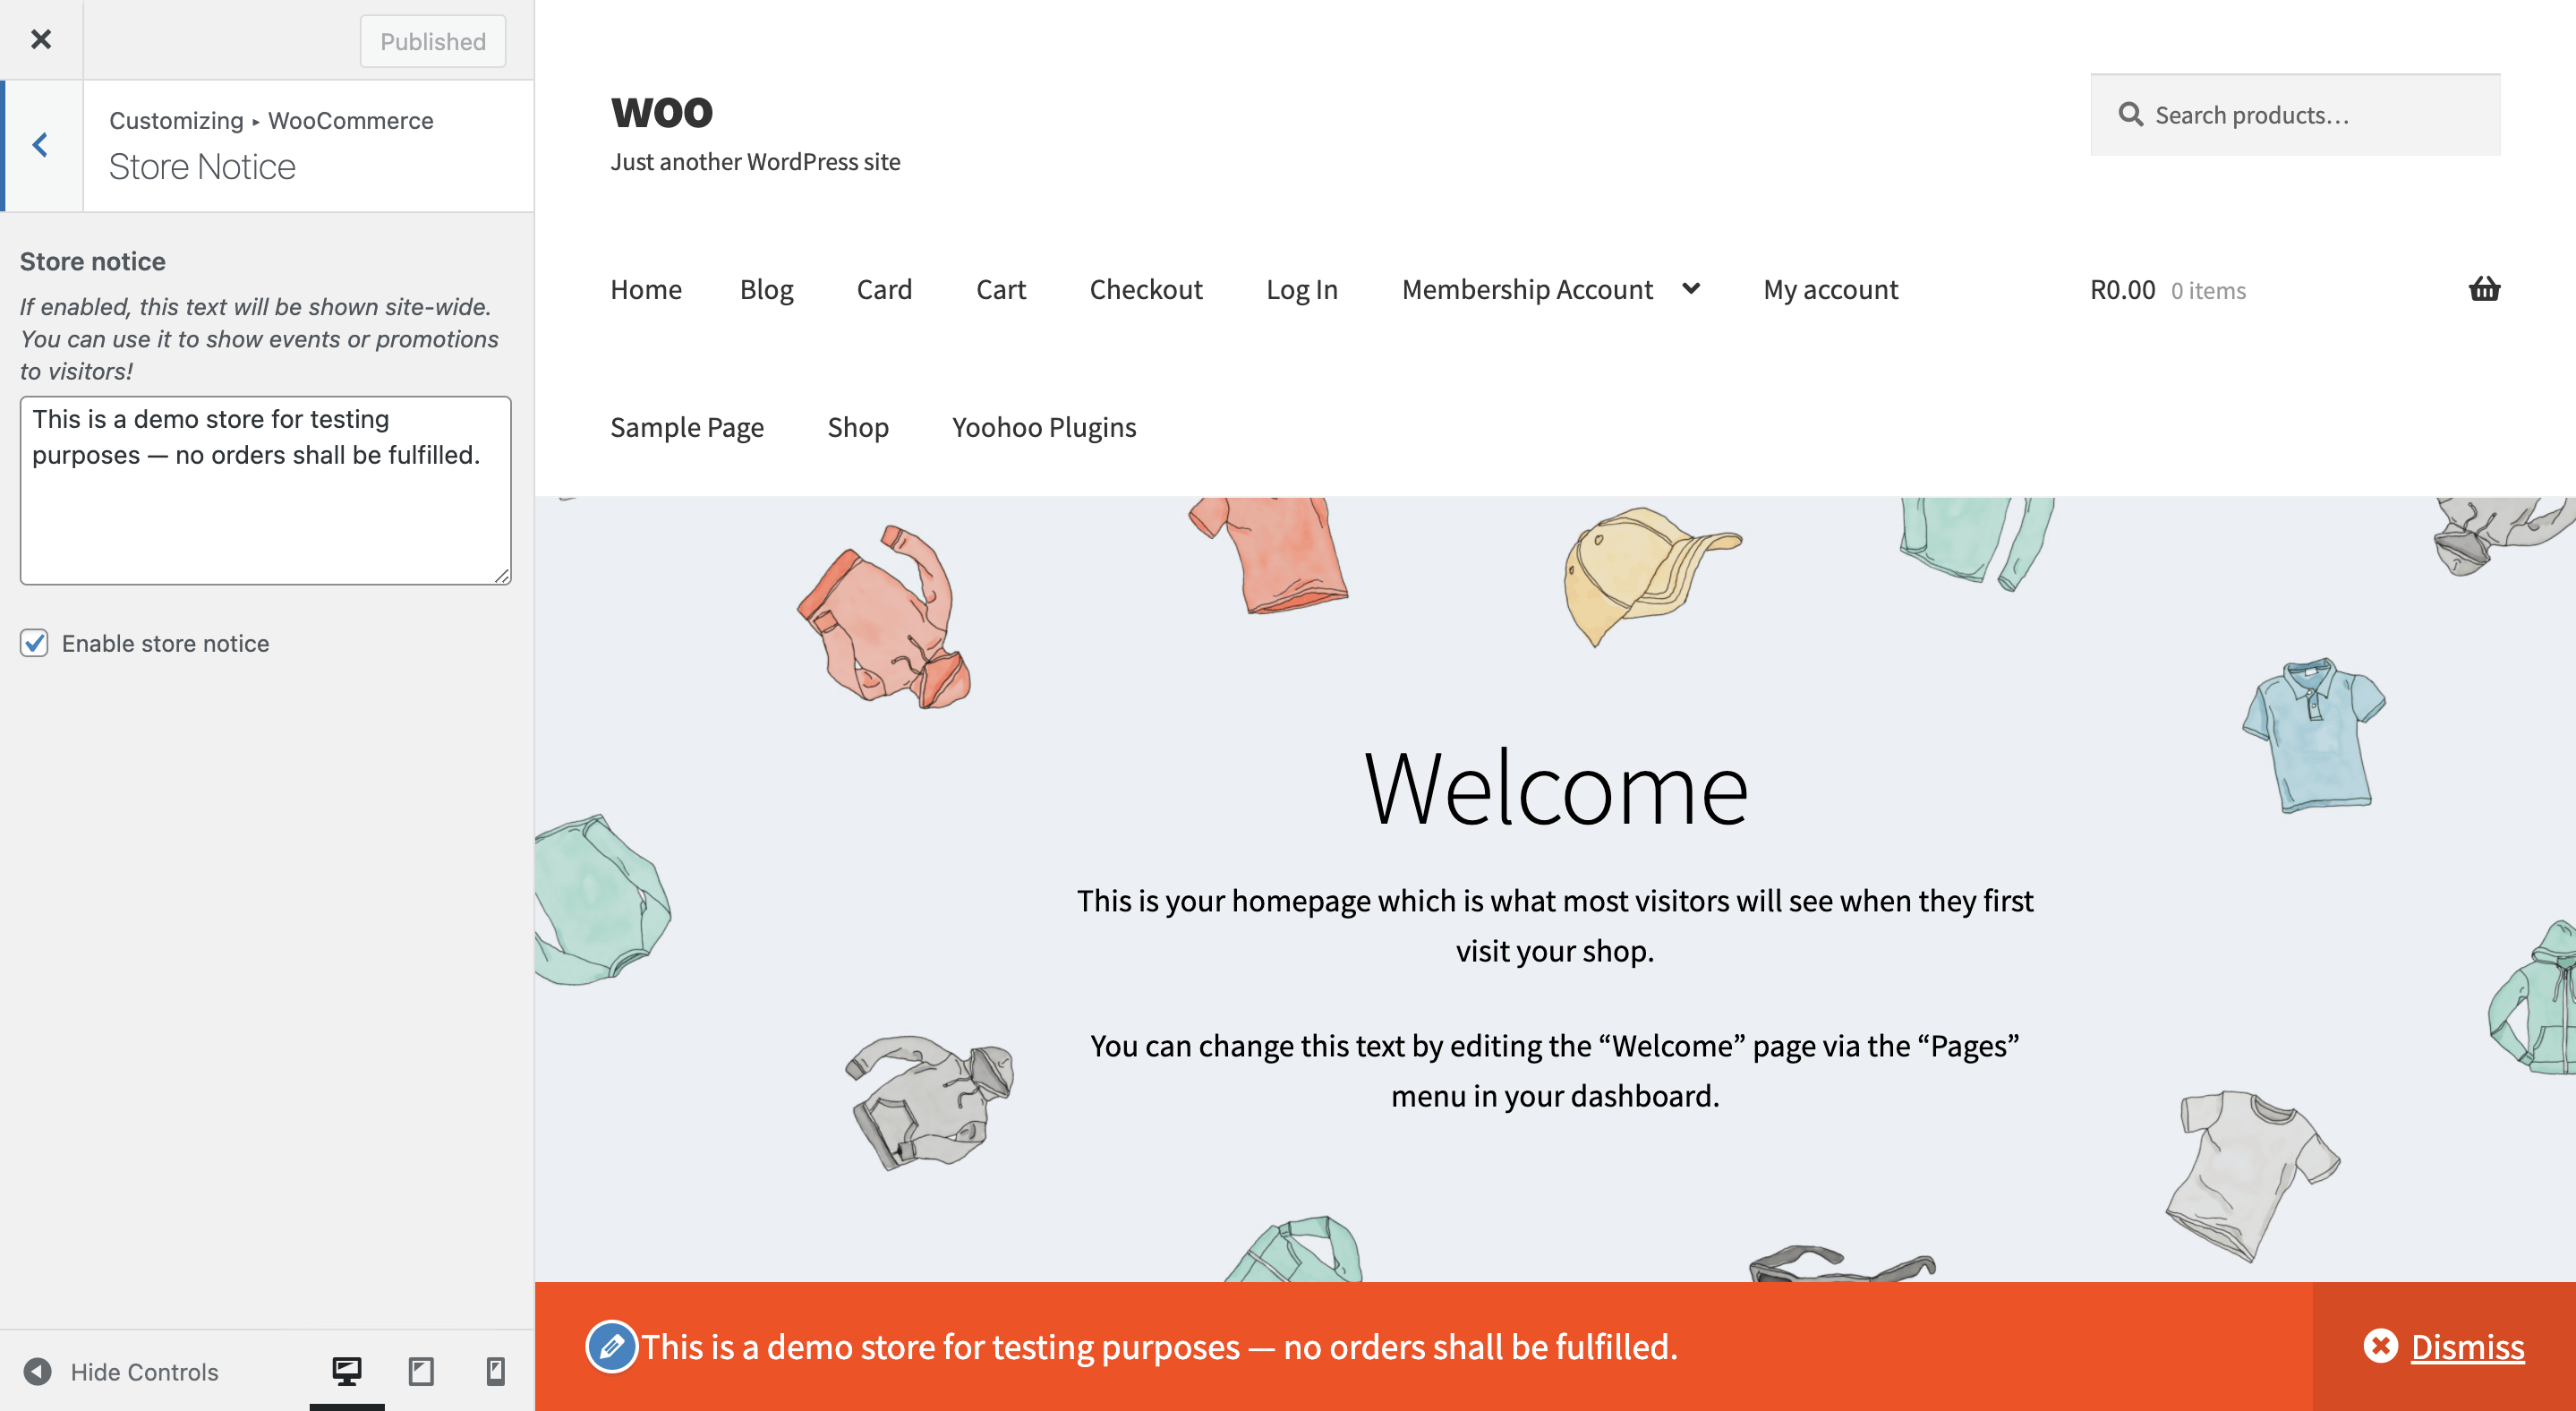
Turn on the WooCommerce Announcement Bar
Follow these steps to turn on the WooCommerce Announcement Bar a.k.a Store Notice:
- Navigate to your WordPress Customizer. This can be found under Appearance > Customize.
- Choose WooCommerce and Store Notice.
- Inside the store notice textarea widget, you may enter your message. This supports HTML code to create links and such.
- Enable the store notice by checking the checkbox.
- Publish your Customizer settings.
Tips to Customize the WooCommerce Store Notice
We’ve found that the WooCommerce store notice is somewhat limited in terms of functionality and styling. However, it’s still a great feature and a quick way to add a notice about delays in orders, a limited time special and more!
To customize the store notice announcement, you may use the following CSS selector p.demo_store
For example your custom CSS, that may be added to the WordPress Customizer > Additional CSS settings section, would look something like:
p.demo_store {
    background: orangered;
    color: white;
    font-size: 20px;
}
Bonus: Sitewide Notice WP
Here at Yoohoo Plugins, we’ve built an array of WordPress plugins that often solve our own issues or needs. One of those needs was to have a simple, lightweight notification bar to show on all WordPress pages or to show to certain WordPress users such as non-customers etc.
Sitewide Notice WP allows you to easily set the color of the bar, color of the text, hide it on mobile and hide the bar. We’re hoping to add more features to this in the near future.
We built a little plugin called Sitewide Notice WP, one of the first plugins we’ve created and it’s still going great!
