
Table of Contents
- What you need
- Install the plugin and open the groups
- Choose the product page badges
- Check the product page
- Show badges on the cart
- Use the footer or a custom group
- Fix a missing row or a licence notice
- Conclusion
WooCommerce trust badges are the payment, security, and guarantee icons a shopper sees while deciding. Trust Badges for WooCommerce can place them under the add to cart button, on the cart, and in the site footer. A shortcode covers any other spot.
This how-to follows the getting started guide, read on 5 November 2026. It does not replace that page. The walkthrough turns on the product page group, checks a product, then uses the cart and the shortcode when the automatic row is missing.
Baymard’s cart abandonment page, updated 28 October 2026, lists “I didn’t trust the site with my credit card information” at 19% among the reasons left once “just browsing” is set aside. Those reasons overlap. The same page treats a neighbouring 17% figure, for a long or complicated checkout, as a share of US online shoppers, so 19% is not 19% of every cart. Icons do not create that trust on their own. Baymard’s payment UX note says shoppers trust a payment step that is clear and predictable, and that badges can help. Show only methods and promises the store actually offers.
What you need
- WooCommerce installed and active, if you want the automatic product and cart rows. The getting started guide says the plugin needs WordPress 5.8 or newer, WooCommerce 5.0 or newer, and PHP 7.4 or newer.
- Trust Badges for WooCommerce, from the purchase email or from File Downloads. The plugin folder is
yh-woo-trust-badges. The screen title after activation is Trust Badges for WooCommerce. - A published product you can open on the front end.
The product page, checked the same day, says the plugin includes 400+ payment, security, shipping, and guarantee icons, and that it is ready for HPOS and WooCommerce 11. Public prices are $47, $97, and $147 per year for 1 site, 5 sites, and unlimited sites. A licence key is for automatic updates and support. The public pages do not state a plugin version, so this article does not either.
Without WooCommerce the plugin still loads. Automatic product and cart placement is skipped. Shortcodes and the footer group still work, and the settings screen moves to Settings → Trust Badges.
1. Install the plugin and open the groups
In WordPress go to Plugins → Add New → Upload Plugin, upload the zip, and activate Trust Badges for WooCommerce. You can also unzip it and copy the yh-woo-trust-badges folder into /wp-content/plugins/.
Copy the key from License keys or the purchase email. Open WooCommerce → Trust Badges, choose the License tab, paste the key, and save.
Activation creates three groups. Turn a group off when you do not want it on the front end.
product_pageprints after the add to cart form on a single product. The default header is Secure Payment Methods.cartprints with the classic cart totals, and after the cart block. The default header is Secure Cart.footerprints in the site footer on every page. The default header is Payment Options.
A custom group can use any ID, including a number. It shows only where you place a shortcode.
Each group has its own header, alignment, style, size, colour, animation, and badge list. Alignment is left, center, or right. Style is original, monochrome, card, or mono-card. Desktop and mobile sizes are separate. The colour tint applies to the monochrome styles. Animation is an optional fade, or a similar effect, on load.
2. Choose the product page badges
Open WooCommerce → Trust Badges. Select Product Page in the group list. Leave the group enabled. The live preview sits on the right.
Pick icons that match how the store takes payment. Add a guarantee badge only when that promise is real. The product page names Visa, Mastercard, PayPal, Apple Pay, Stripe, and regional methods as examples in the library. Search the library, or upload your own image. Set alt text when you upload. You can edit it later. Uploaded files are stored under wp-content/uploads/yh-woo-trust-badges/, so a plugin update does not remove them. SVG uploads are sanitised. Scripts and event-handler attributes are stripped before the file is saved.
The header is optional. A new product page group starts as Secure Payment Methods. Change that text, its font size, and its colour on this group only. Then use Save Changes.
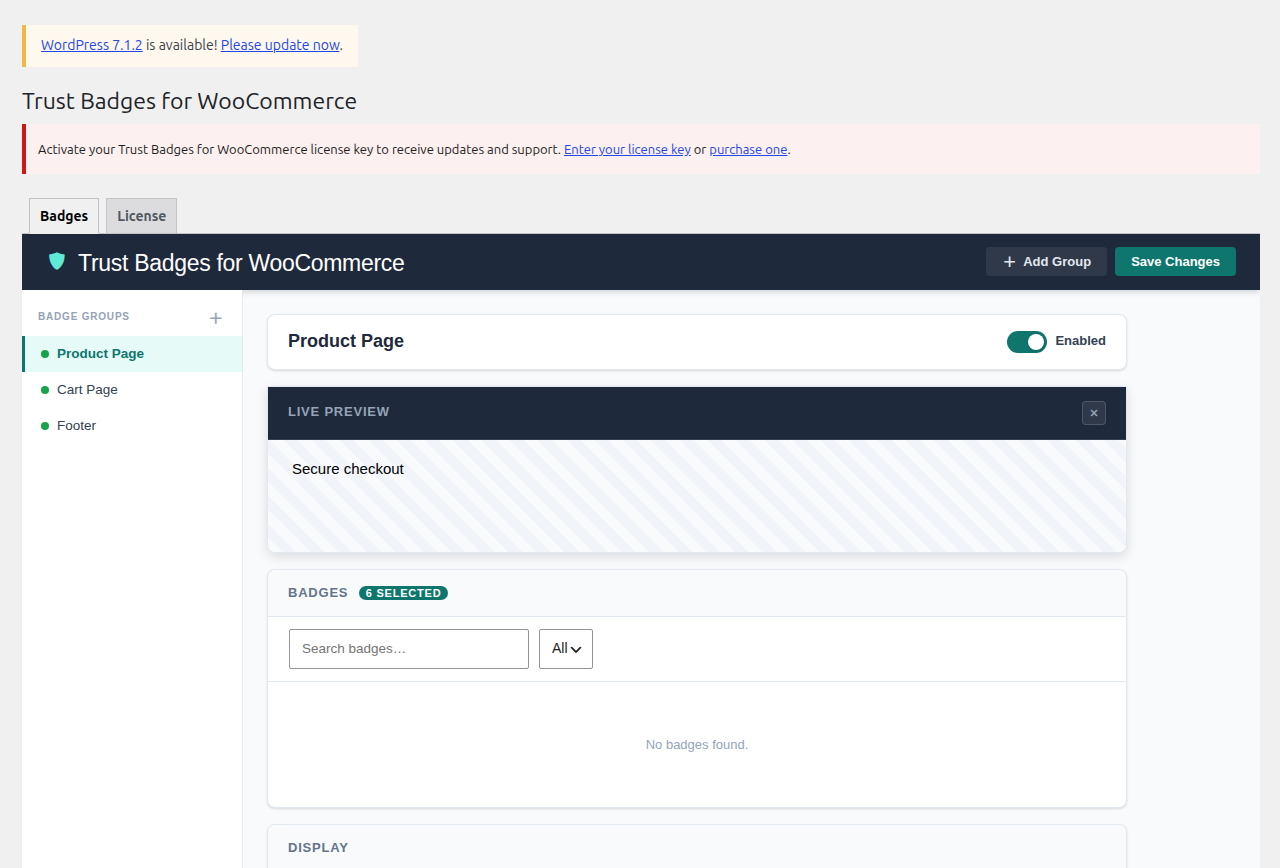
The admin picture is a Yoohoo screen titled Trust Badges for WooCommerce. The groups listed are Product Page, Cart Page, and Footer. Product Page is enabled. The live preview header reads Secure checkout, which is a custom header on that capture, not the default Secure Payment Methods. The badge count reads 6 selected, while the visible search list says No badges found. Do not treat that empty list as the saved set. A notice on the same screen asks for a licence key, and a WordPress update notice mentions 7.1.2. That notice belongs to the site in the capture. The getting started minimum is still WordPress 5.8.
3. Check the product page
Open a single product while logged out. The product_page group prints after the add to cart form, on the hook woocommerce_after_add_to_cart_form.
On 5 November 2026 the public demo at demo.yoohooplugins.com/trust-badges said Visa, Mastercard, and PayPal sit under add to cart, and it pointed to the Sunglasses product. That product page showed the default header Secure Payment Methods. The badge image alt text on the page was Mastercard, Visa, and PayPal. The price shown was 90.00. The same product also prints a lead time, because that demo uses Lead Times. Trust badges do not add the lead time.
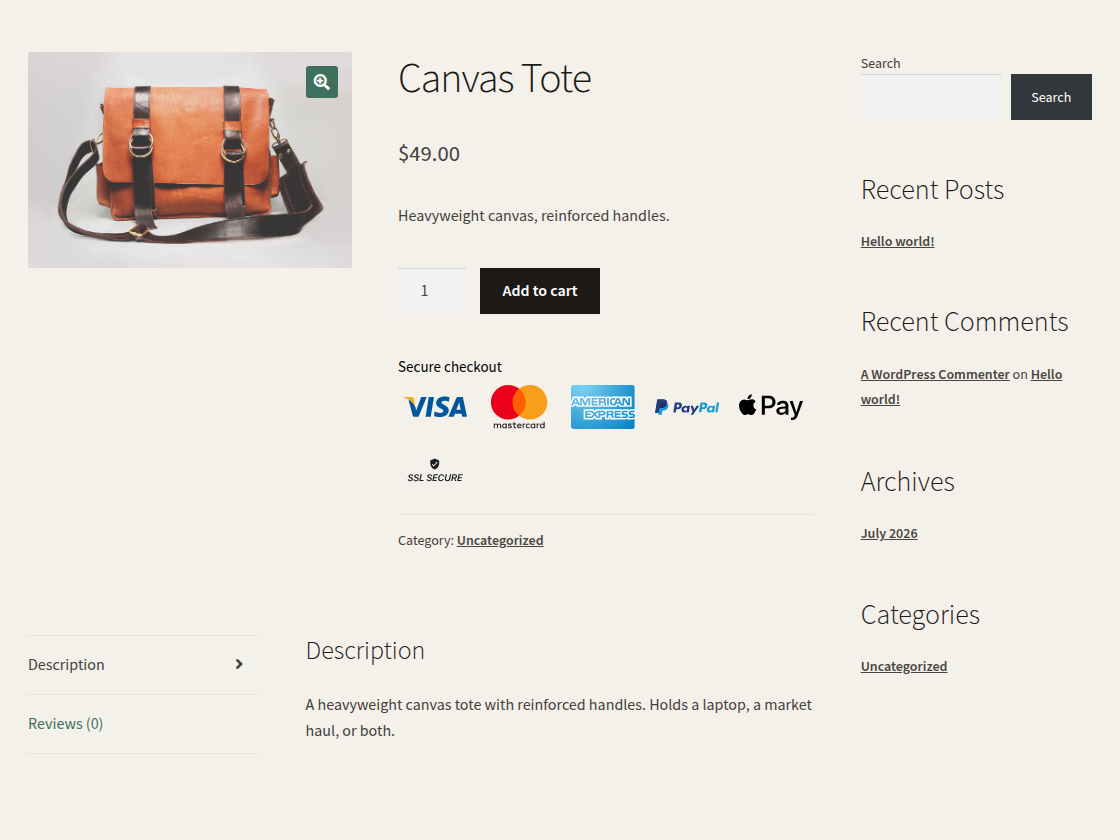
The picture above is an earlier Media Library example, not the 5 November demo. The product is Canvas Tote at $49.00, with the short description “Heavyweight canvas, reinforced handles.” The header under Add to cart is Secure checkout. The row shows Visa, Mastercard, American Express, PayPal, Apple Pay, and a small SSL Secure mark. That is six marks, which matches the “6 selected” count on the admin capture. Category is Uncategorized. The sidebar shows a Hello world post and a July 2026 archive. Those names, prices, and the extra icons belong to that example. If the store does not take American Express, leave that icon out of the group.
A payment logo tells the shopper which methods you accept. It is not a security audit. The SSL Secure mark in the example is a badge in the group, not proof that a third party scanned the store.
If the row is missing, the product page group is off, WooCommerce is inactive, or the theme does not fire woocommerce_after_add_to_cart_form. Turn the group on, confirm WooCommerce is active, or place this shortcode in the product template. Use a Shortcode block where the editor accepts one.
[trust_badges id="product_page"]
[yh_trust_badges] is an alias of the same shortcode.
4. Show badges on the cart
Select Cart Page under WooCommerce → Trust Badges. A new cart group uses the header Secure Cart. Classic cart templates print the group with the cart totals. On a block cart, classic cart hooks do not run. The plugin injects the group after the woocommerce/cart block when the cart group stays on.
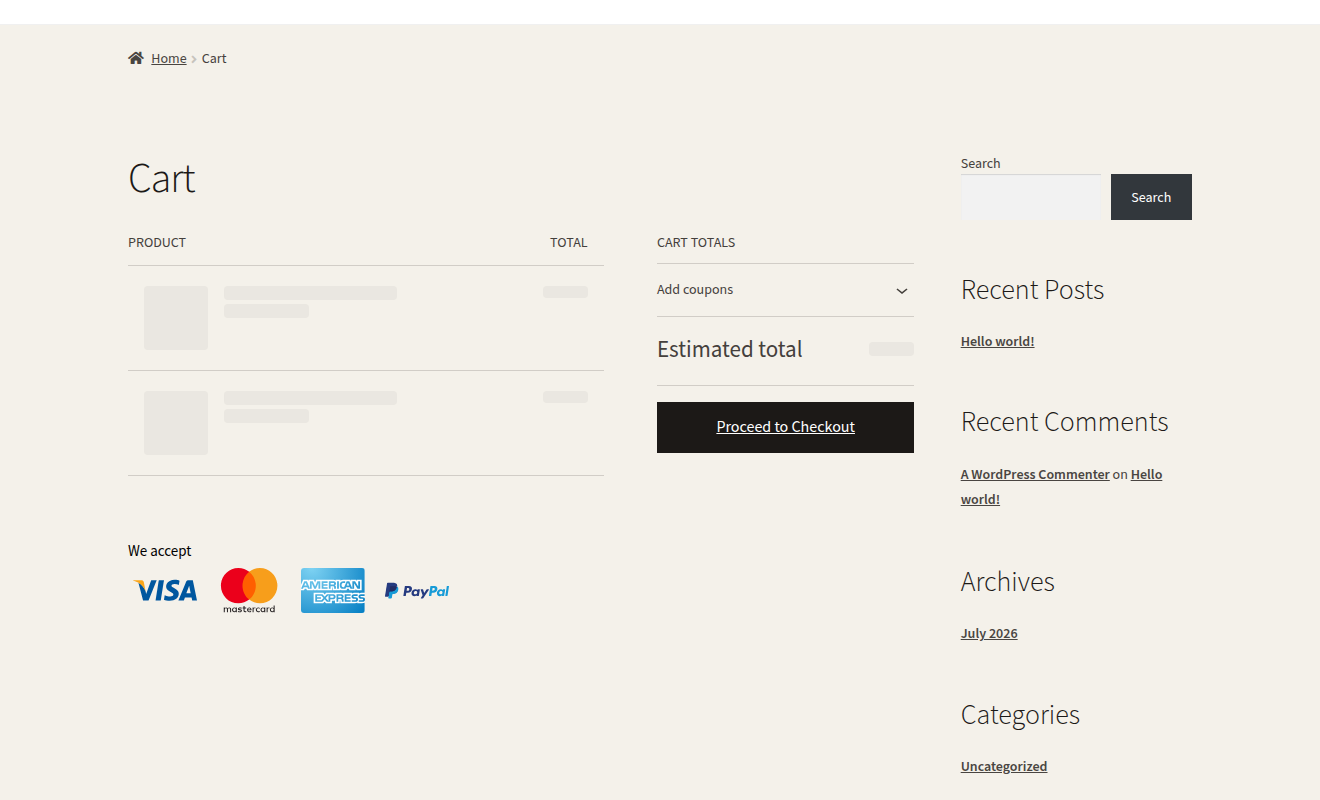
This cart picture is a September Media Library example of a classic cart. It shows product rows, cart totals, Add coupons, Estimated total, and Proceed to Checkout. The header reads We accept, not the default Secure Cart. The row shows Visa, Mastercard, American Express, and PayPal. Apple Pay and the SSL Secure mark from the product example are not in this cart row. The product lines in the picture are blanked. That is the capture, not a setting to copy. A filled cart on the public demo was not rechecked on 5 November.
If a custom cart template still hides the row, add this shortcode to that template:
[trust_badges id="cart"]
5. Use the footer or a custom group
The footer group is site-wide. Its default header is Payment Options. A shortcode with no id prints that footer group, not the product page:
[trust_badges]
Pass id when you want a different group. A custom id is whatever you set with Add Group. A custom group does not appear until something on the site prints its shortcode.
[trust_badges id="product_page"]
[trust_badges id="cart"]
[trust_badges id="footer"]
[trust_badges id="my_custom_group"]
Desktop and mobile sizes are separate, so check a phone width after you save. The demo landing page is one storefront arrangement. Your header, size, and icon list can differ.
These icons do not replace a catalog or a shipping wait. A product table is a different job, covered in How to Add a WooCommerce Product Table to a Page. A lead time still belongs on the product through Lead Times for WooCommerce.
6. Fix a missing row or a licence notice
- Product page empty: the group is off, WooCommerce is off, or the theme skips
woocommerce_after_add_to_cart_form. Use[trust_badges id="product_page"]in the template. - Cart empty on a block theme: keep the cart group on. If the template still hides the row, use
[trust_badges id="cart"]. - The shortcode shows the footer icons inside a product description:
[trust_badges]with no id is the footer group. Pass the id. - Updates do not arrive: the updater talks to yoohooplugins.com. A 1 Site licence holds one activation. Activate under WooCommerce → Trust Badges → License. If you moved the site, deactivate the old URL first. The staging and multisite guide covers two URLs at once. Its examples name PDF Invoices. The same page says the seat rule applies to other licensed Yoohoo products.
Conclusion
Start with the product page group, icons the store actually accepts, and a header you are happy to show. Then check the cart while logged out, on a classic cart and on a block cart if you use one. Use the shortcode when the automatic spot is missing, or when you need a custom group.
Trust Badges for WooCommerce is the plugin used here. The getting started guide stays the setup reference this article does not replace.