

Table of Contents
- What the shopper sees
- Install and open the settings
- Choose a format
- Set one product or variation
- Check the product page
- Conclusion
A shopper who can see WooCommerce lead times before they add to cart does not have to guess when the item will be ready. Lead Times for WooCommerce prints that timing with the stock status. You set it once for the shop, then override it on a product, variation, brand, or category that needs its own message.
This is a how-to for the plugin. The steps follow the getting started guide and the current plugin source, checked on 21 September 2026. It does not replace any older article.
What the shopper sees
On a single product page the lead time sits with the stock status. That place is turned on by default. When WooCommerce already prints an availability line, the lead time is added after a vertical bar. When there is no availability text, the lead time is its own line. The default text colour is #333333.
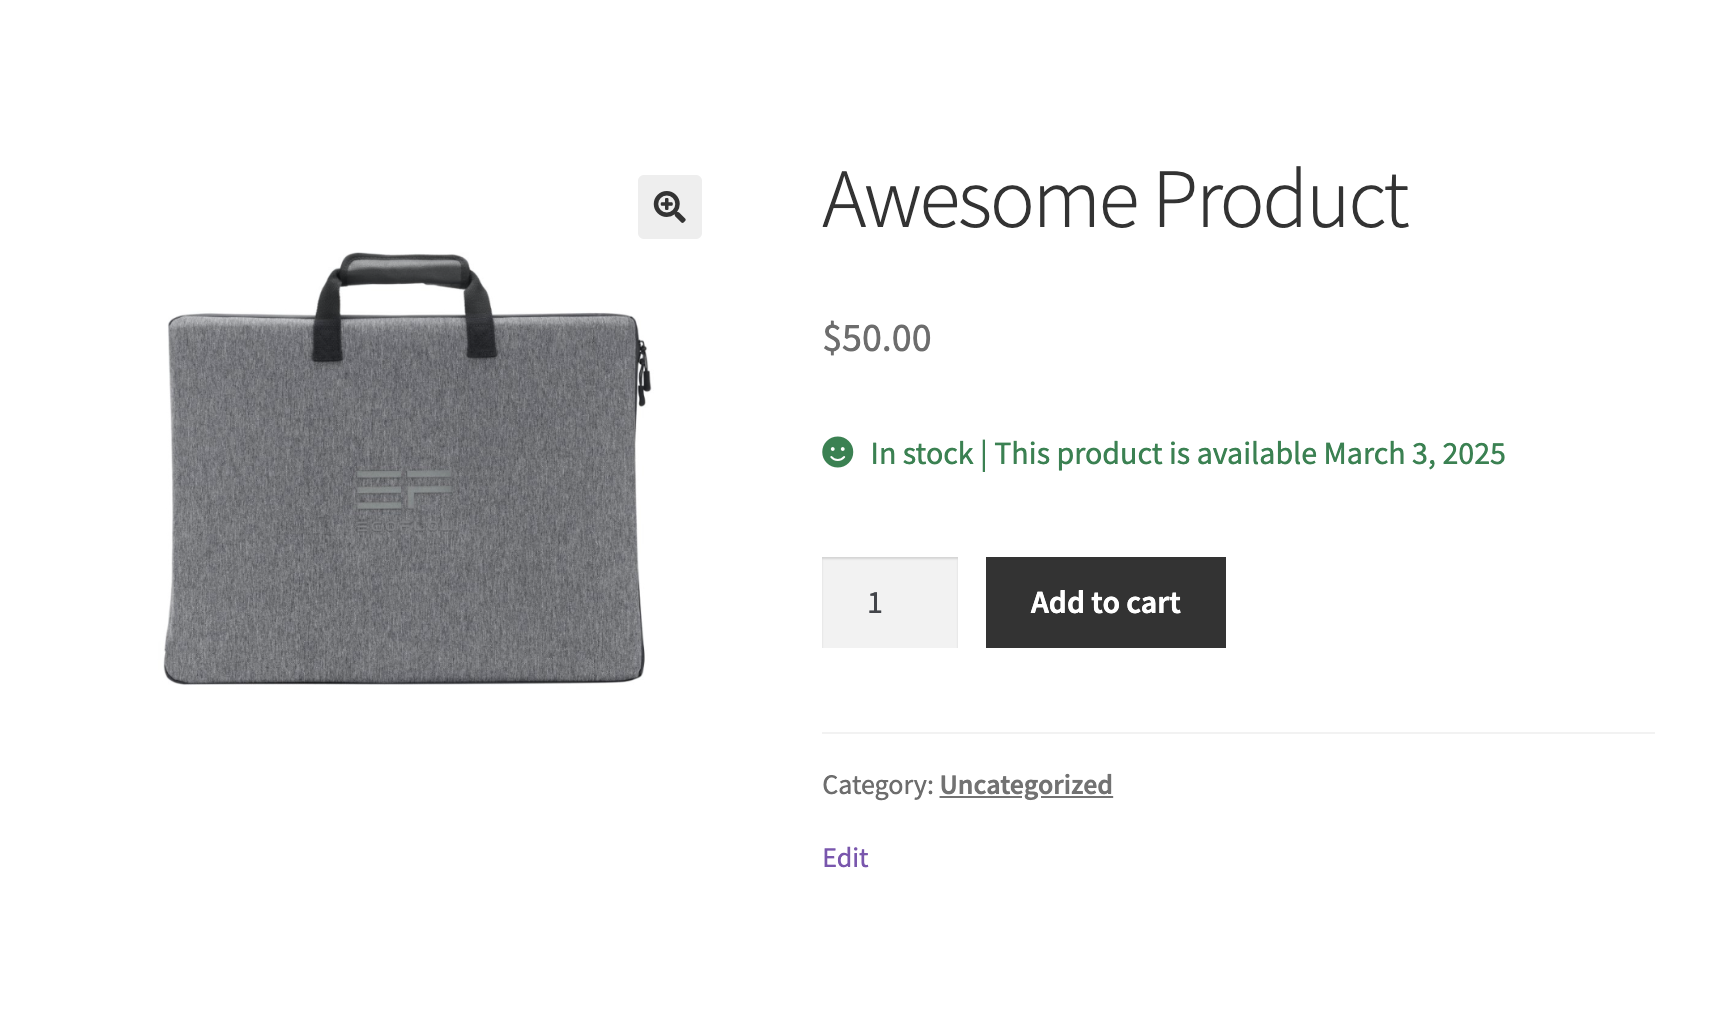
These places stay off until you tick them under Display lead times on:
- Cart
- Checkout
- Shop and category pages
- Brand pages
- Order details, including the order page and the customer email
Display lead times for starts on for in stock, out of stock, and backorder. Shop loops still skip variable, external, and grouped products. A simple product can show its lead time in the loop after you enable shop display.
The classic product editor does not add these fields to grouped or external products.
Install and open the settings
Download the zip from the purchase email or from File Downloads in your Yoohoo account. In WordPress go to Plugins → Add New → Upload Plugin, install the zip, and activate Lead Times For WooCommerce.
Open WooCommerce → Settings → Products → YH Lead Times. Paste the licence key from the same account page and save. Updates and support use that key.
The settings screen says the global values can be overridden for categories, products, or variations. In the current plugin the first filled-in value wins, in this order:
- The product, or the variation when that variation has its own value. An empty variation uses the parent product.
- The product brand, when the store uses brands.
- The product category.
- The global YH Lead Times settings.
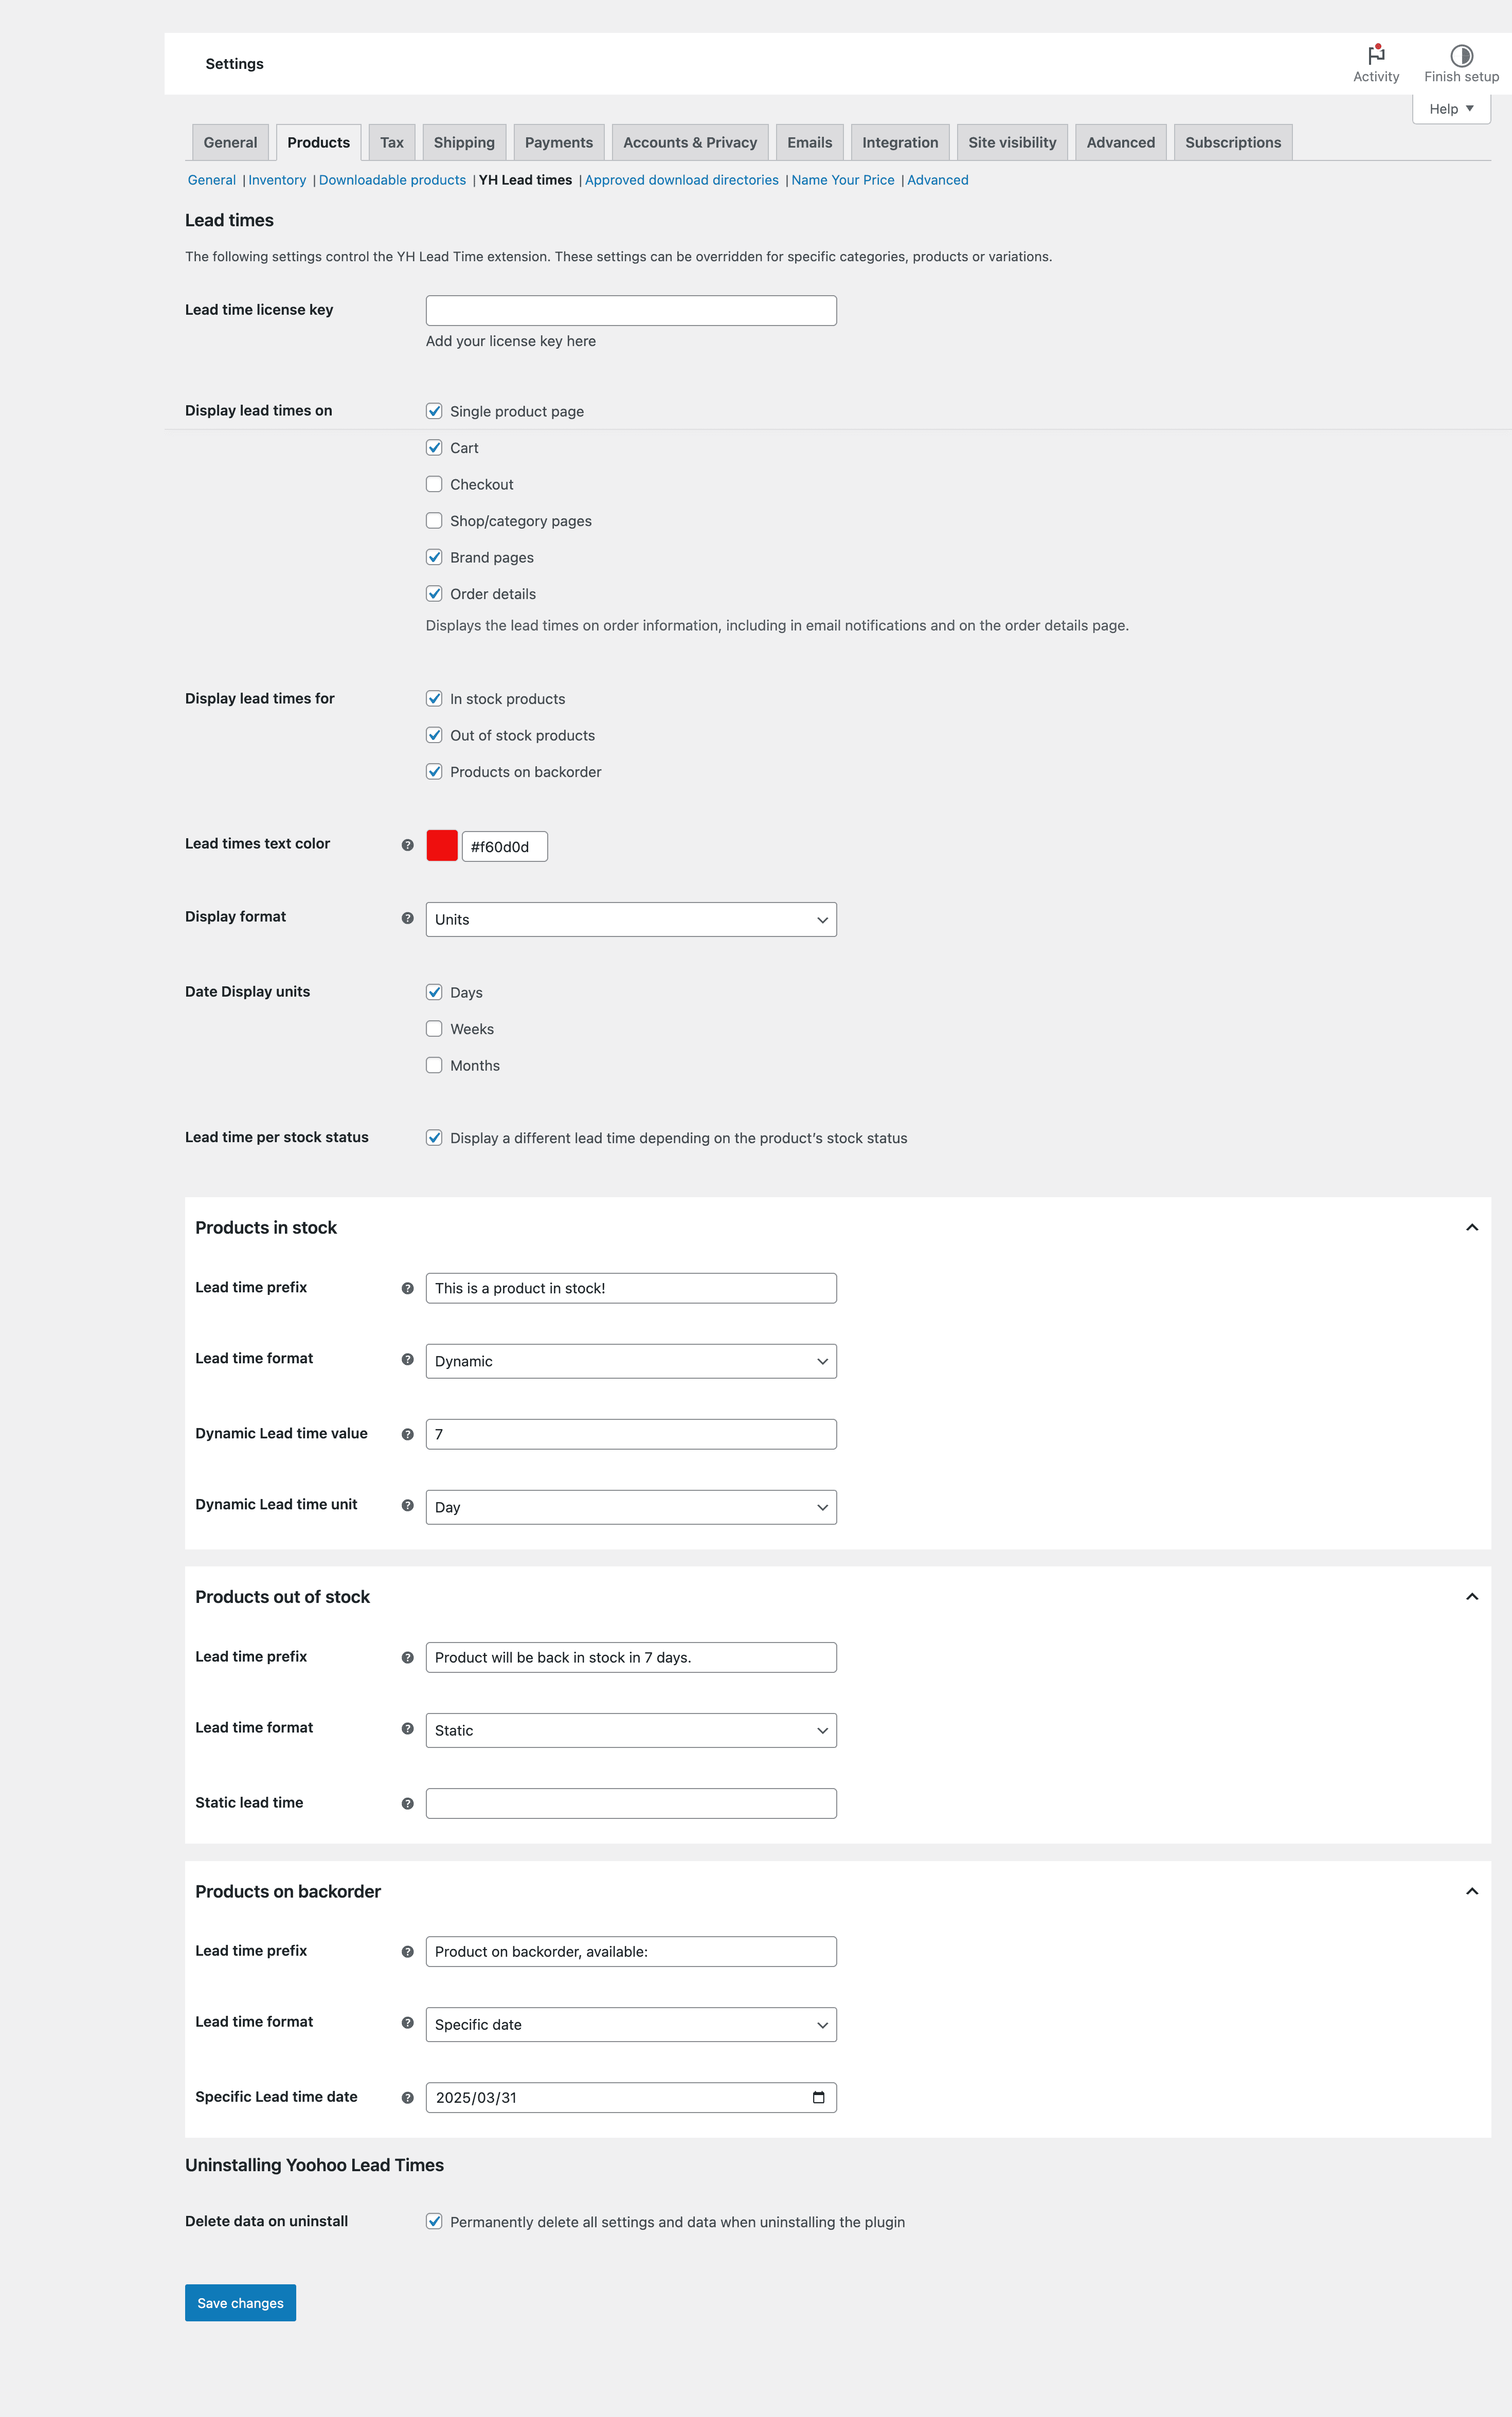
A prefix such as Lead time: is optional. When you set one, it is placed in front of the lead time.
Choose a format
Each level uses one of three formats.
Static is a sentence you write. Use it when the note should not move with the calendar.
Specific date is one fixed date. It stays on that date when someone views the product tomorrow. Display format chooses Units, which shows the remaining time in the date units you pick, or Date, which shows the date itself.
Dynamic is a number of days, weeks, months, or years counted from the day the customer views the product. The same display format can show units or a calculated date.
Turn on Lead time per stock status only when in stock, out of stock, and backorder should each say something different.
Lead time: Made to order. Allow 2 weeks.
That line is a static example with the prefix filled in. Put the words in Lead time text, not in a code file.
Set one product or variation
Edit the product and open the Inventory tab. The controls sit with the stock fields: format, lead time text, a date, and a dynamic value plus unit.
On the newer WooCommerce product editor the same controls are in the Product Lead Times group, with a link back to the global screen. WooCommerce documents that editor in the product editor guide. Product data in general is covered in Managing products.
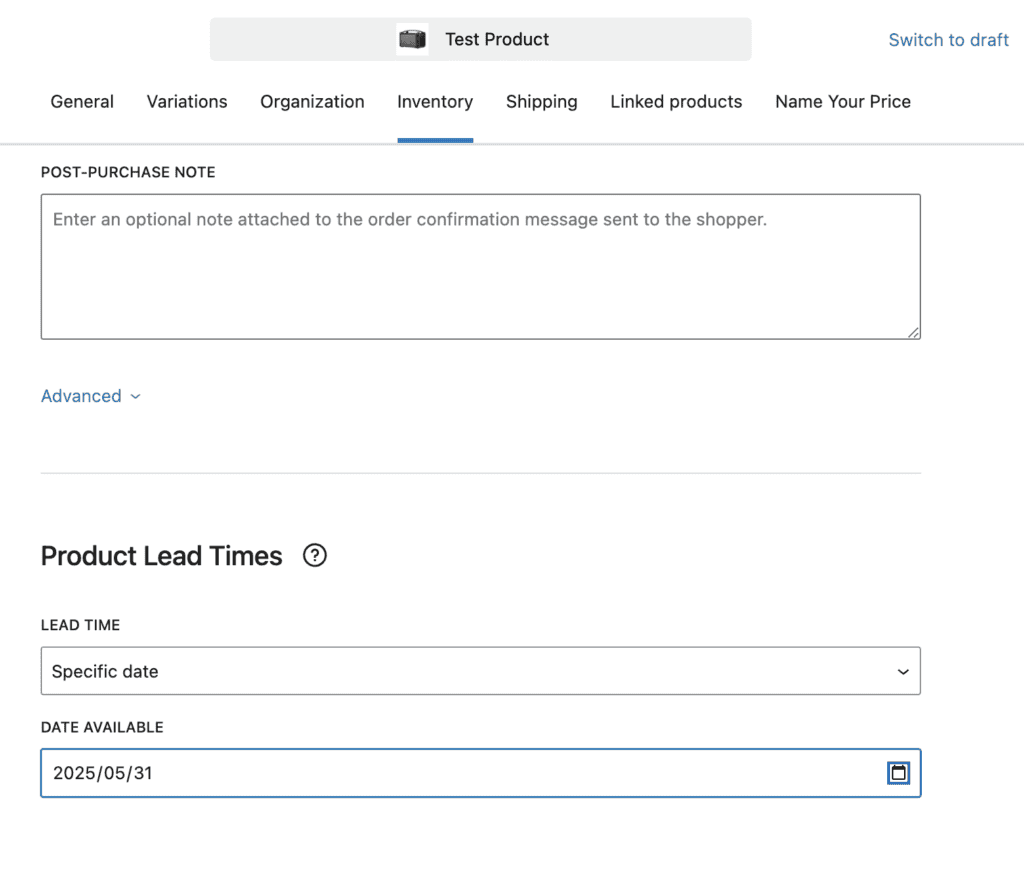
For a variable product, set the lead time on the variation. If that variation’s static text or specific date is empty, the parent product’s lead time is used.
Category and brand overrides live on the term edit screen and use the same three formats. A value on the product still beats the brand, the category, and the global default.
Check the product page
Open a simple in-stock product on the shop. You should see the lead time with the stock status, in the colour you chose. If it is missing, check four things:
- Single product page is still ticked.
- The product’s stock status is one you display lead times for.
- The winning level actually has text, a date, or a dynamic value.
- You are not editing a grouped or external product in the classic editor, which does not show these fields.
Leave cart, checkout, and order email off until the product page reads the way you want.
A product that should also let the customer choose an amount uses a different plugin, Name Your Price for WooCommerce.
Conclusion
WooCommerce lead times start as one global message. Make them specific only where a product, variation, brand, or category needs a different one. Read the line on a single product page before you show it in the cart or the order email.
The setting list and the official screenshots stay in the getting started guide. If a licence key or a product will not show its lead time, open a ticket on the support page.