
In this article we will cover how to manually update a WordPress plugin using WordPress 5.6. This is great if you are unable to automatically update a WordPress plugin or theme.
I highly recommend in having a backup of your site (or plugin) before updating your WordPress site. Should anything go wrong you can restore the backup.
Updating a WordPress Plugin via the WordPress dashboard
You may follow these steps below if you are on WordPress 5.6 or above:
- Login to your WordPress dashboard.
- Navigate to Plugins and select Add New.
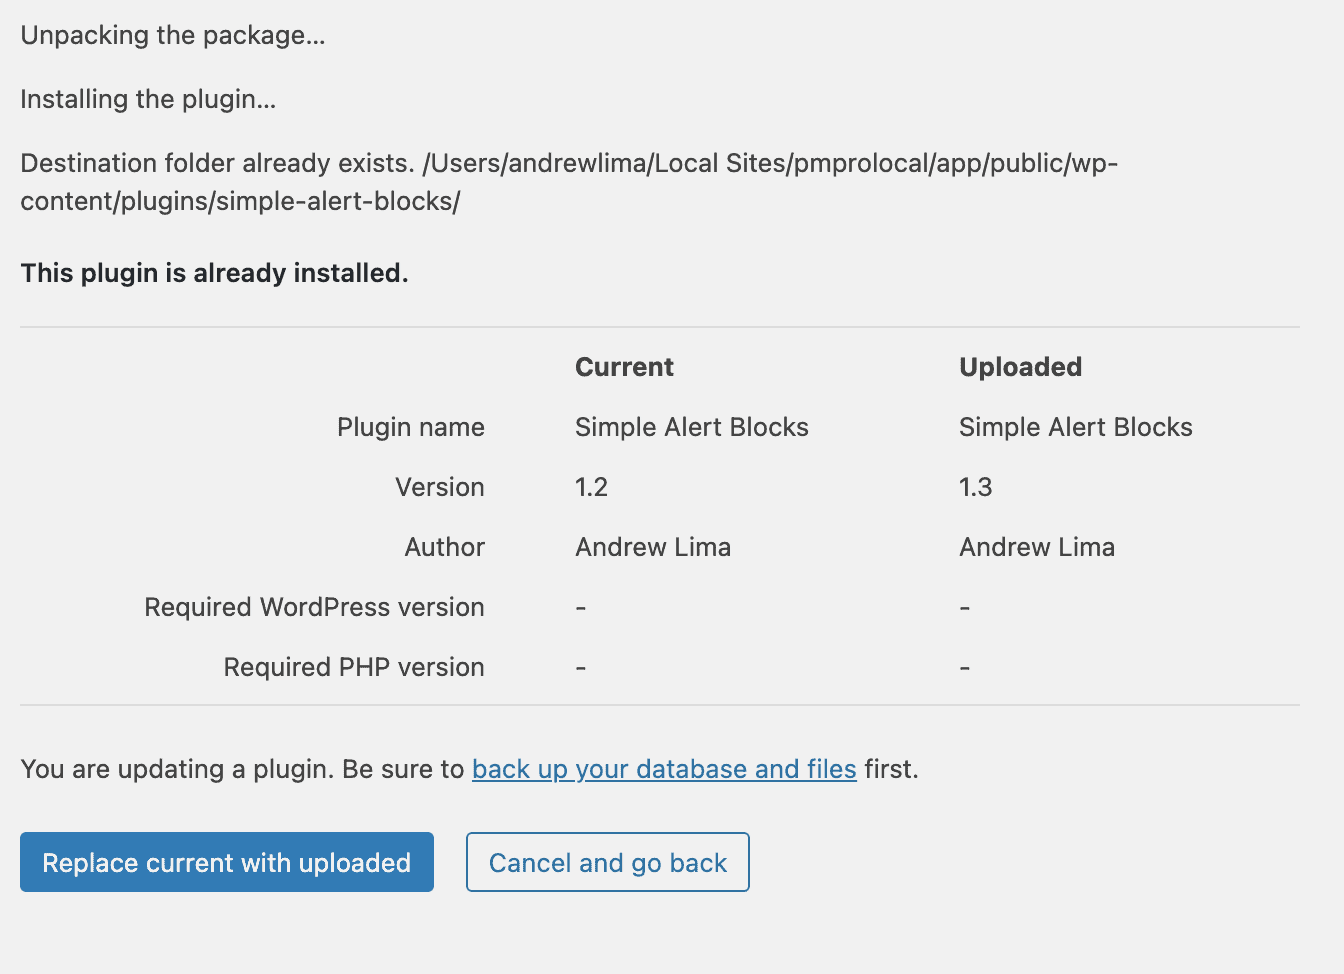
- At the top of the Add New screen you may select the Upload Plugin option. (Tip: Drag your .zip file onto the Upload button to choose the file without opening the popup window).
- Select Install Now and let the plugin upload.
- Once the plugin uploads, you may select the option Replace current with uploaded
Updating a WordPress Plugin via FTP (Advanced)
I prefer using the WordPress dashboard to manually update a WordPress plugin over the FTP method. However, if you really have to use FTP or your hosting platforms file manager to update the files you may follow these steps (Please note that your file manager paths, wording may differ slightly).
Here are the steps to updating a WordPress plugin via FTP:
- Extract the .zip file of the WordPress plugin to your desktop (or any location you are comfortable with).
- Log in to your site using either FTP/SFTP protocols.
- Navigate to your WordPress installation, this is usually under a directory like public_html or www
- Once in your WordPress installation directory, navigate to wp-content/plugins
- Drag and drop (upload) your extracted folder into your the plugin directory. Be sure to overwrite all files when prompted.
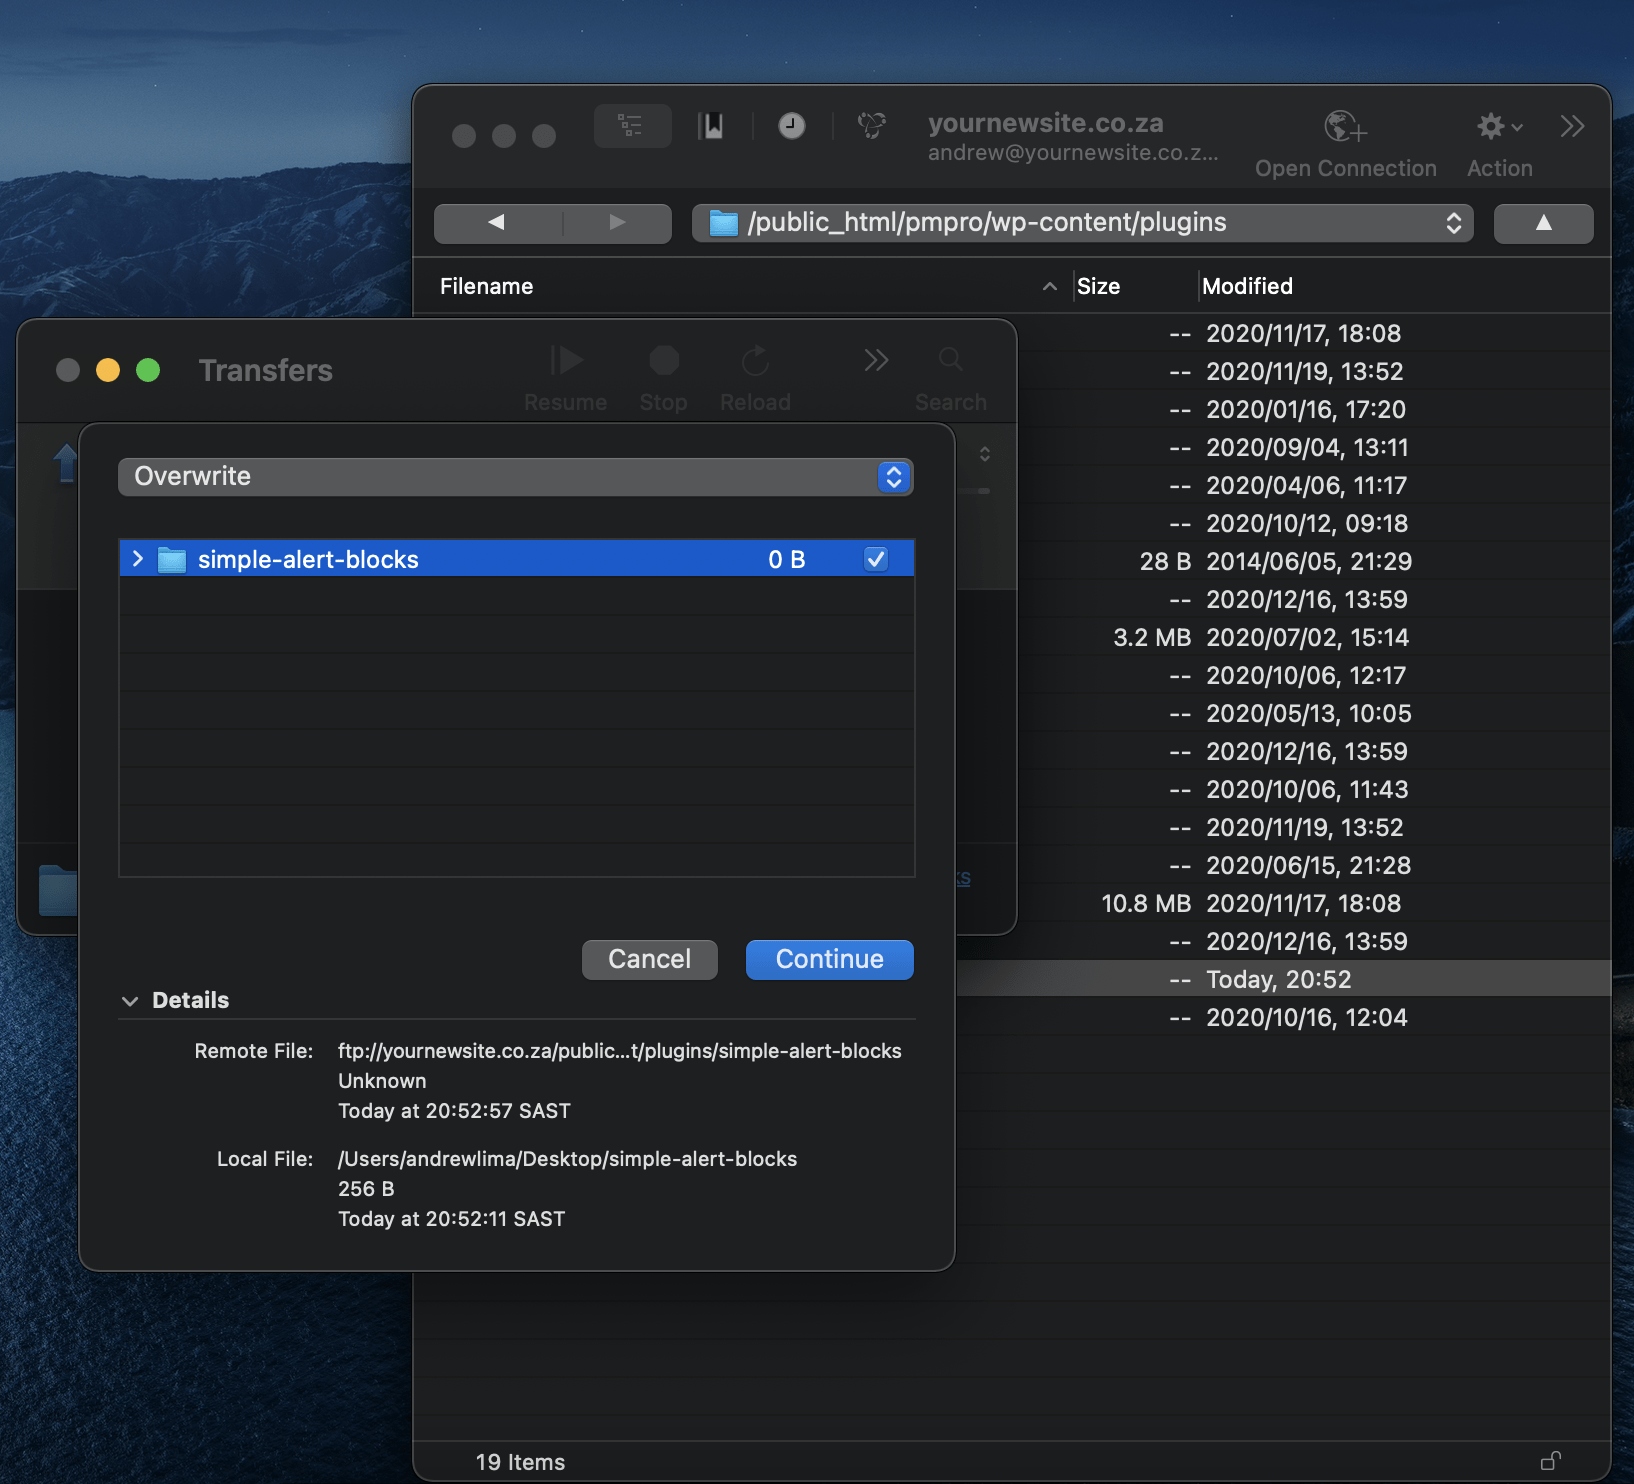
Photo by Yusuf Dündar on Unsplash
