
Updating a WordPress user has never been easier thanks to WP Zapier! In this short guide, we will cover the easy steps to take to simply update a user’s role in your WordPress site when passing data from Zapier. If you aren’t familiar with setting up WP Zapier Integration to receive data to create or update a user, follow this guide.
Changing A WordPress User’s Role With Zapier (Steps):
- Once you have setup your Zap and ready to pass information through to WordPress
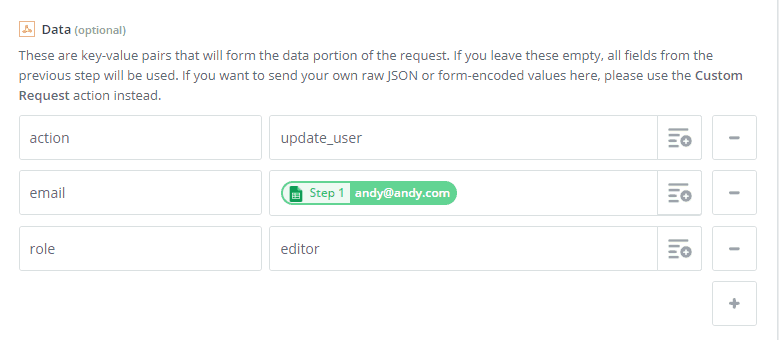
- Inside the “Data (optional)” section, this is where you pass information through to Zapier or to WordPress depending on your Zap.
- To update a WordPress user you simply need to pass in the two required parameters:
- action – update_user.
- email – the user’s email you would like to update.
- In the image below, we are wanting to change all user’s that run through this Zap to “Editor”, be sure to set this to the role’s stored name (i.e. My Custom Role may be saved as ‘my_custom_role’).
- That’s it, it’s that simple.
Some Things To Remember
- You won’t be able to adjust Admin accounts through update_user action. WP Zapier does not allow this by default to prevent mistakes from happening.
- This will update the user role and not add in an additional user role to the user.
- This will update the user every time the zap is run and their data is passed through.
- The two main required fields for update_user action is the action itself and the user’s email. (You may also reference via username).
If you have any further questions about this guide, please feel free to reach out to our support team.
