
In this guide, you will learn how to create a WordPress user from Zapier. This basically means “push data to WordPress from Zapier and create a WordPress user with the data.” Zapier is an automation tool that allows you to connect more than one application between each other and now supports over 6,000 applications.
Requirements
In order to follow along, you will need the following:
- A Zapier account that has access to “Webhooks By Zapier” triggers.
- WP Zapier Plugin.
- A website hosted on a server, this is needed to receive the webhook call from Zapier. This won’t work while testing on local environments.
TL;DR
Here’s a video explaining on how to create or manage WordPress users from Zapier.
Let’s Create A WordPress User From Zapier
As mentioned above, Zapier allows you to integrate with over 1000+ applications and most major CRM’s work with Zapier in some form or another. To keep this as simple as possible and to make it easy for any user to understand the concept we will use Google Sheets and create a WordPress user whenever a new row of user information is added.
This is definitely not a common use-case for Zapier and WordPress but it could easily be changed to create a user whenever they are added as a HubSpot contact, signed up to a mailing list or even if they registered on another website entirely.
The first couple of steps would be creating the trigger for Zapier, which in our case would be “create a user inside WordPress whenever a new row is added to my Google Sheets”. You may replace this with your own trigger available in Zapier.
Each application has a set of it’s own triggers such as “contact added”, “new row inserted” and is relevant to the application.
Step 1: Create A Simple Google Sheets
This is fairly simple, create a empty Google Sheets and name it “Create A WordPress User From Zapier Example” or something similar. Remember you will need to reference this from within Zapier at a later stage so name it something descriptive.
Inside your Google Sheet that you have just created, add the following data in the first row and make sure each heading is in it’s own column:
- username (required)
- email (required)
- first name (optional)
- last name (optional)
- role ( optional – defaults to “subscriber”)

Be sure to keep this tab open in on your browser, as we will be populating and testing the data received really shortly.
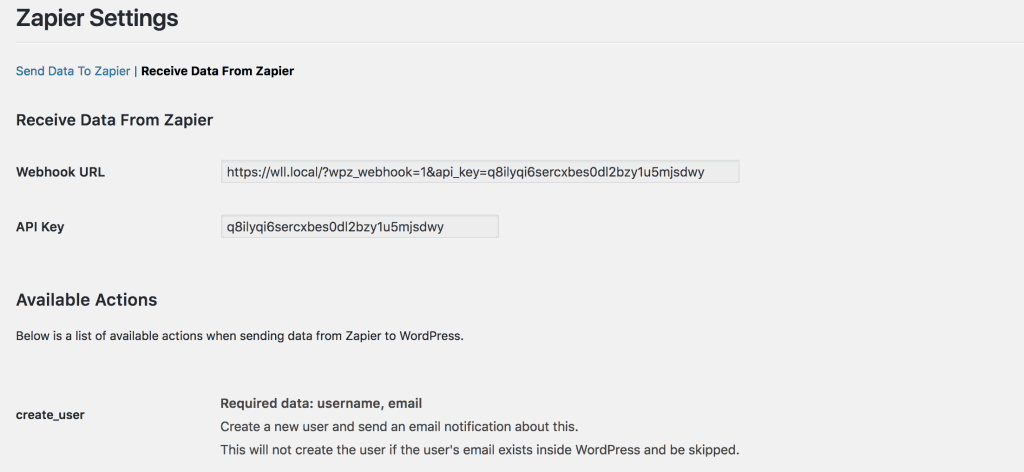
Step 2: Login To Your WordPress Website
Login to your WordPress website and navigate to WP Zapier > Receive Data within the WordPress dashboard. This will open up a settings page to give you a list of available actions, your API key which is used to authenticate the request. Be sure to not share this publicly. Leave this tab open while working through this guide, as you will need to navigate back to this screen.
Step 3: Creating The Zap
Now for the fun part, we will actually setup an automated task that will create a user inside our WordPress site whenever a new row is added to our Google Sheet. Register and login to your Zapier account to proceed with the steps below.
Step 3.1: Setting Up The Trigger
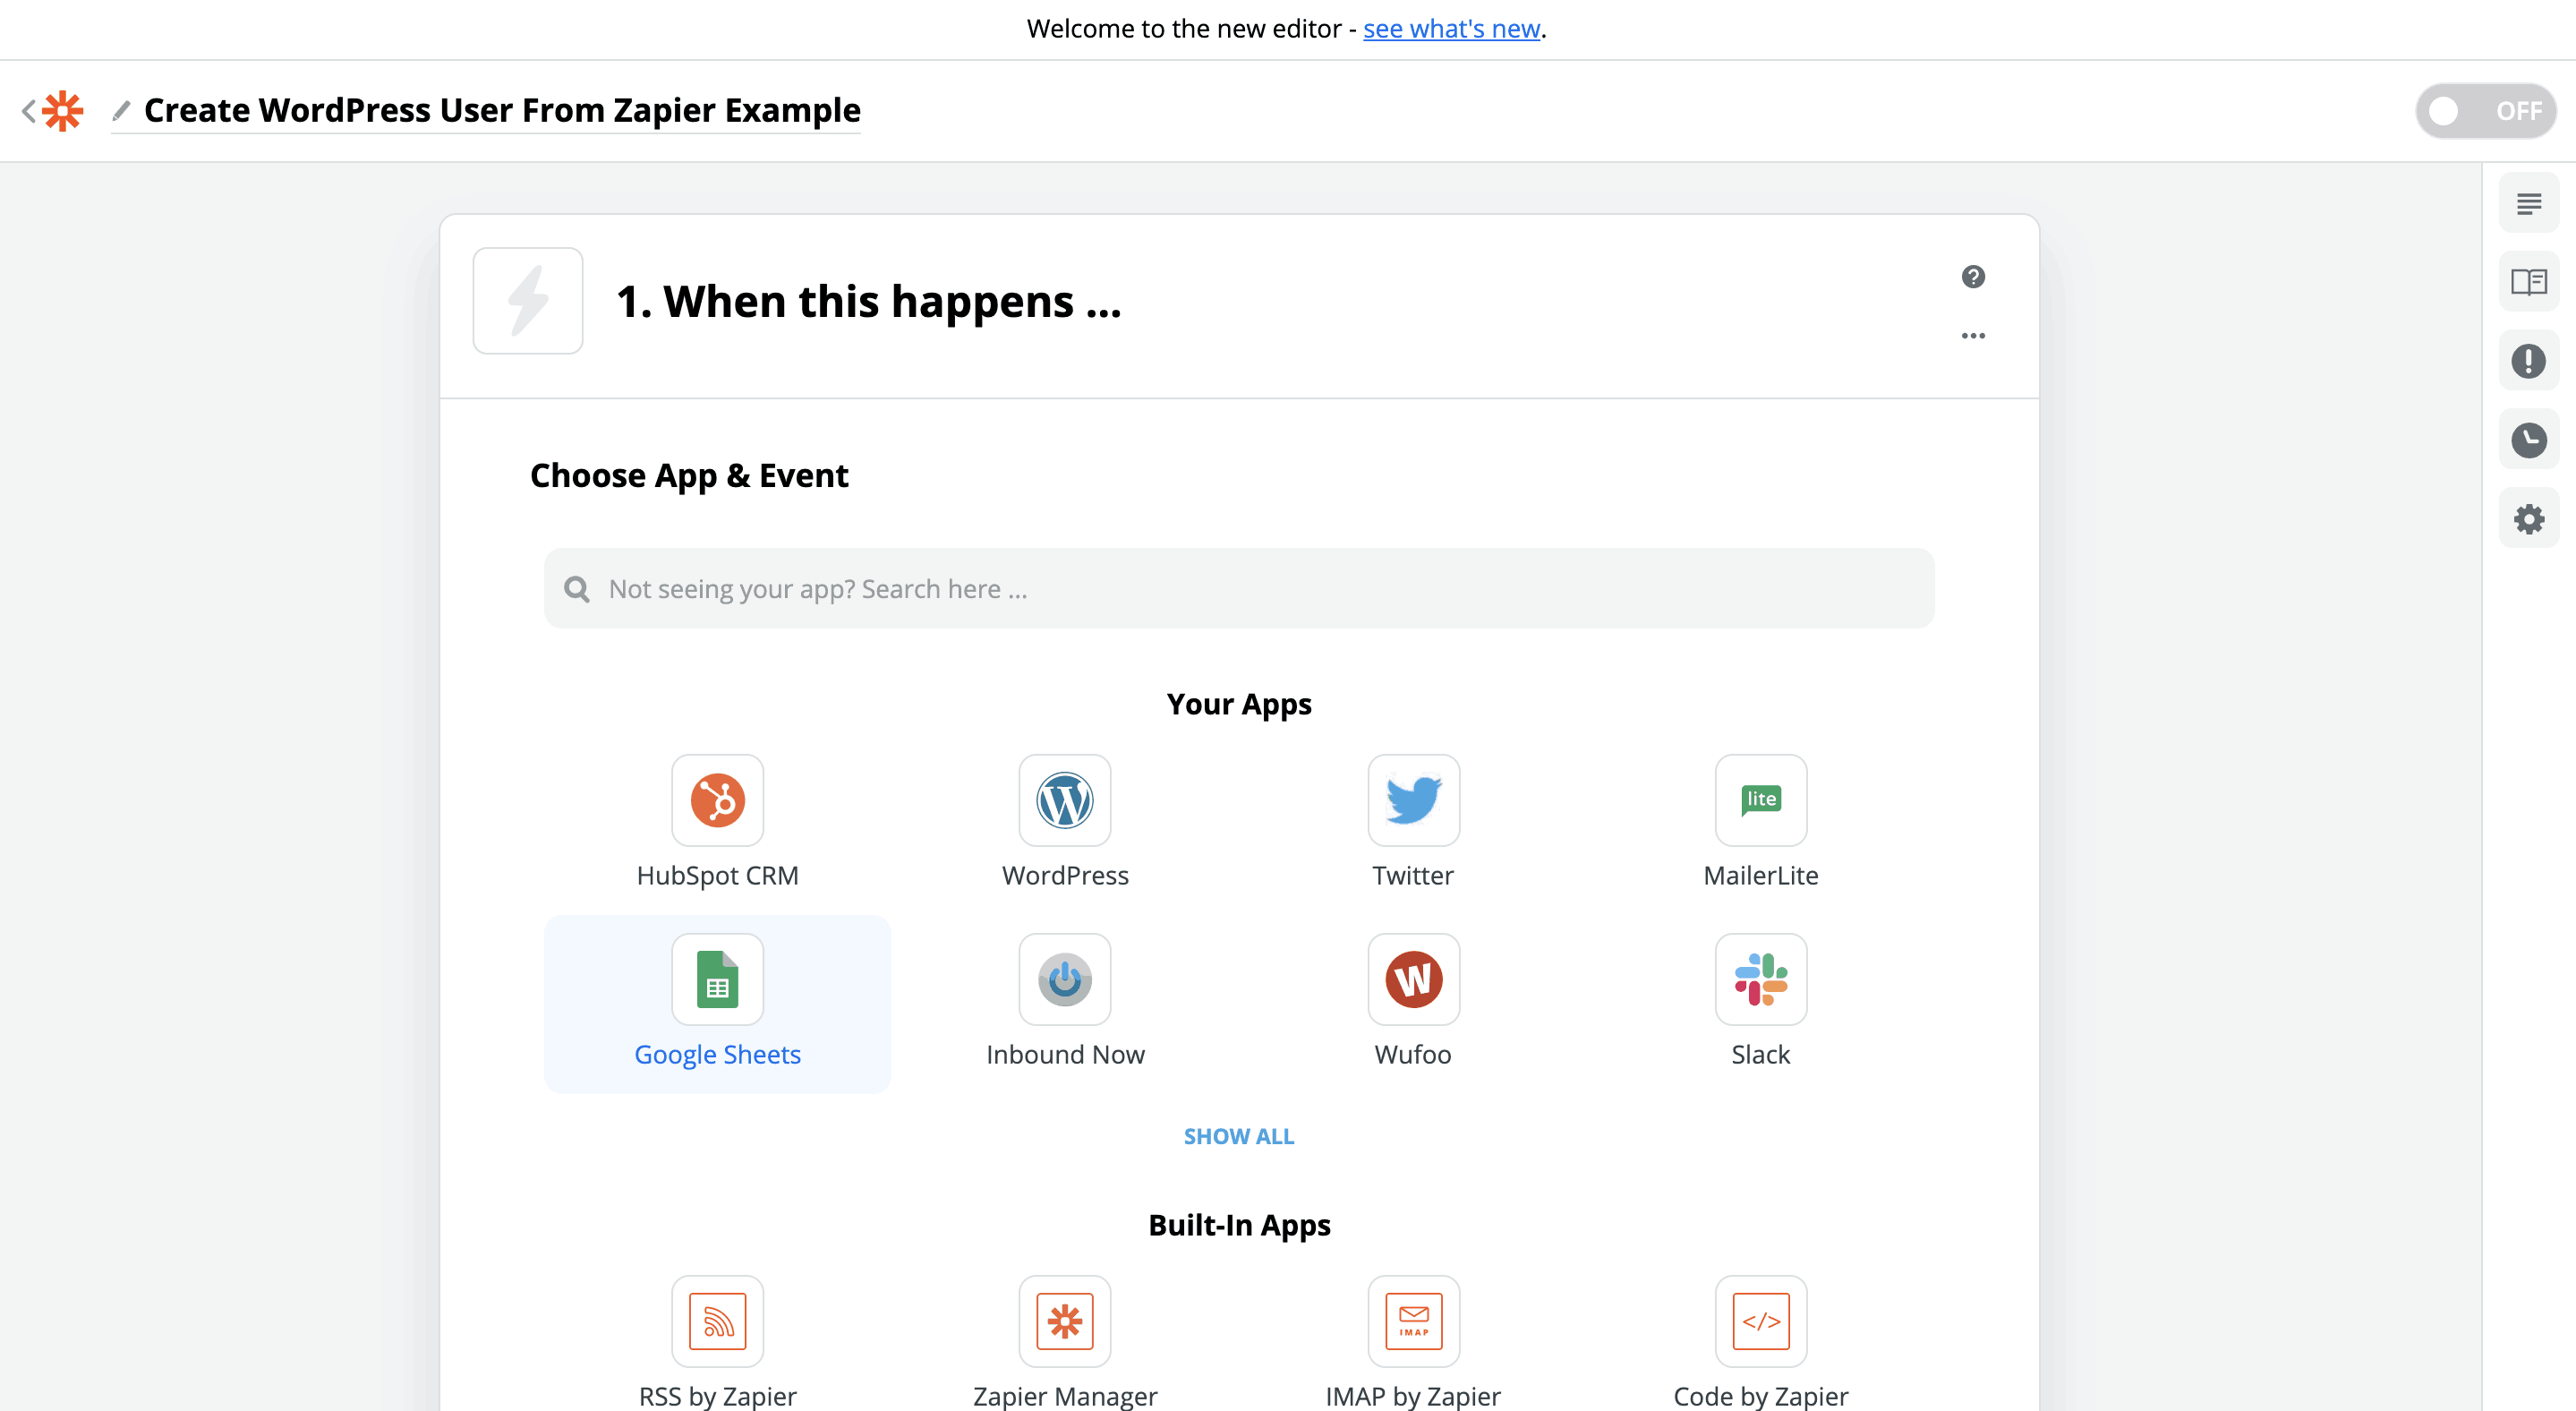
Once you are logged-in to your Zapier account, you should be on the Zapier dashboard and there should be a huge orange button that says “Make A Zap!” and click it.
Step 3.1.1: Choosing A Trigger Application
You should be on the “Choose A Trigger” screen. If you do not see your trigger application, search for it. In our case it would be Google Sheets. Select your trigger application.
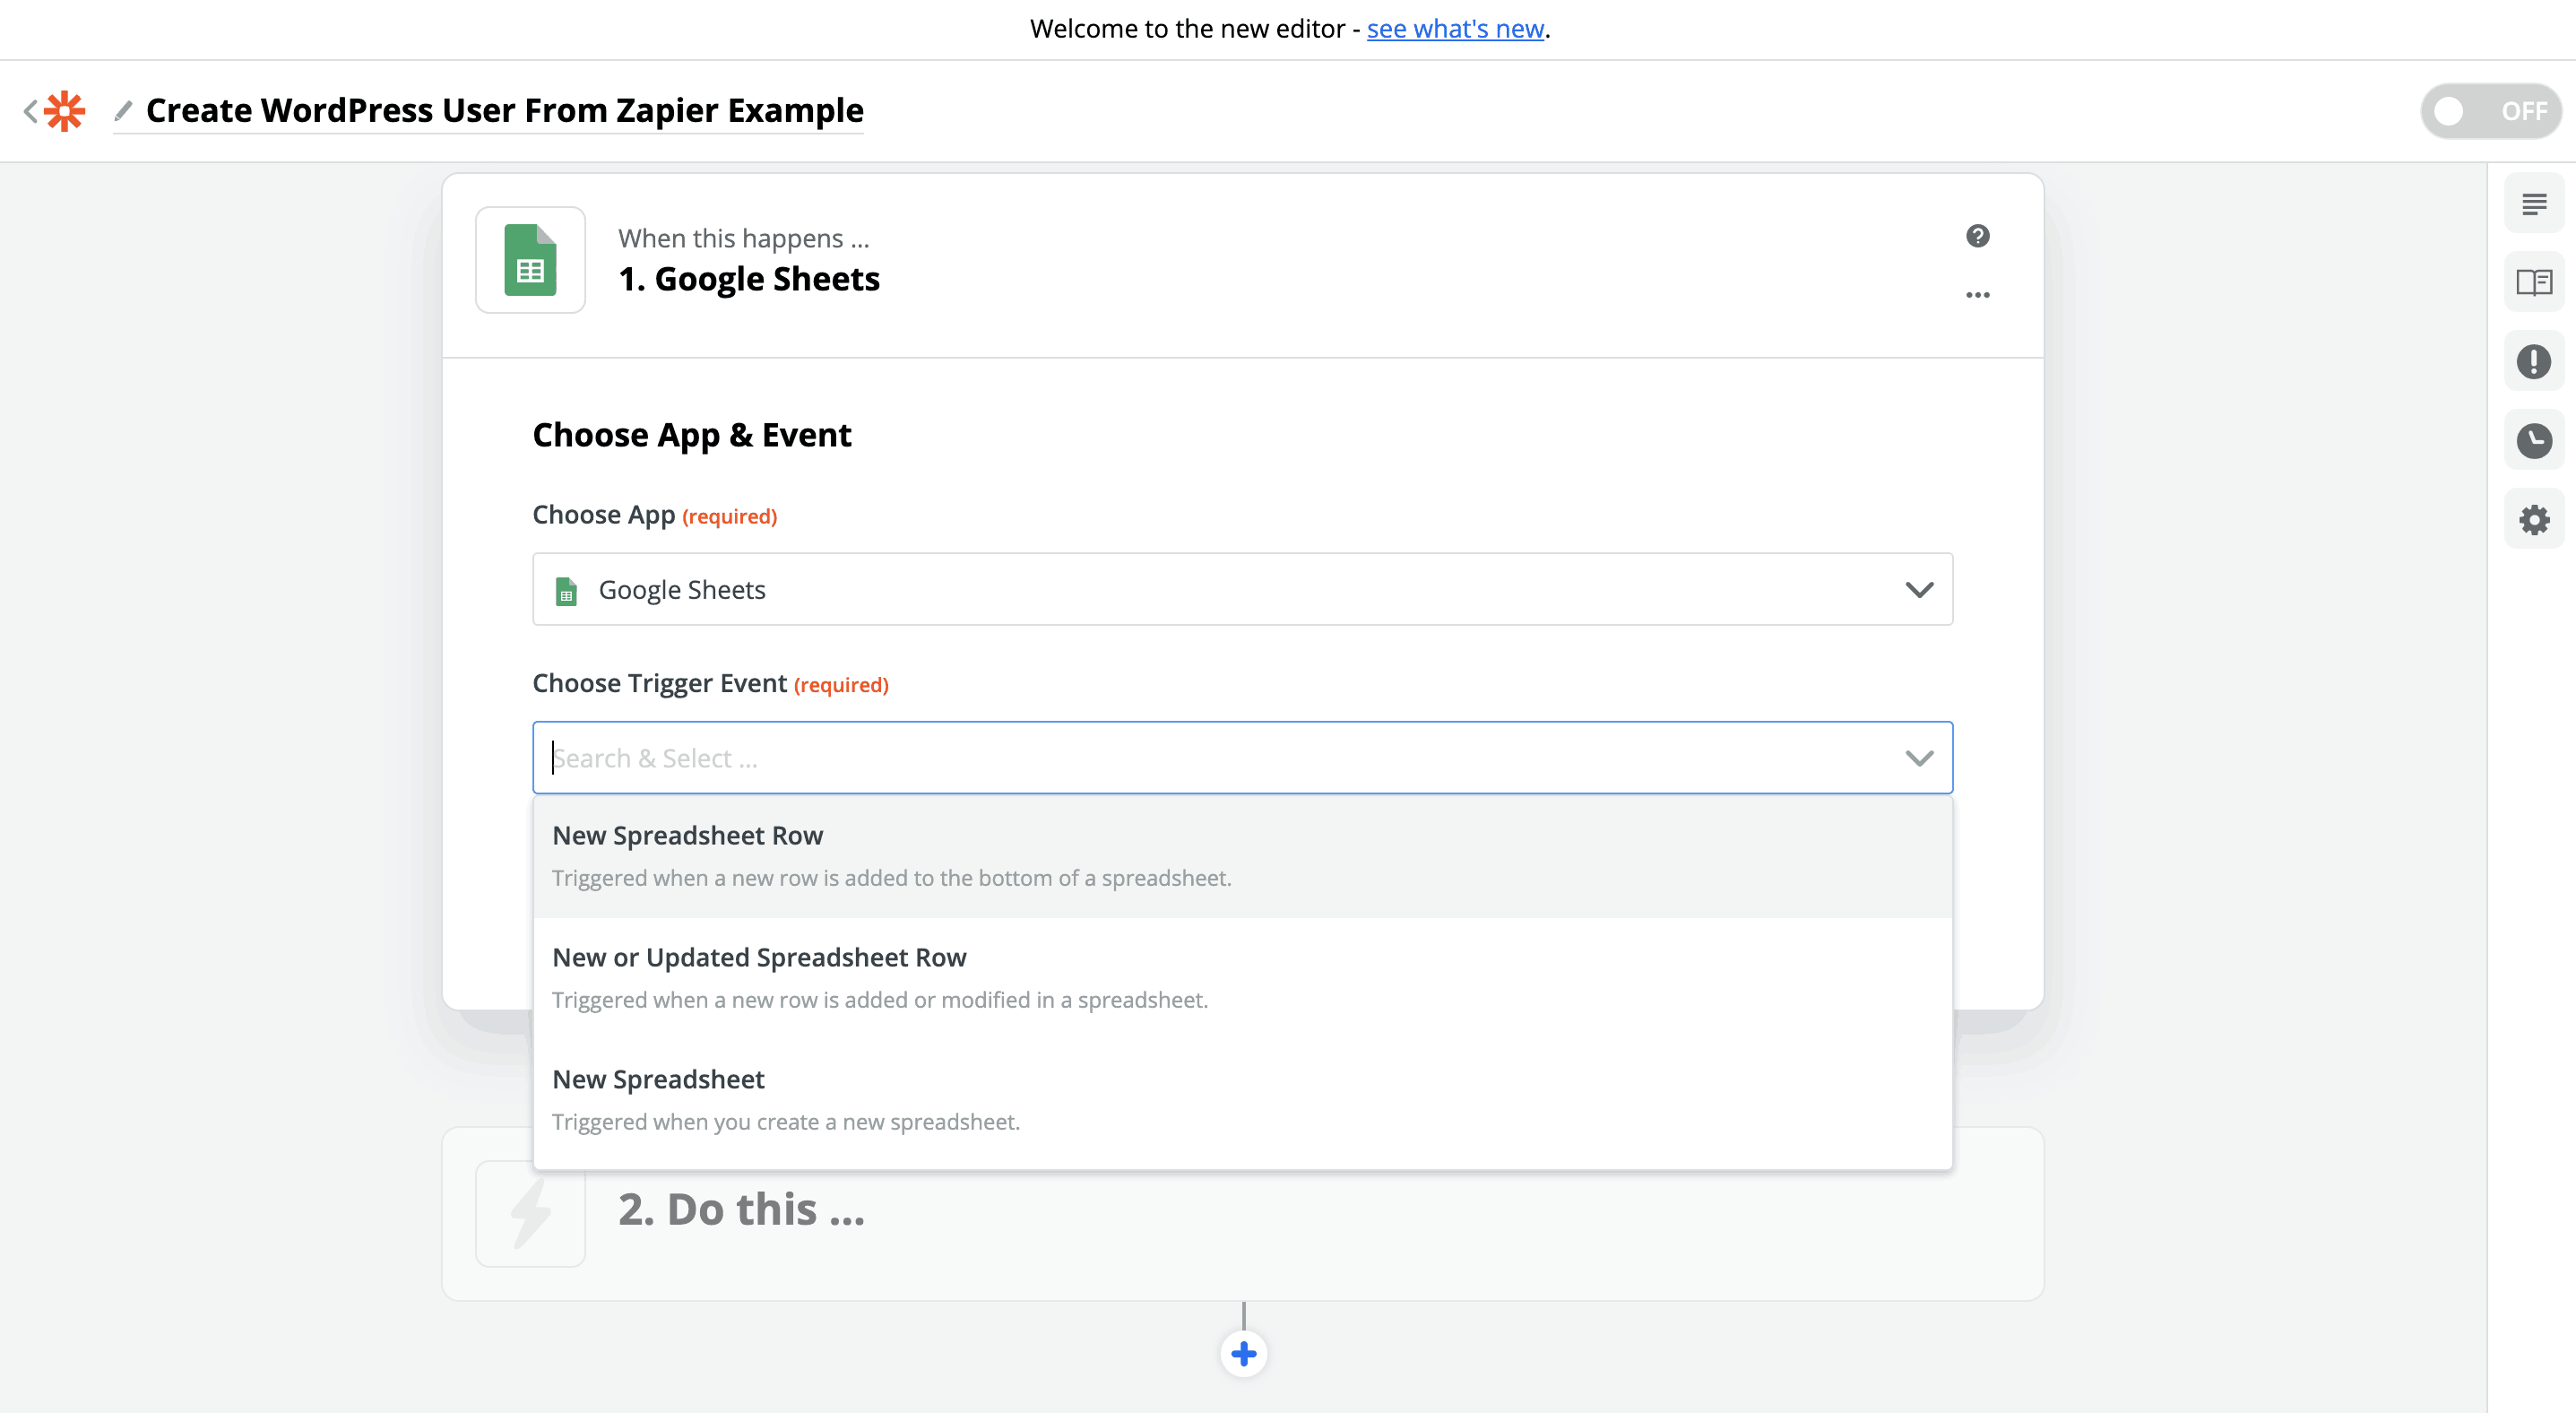
Step 3.1.2: Choosing A Trigger
Once you have selected your trigger application, this will allow you to choose “when” you want to send data to your WordPress website. In our case, whenever a new row is added. Select your trigger and click Save + Continue.
Step 3.1.3: Connect Your Account To Zapier
This step is usually to authenticate and give permission to Zapier to retrieve your Google Sheets or get access to your trigger application on your behalf. This step will differ for each trigger application and is required in order for this to work. Connect your relevant account, in our case we will be connecting our Gmail account so Zapier can access our Google Sheet documents.
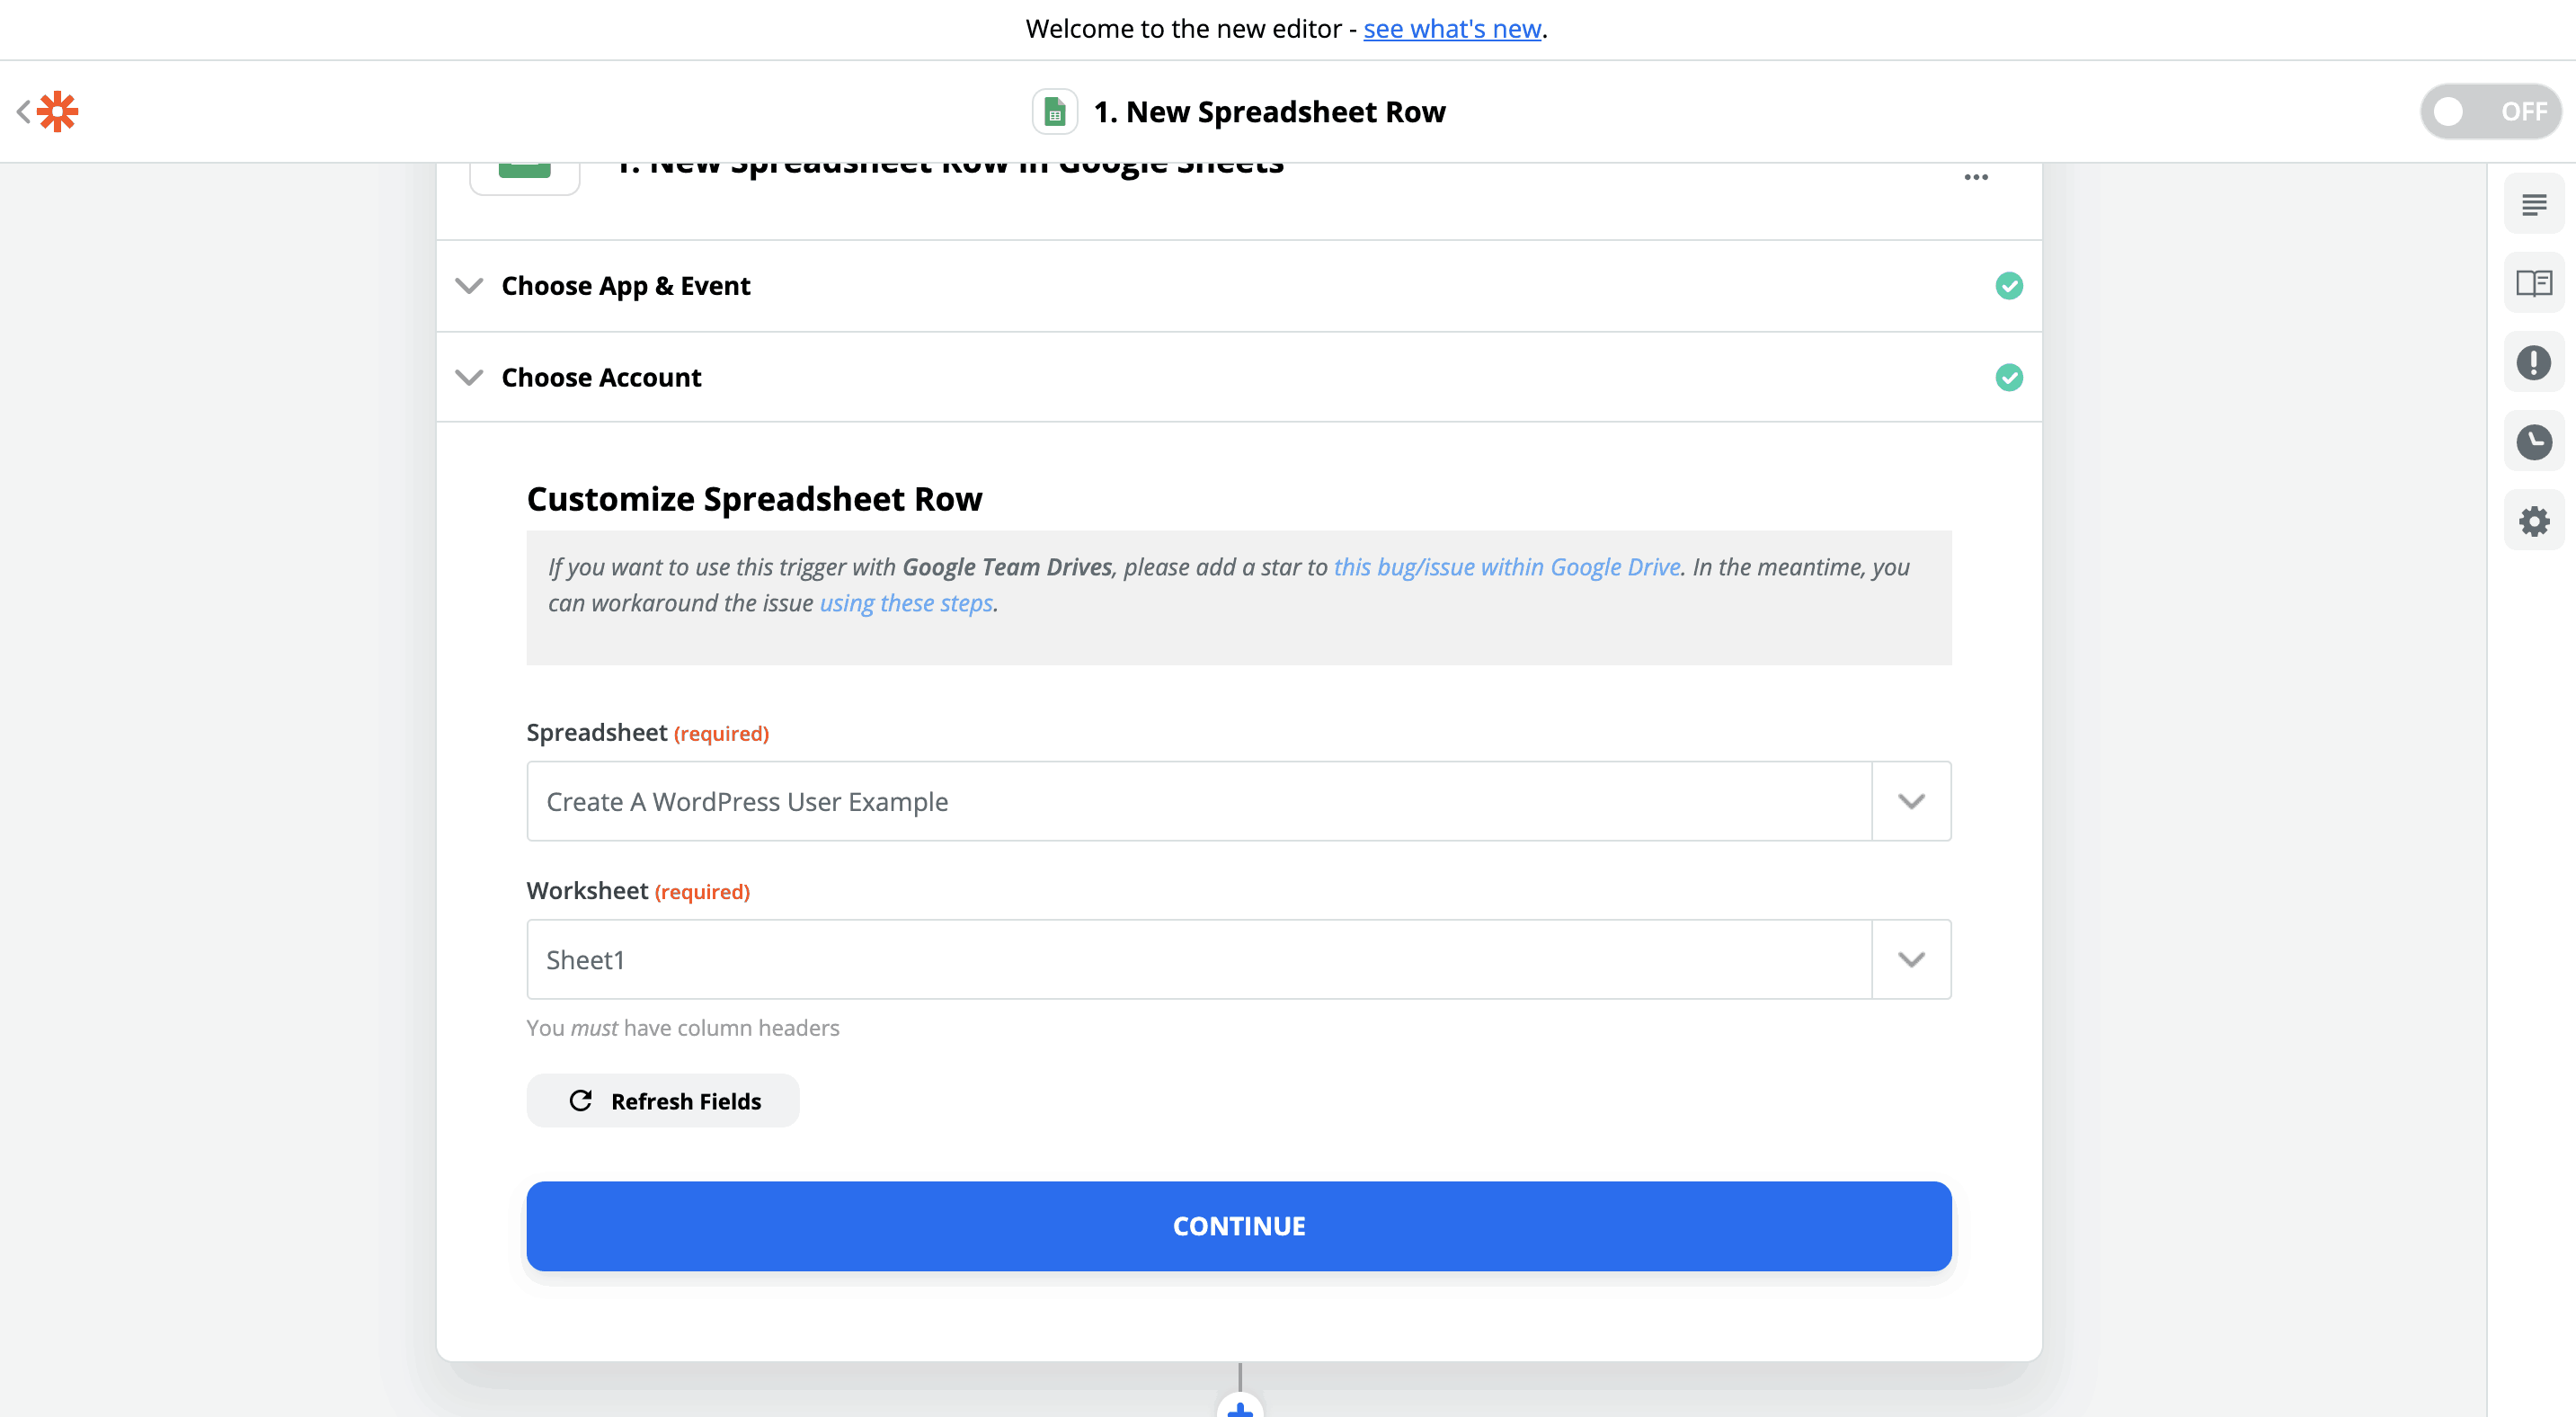
Step 3.1.4: Choosing Our Google Sheets For Zapier
Now that your account is connected, Zapier is able to retrieve all your Google Sheets linked to your Gmail account. Be sure to select “Create A WordPress User From Zapier Example” and set the worksheet to “Sheet 1” or to the sheet you would like Zapier to track. (See step 1)
Step 3.1.5: Testing Our Trigger Application Data
In step 1, we suggested in keeping a tab open for your Google Sheets as we needed to add data to this in order to test it correctly.
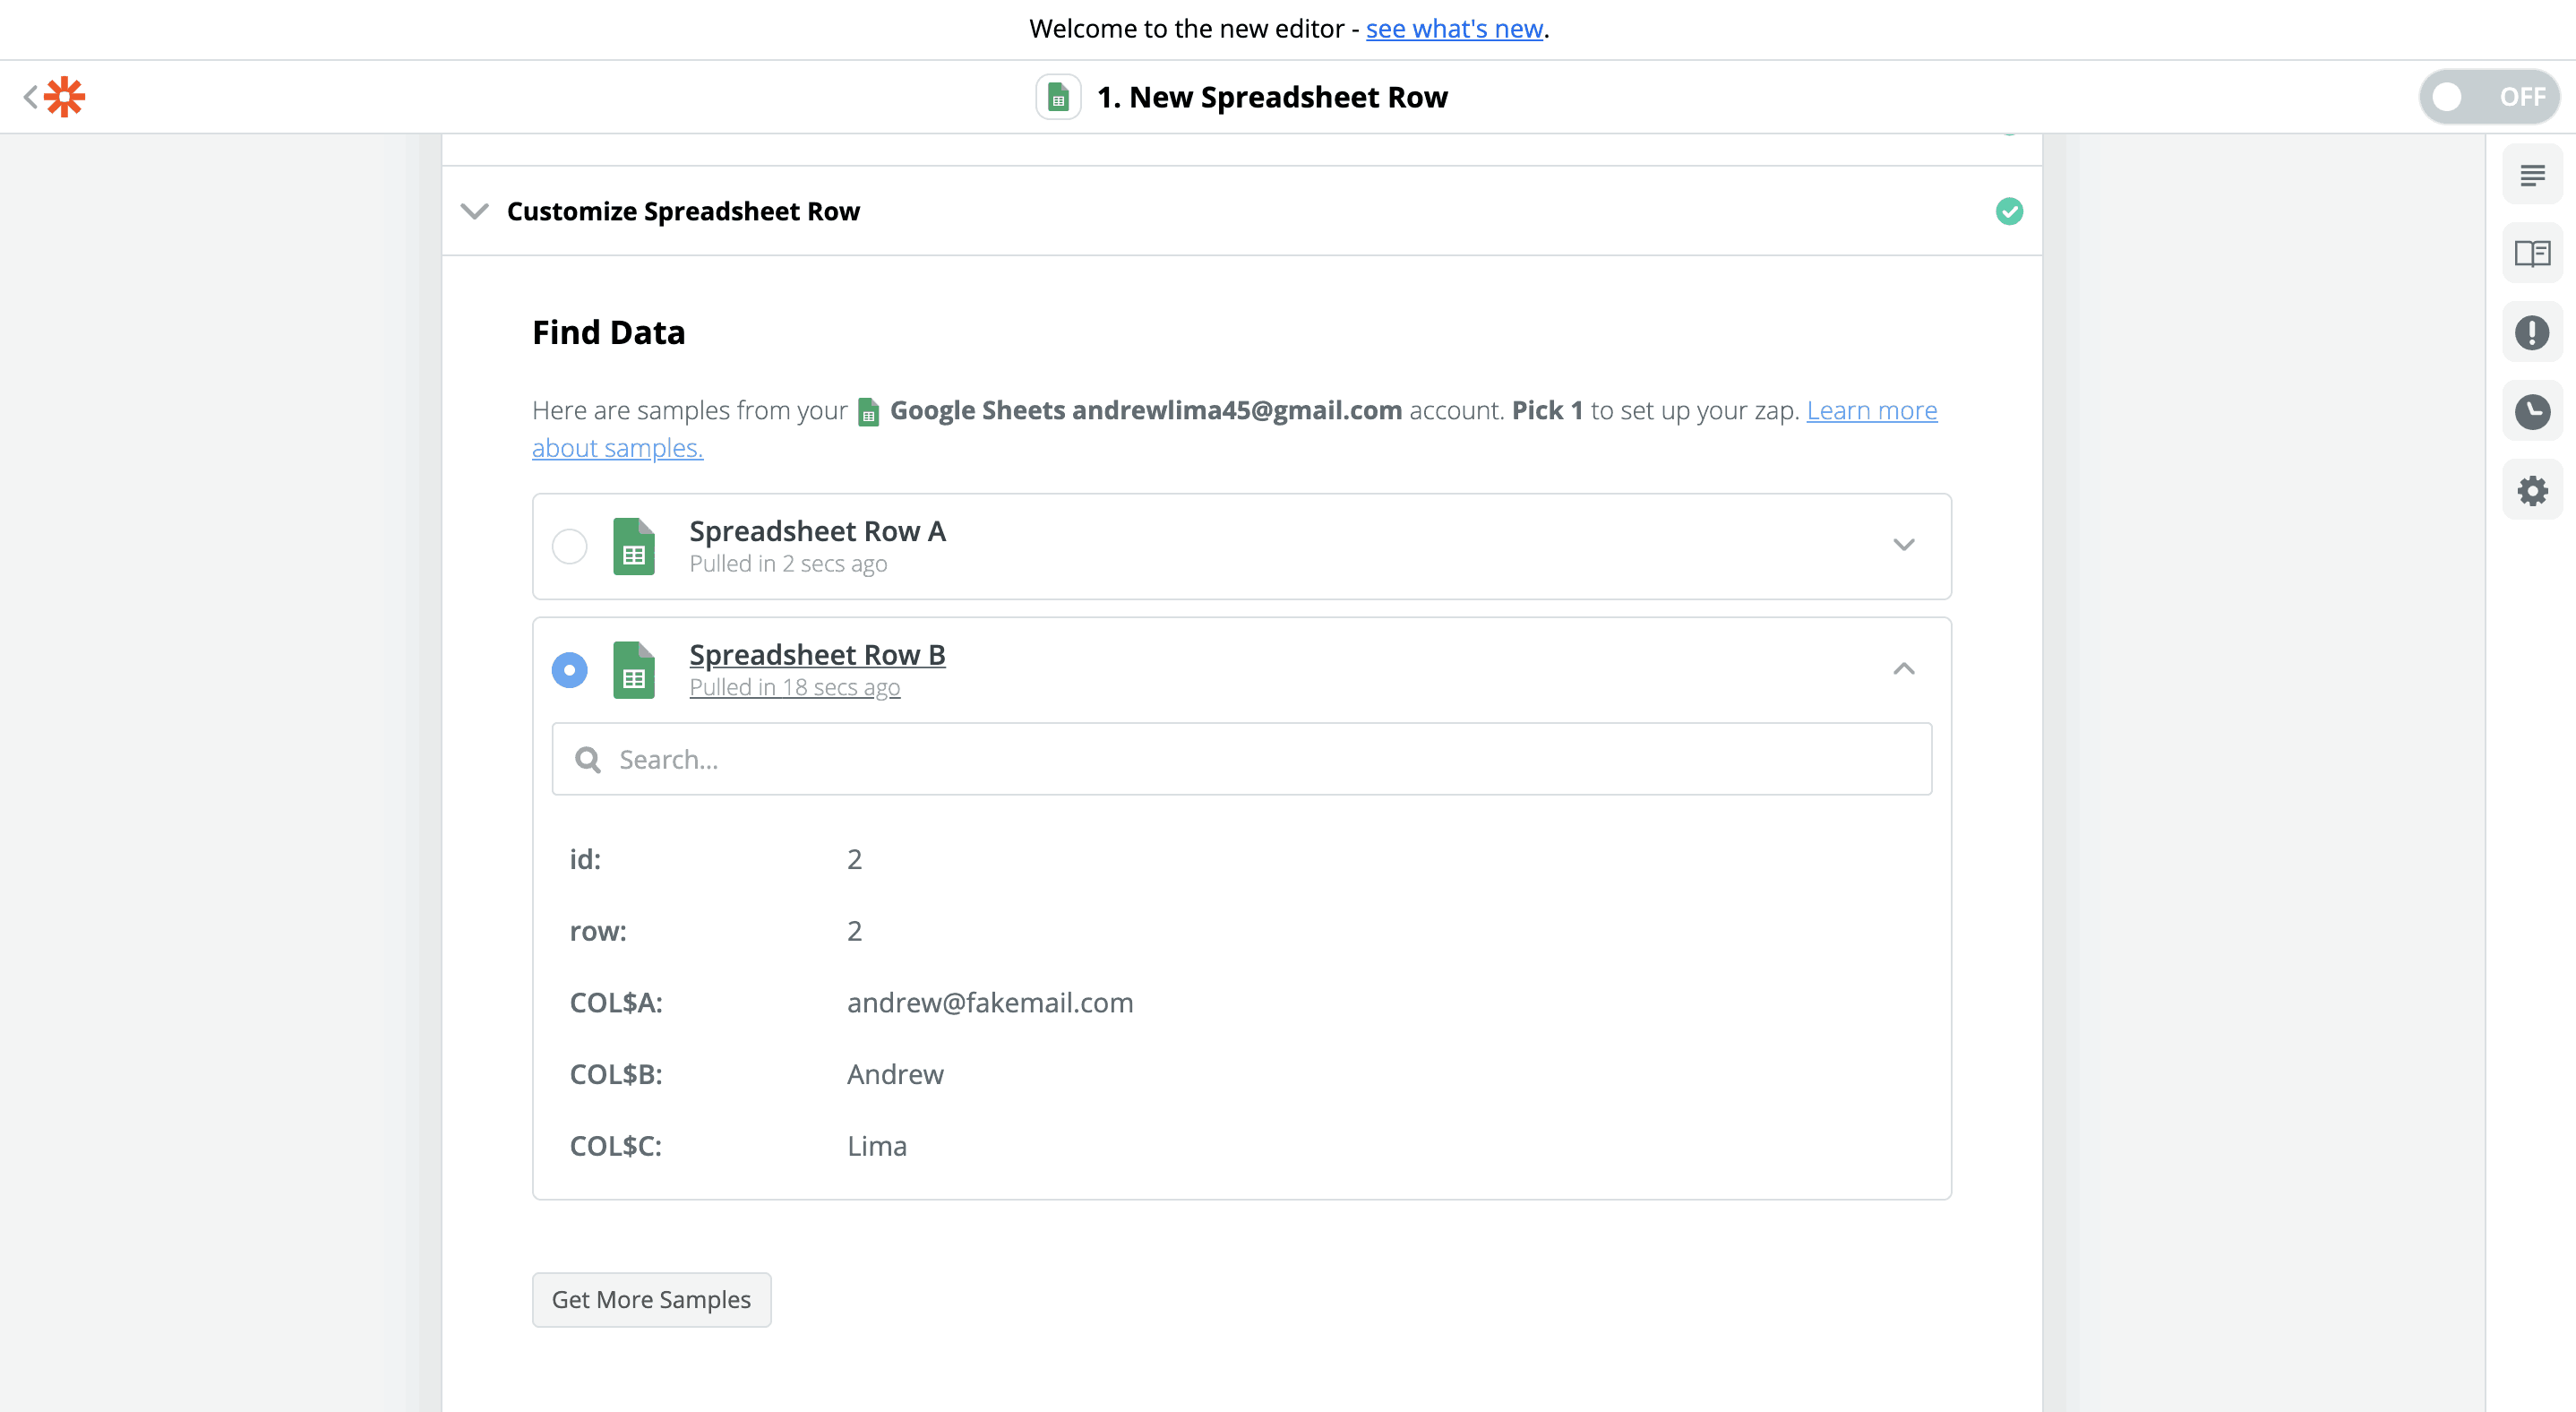
You should be on the Test Google Sheets / Pull In Samples page by now. This is where Zapier will see what data it receives from your Google Sheet and if it’s successful or not.
This step is important for the second half of the integration when we map the data to the WordPress fields we will be syncing data with (i.e username, email, first_name, last_name and role).
Go to your Google Sheets and add in some dummy data now, your Google Sheet should look something along the lines of:

Now that some test data has been added, navigate to your Zapier tab and select “Test & Review” to see what data was received by Zapier. This shouldn’t take too long to show results, but be patient and give it a few moments.
If successful, you should see a the demo data that was tested previously and this gives you the ability to either re-test your data or view your data that was received by Zapier, select the spreadsheet row and it should look similar to this
Be sure to continue and this will take us to our final step inside Zapier, syncing the data received and pushing it to WordPress to create a new user.
Step 3.2: Setting Up The Action
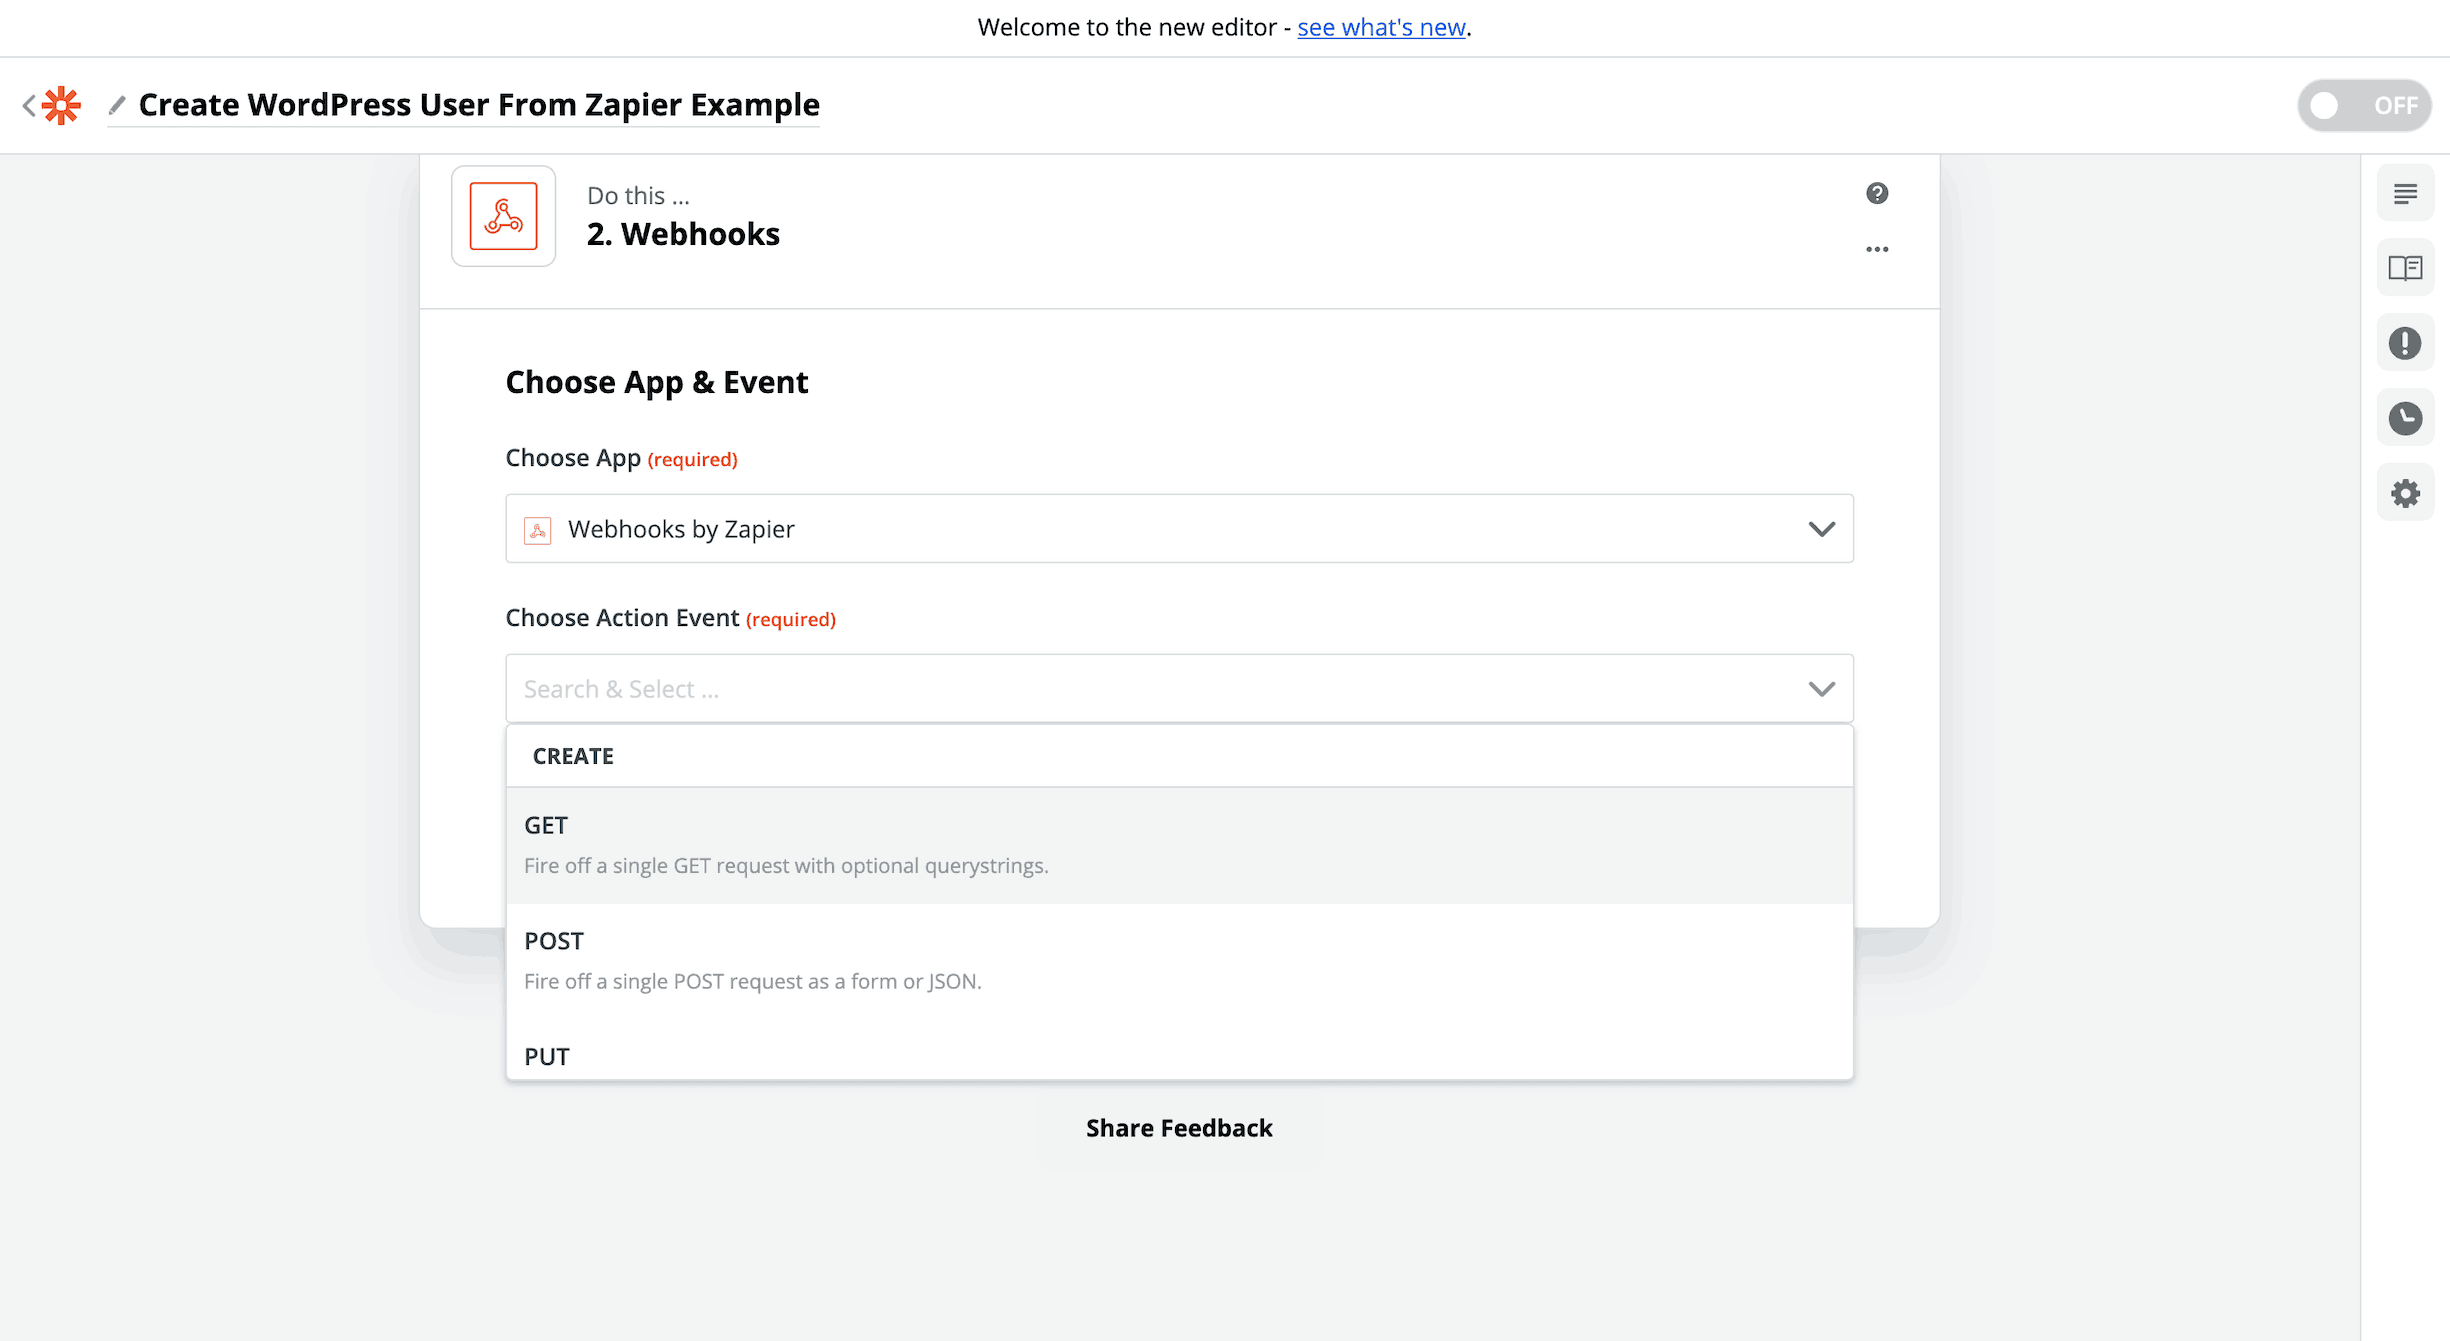
Zapier free accounts only allow for a two-step Zap. Which is perfect for our use-case, this part will be matching the data from step 3.1 and passing it to WordPress / WP Zapier. The type of application in this step will never change and always be “Webhook By Zapier”.
Step 3.2.1: Choose Action
In this step, always choose “GET” as we are pushing data away from Zapier and to our WordPress website. Click “Save + Continue”.
Step 3.2.2: Setup Template
This step is where we set up all our data and once you’ve done one Zap like this, you will be on your way to creating useful integrations to your WordPress site. To simplify this template, we will only mention the required settings in order to make this webhook work.
Required Settings:
- URL – copy this URL from the “Receive Data From Zapier” settings page inside your WordPress site.
- Payload Type – set this to “form”, this will be as if we submitted a form to our website.
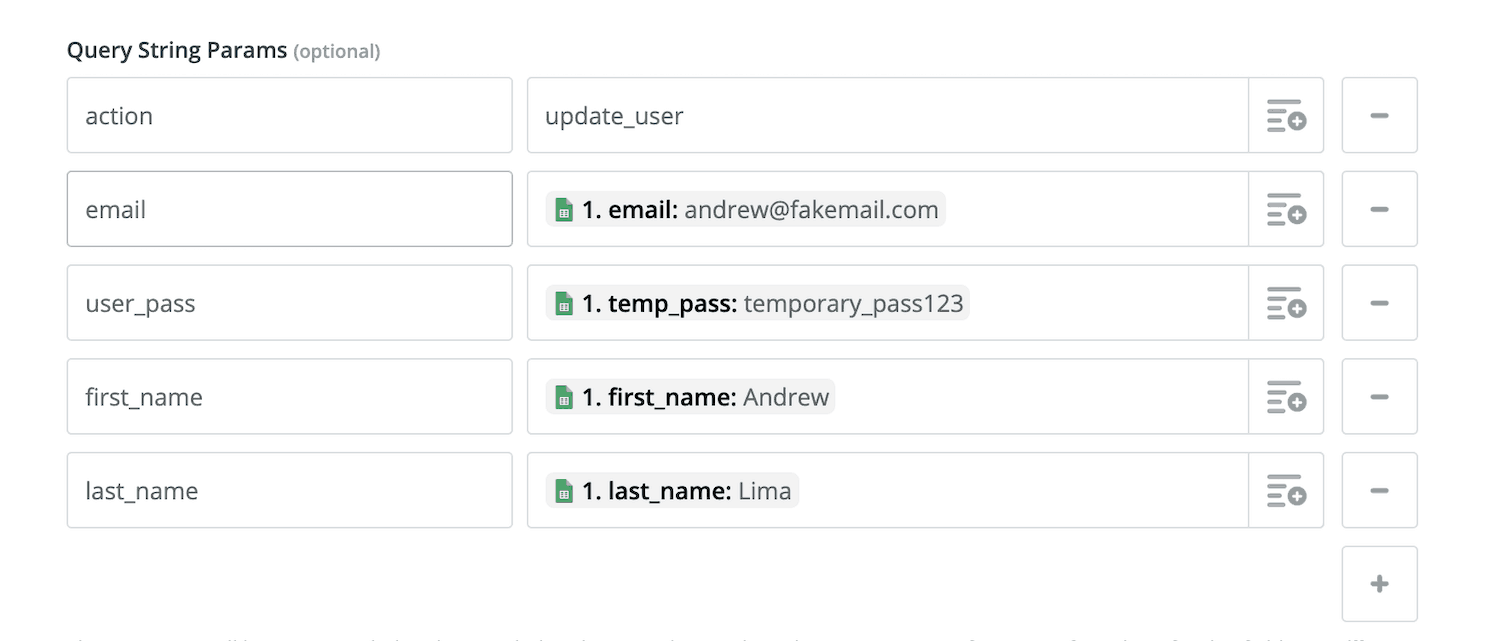
- Query String Params – this is possibly the most important section of the template, this is where we map the data to the Zapier Integration plugin. Add a new row per item that passes through, this would be for our use-case:
- action – type in update_user (The following available actions are create_user, update_user and delete_user).
- username – select the + and choose the username from our trigger application. (If no username is given, one will be generated).
- email – select the + and choose the email from our trigger application.
- first_name – select the + and choose the first_name from our trigger application.
- last_name – select the + and choose the last_name from our trigger application.
- role – select the + and choose the role from our trigger application.
- Unflatten – set this to “no”
Select “Continue” and this should show a preview of the data that you would send to WordPress, and select “Test & Review”. This will create a dummy user on your WordPress website. So be sure to login to your WordPress website and remove the user.
Continue through the last remaining steps and name your Zap, remember to name it something that is descriptive.
Overview
That’s it, whenever you add a new row to your Google Sheets that is linked to Zapier it will create a new user in WordPress. If the username or email exists it won’t create the new user and fail to register the new user. This may not be a great use-case for a real world example but at its simplest form it should be easy to understand and implement more complex integrations between WordPress and Zapier.
