Do you run a WordPress membership site? Then you know the struggle. Admin work piles up fast. When a new member joins, you usually have to:
- Generate an invoice.
- Email it to the member.
- Save a copy for your records.
- Update your CRM.
These tasks are small. However, they add up. Consequently, they distract you from your main goal: growing your business.
Fortunately, there is a better way. You can automate WordPress invoices entirely. Imagine this. You create and send invoices instantly. You do this across multiple channels. Best of all, you need zero coding skills. You also avoid expensive licenses.
This guide shows you how. We will build a powerful workflow. It will automate WordPress invoices using free tools:
- Paid Memberships Pro: Your membership engine.
- Paid Memberships Pro PDF Invoices: Your invoice generator.
- WP Zapier: Your automation bridge.
By the end, you will have a fully automated system. It emails invoices. It archives them. It even updates your CRM.
The Perfect Trio to Automate WordPress Invoices
We need three tools for this automation. Each one plays a vital role.
- Paid Memberships Pro (PMPro): This manages your site. It handles subscriptions. Furthermore, it triggers our workflow. The free version works perfectly.
- Paid Memberships Pro PDF Invoices: Our plugin connects to PMPro. It generates a professional PDF invoice instantly. This happens when an order completes.
- WP Zapier: This plugin bridges your site to Zapier. It listens for WordPress events. Then, it sends data to Zapier. This bypasses the need for a paid PMPro license.
Configuring Your PDF Invoices
First, we must set up your invoices.
- Go to Settings: Navigate to Settings -> PMPro PDF Invoice in your dashboard.
- Customize: Check the Tools and Settings tabs. You can upload a logo here. You can also tweak the template.
Step-by-Step: How to Automate WordPress Invoices
Are you ready? Let’s build your workflow.
Step 1: Prepare Your WordPress Site
First, ensure your site is ready.
- Install Plugins: Install Paid Memberships Pro, Paid Memberships Pro PDF Invoices, and WP Zapier. Activate them all.
- Create a Zapier Account: Sign up at Zapier.com. We use multi-step Zaps. Therefore, you might need a paid plan.
Step 2: Send Invoice Data to Zapier
We need specific data in Zapier. Specifically, we need the user’s email and the invoice PDF URL.
Important: Do NOT edit plugin files. You will lose changes during updates. Instead, use the Code Snippets plugin. It is safe and easy.
Use the Code Snippets Plugin
- Go to Plugins > Add New.
- Search for “Code Snippets”. Install and activate it.
- Go to Code Snippets > + Add Snippet. Select “Add Your Custom Code”.
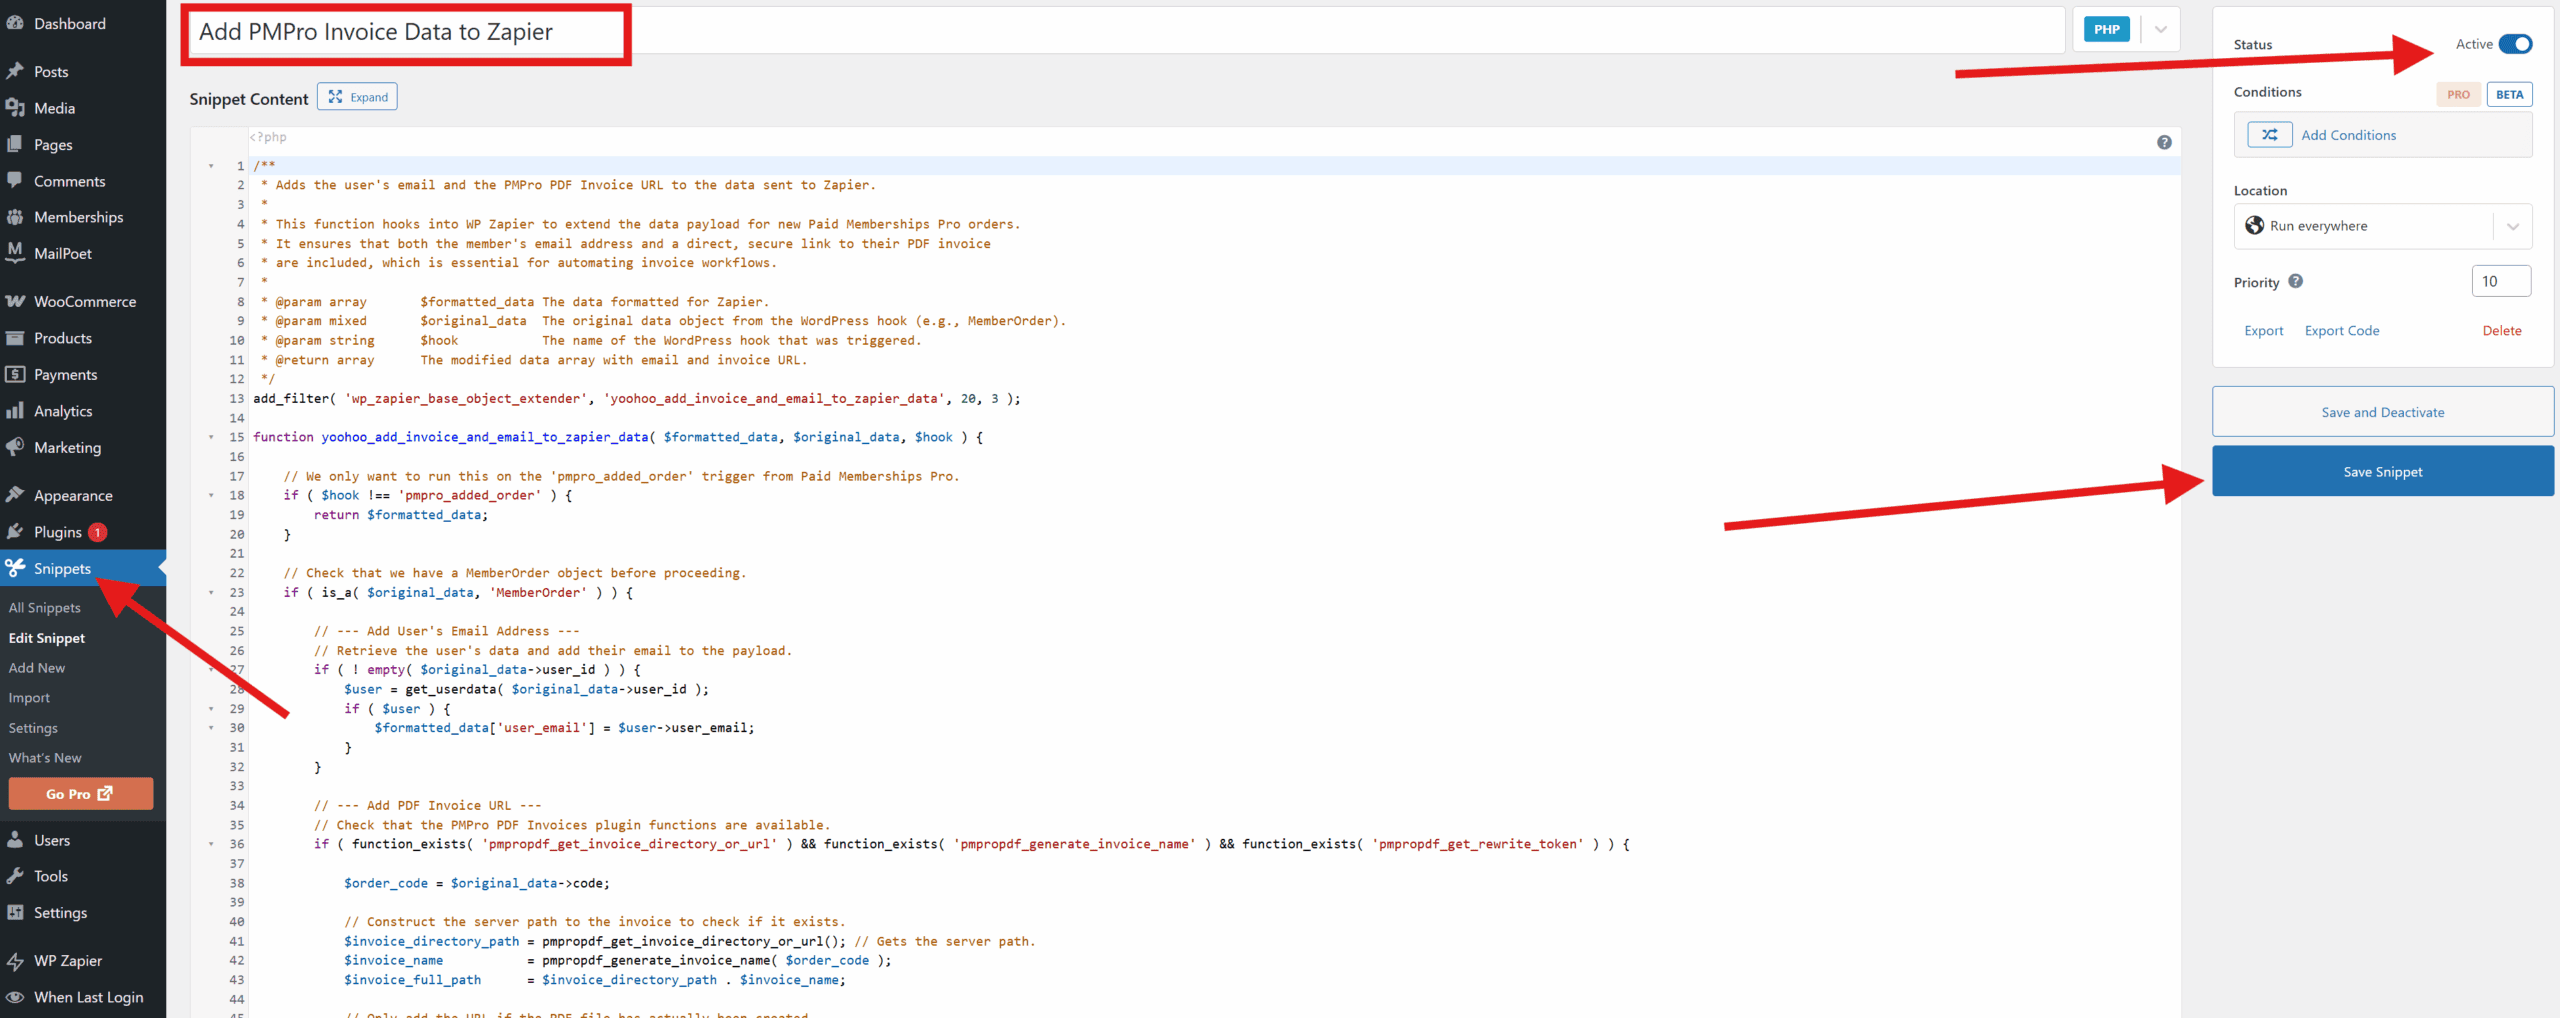
- Name it “Add PMPro Invoice Data to Zapier”.
- Paste the PHP code that you can download from this Gist Here:
- Set “Insertion” to “Auto Insert”. Choose “Run Everywhere”.
- Click “Active”. Then click “Save Snippet”.
Step 3: Create a Webhook Trigger
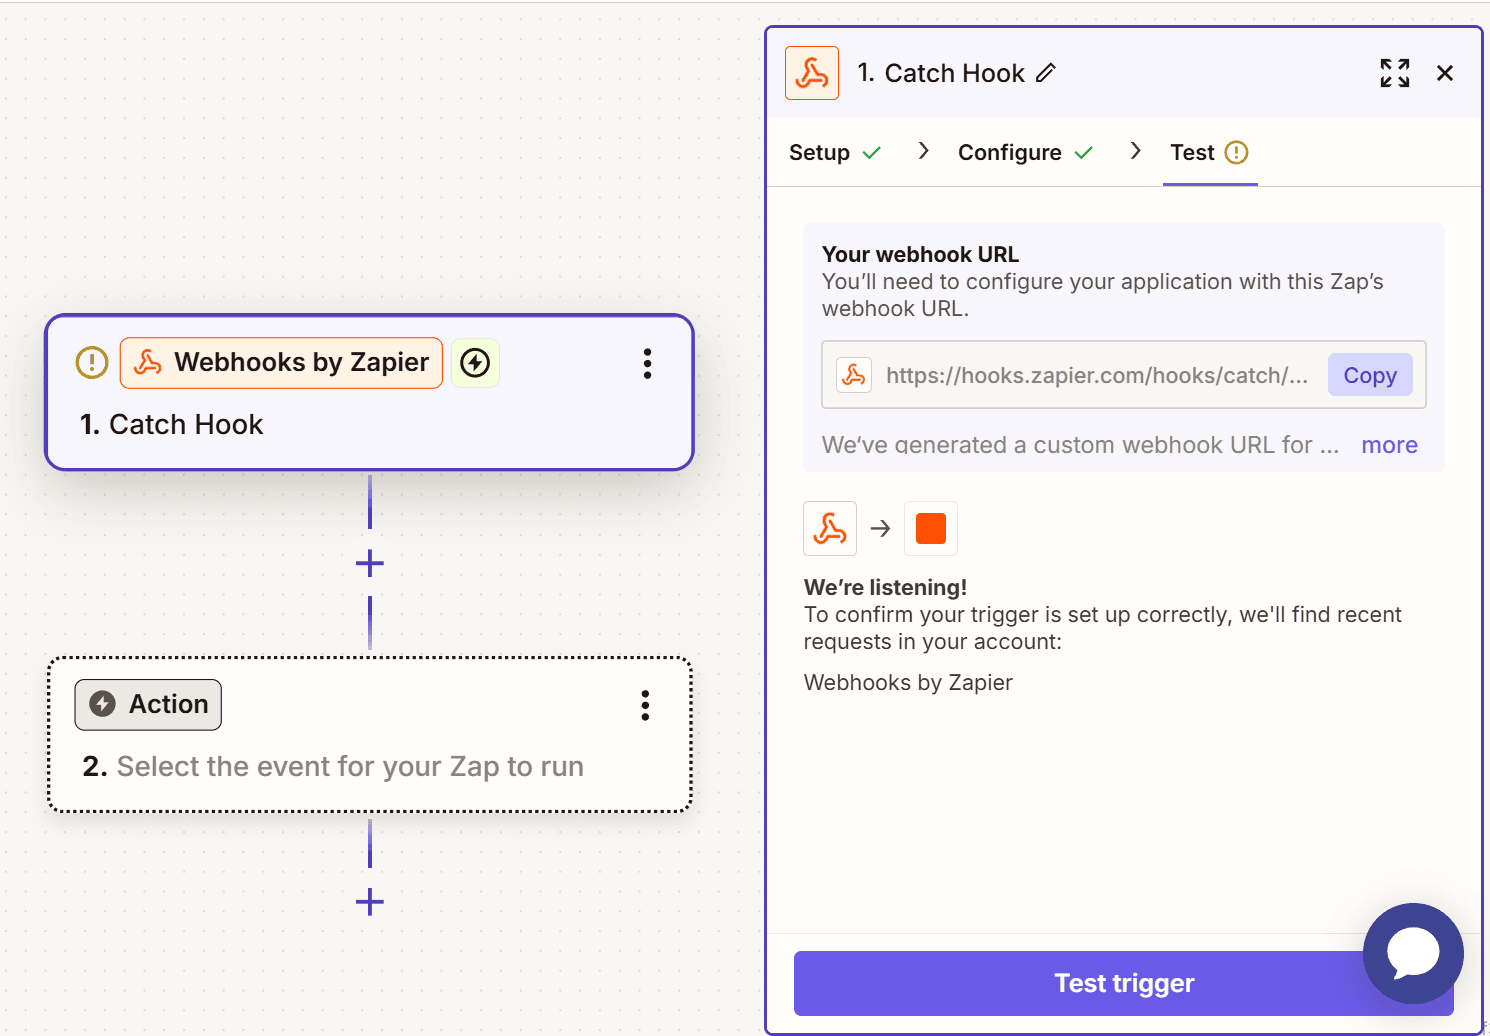
Log into Zapier. Click “Create Zap”. We use a generic webhook.
- App: Select Webhooks by Zapier.
- Trigger Event: Choose Catch Hook.
- Continue: Click “Continue.” Copy the Custom Webhook URL.
Step 4: Configure WP Zapier
Now, connect WordPress to that webhook.
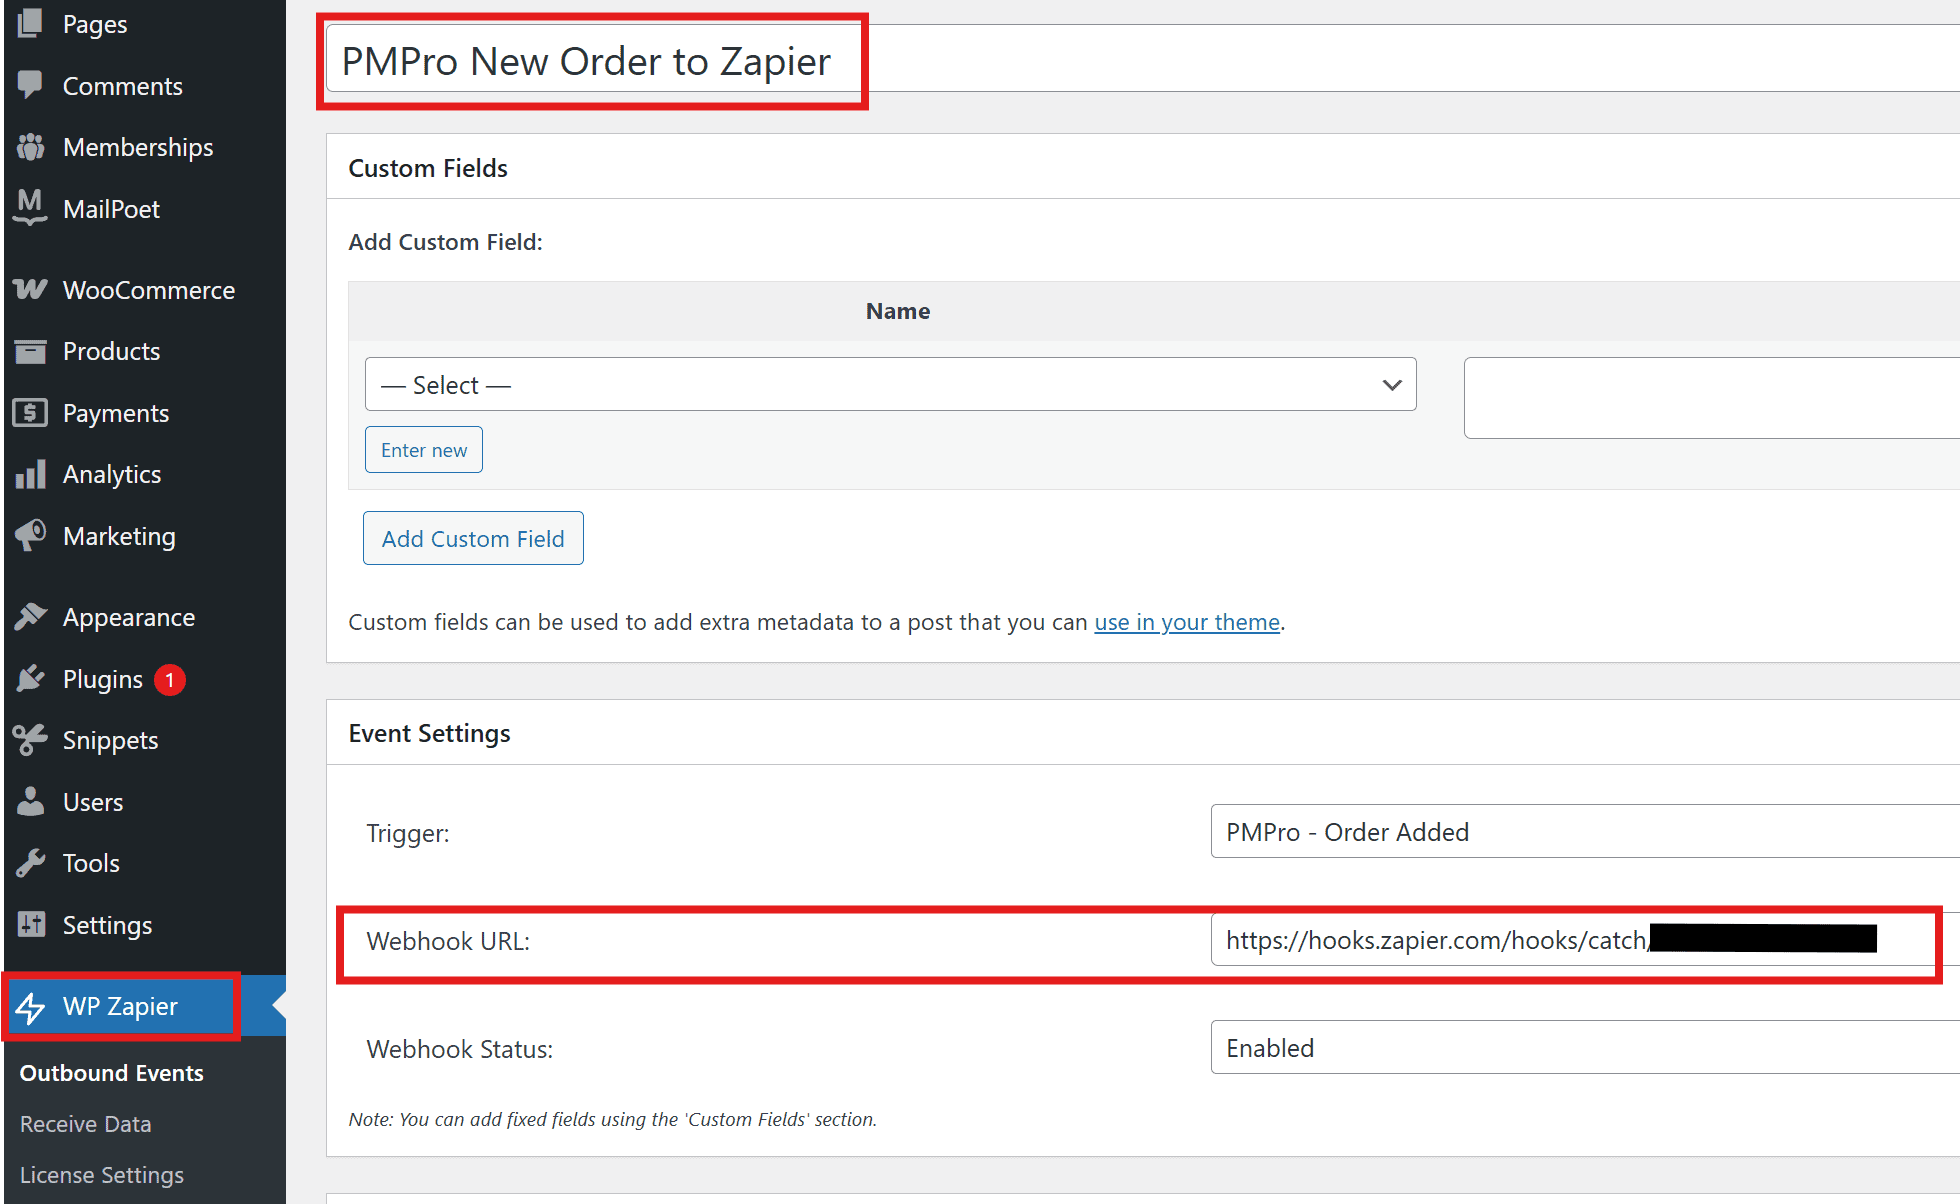
- Go to Outbound Events: Navigate to WP Zapier -> Outbound Events.
- Add New: Click “Add New”. Name it “PMPro New Order to Zapier”.
- Configure:
- Trigger: Select “PMPro Added Order”.
- Webhook URL: Paste your Custom Webhook URL.
- Status: Set to “Enabled”.
- Publish: Click “Publish”.
Step 5: Test and Build
- Create Data: Make a test order in Paid Memberships Pro.
- Test Trigger: In Zapier, click “Test trigger”.
- Verify: Check for
invoice_pdf_urlanduser_email.
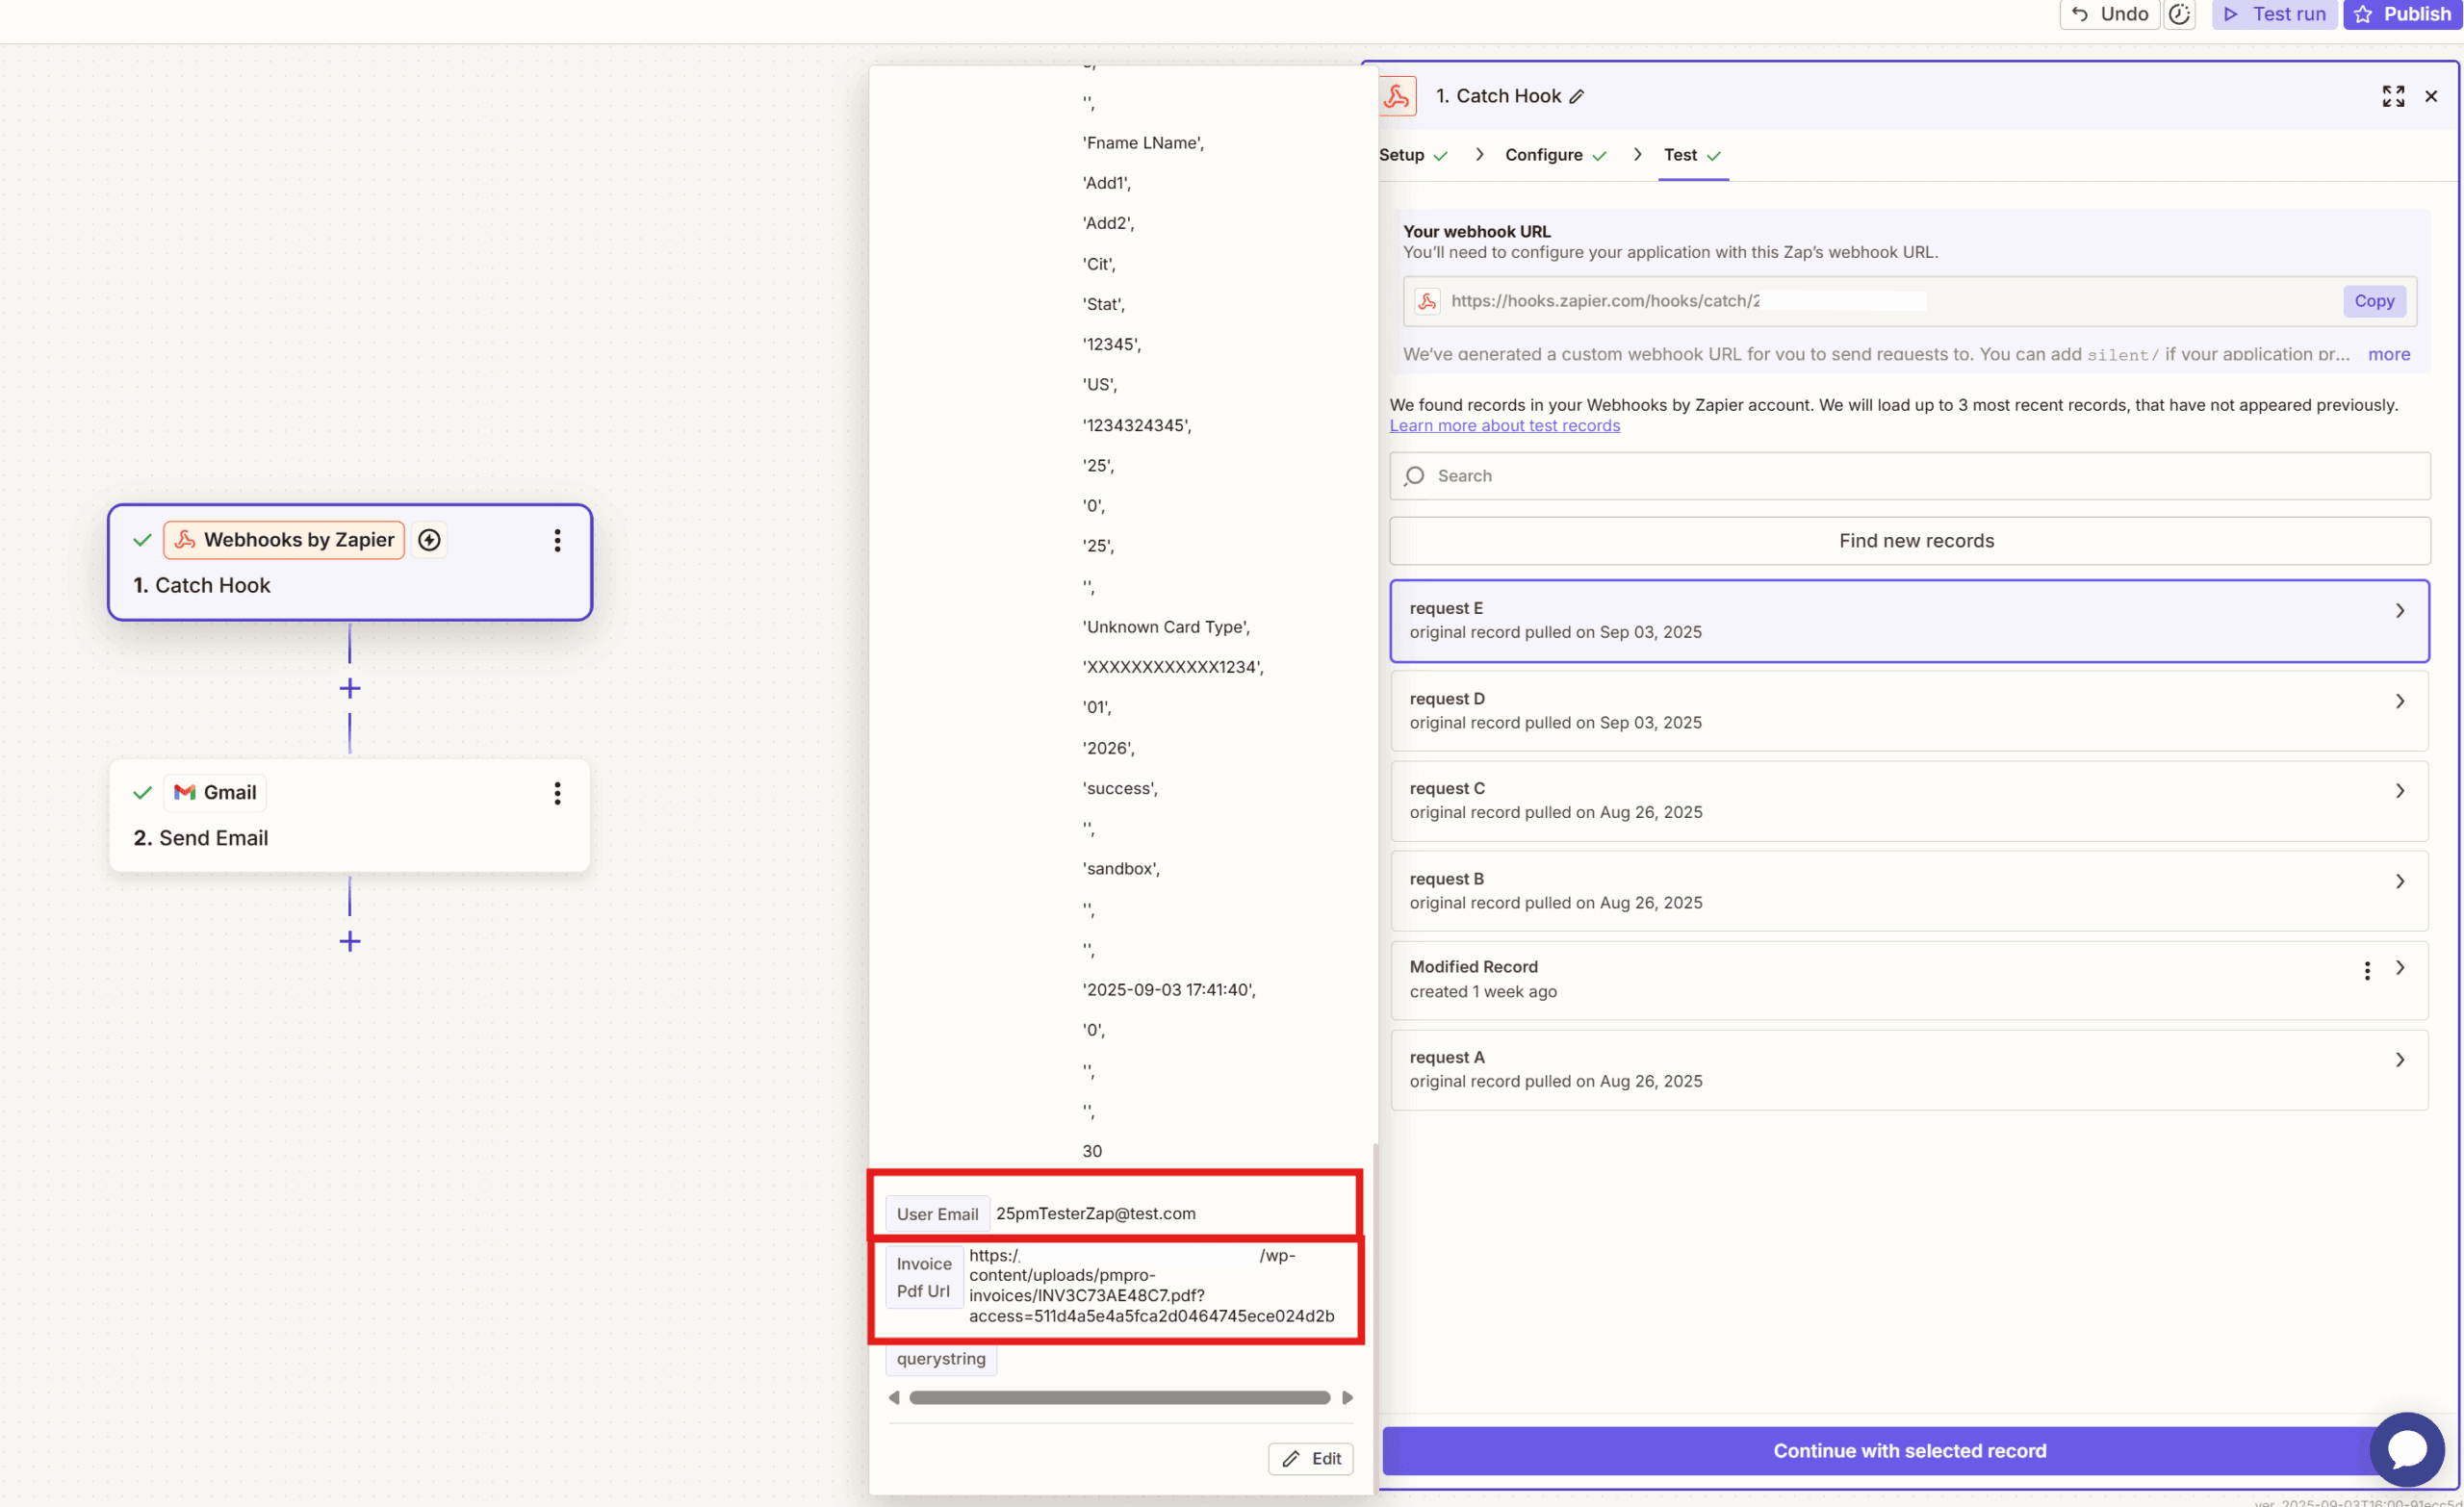
Now, build your actions.
Action 1: Email the Invoice
- App: Gmail.
- Event: Send Email.
- To: Select User Email.
- Attachment: Select
invoice_pdf_url.
Action 2: Archive in Drive
- App: Google Drive.
- Event: Upload File.
- File: Select
invoice_pdf_url.
Action 3: Update CRM
- App: HubSpot.
- Event: Create Deal.
- Map Data: Use User Email to find the contact.
Step 6: Add Filters
Avoid failed payments. Add a Filter by Zapier.
- Rule: Only continue if Status exactly matches
success.
Step 7: Activate
Test every step. Finally, publish your Zap.
Start Automating Today
You can automate WordPress invoices easily. It saves time. It also looks professional. With our Yoohoo Plugins, you do not need expensive tools.
Are you ready to start?
What will you automate next? Tell us below!
