
In this guide you will learn how to import Advanced Custom Fields from CSV. This guide will focus on user fields in particular.
What you need
- Import Users From CSV (WordPress.org download)
- Latest version of Advanced Custom Fields
- Access to Google Sheets or something similar to edit the CSV file.
Creating the CSV file
If you do not already have a CSV file, we will need to download the sample CSV file and open it with Google Sheets. To download the CSV sample file navigate to Users and select Import From CSV, on this screen click the link for the sample CSV, and open this with Google Sheets or a similar program.

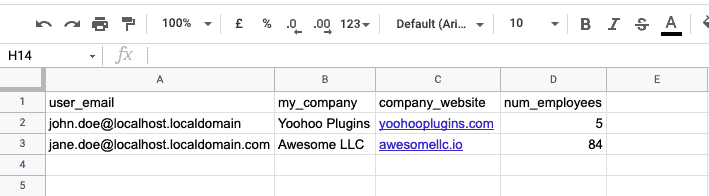
A sample of what editing the sample CSV in Google Sheets may look like.
To import Advanced Custom Fields for a user via the Import Users From CSV plugin will require only the user_email or user_login to identify any pre-existing users in your WordPress site. You may delete any rows from the sample CSV that won’t need changing or importing.
The great thing about the Import Users From CSV Plugin is that any header that isn’t predefined in the plugin will create user meta (a.k.a custom fields) with the header name and value of each row pertaining to the user.
For example if our Advanced Custom Field name for our user is ‘my_company‘, that would be used as our CSV header for the Advanced Custom Field.
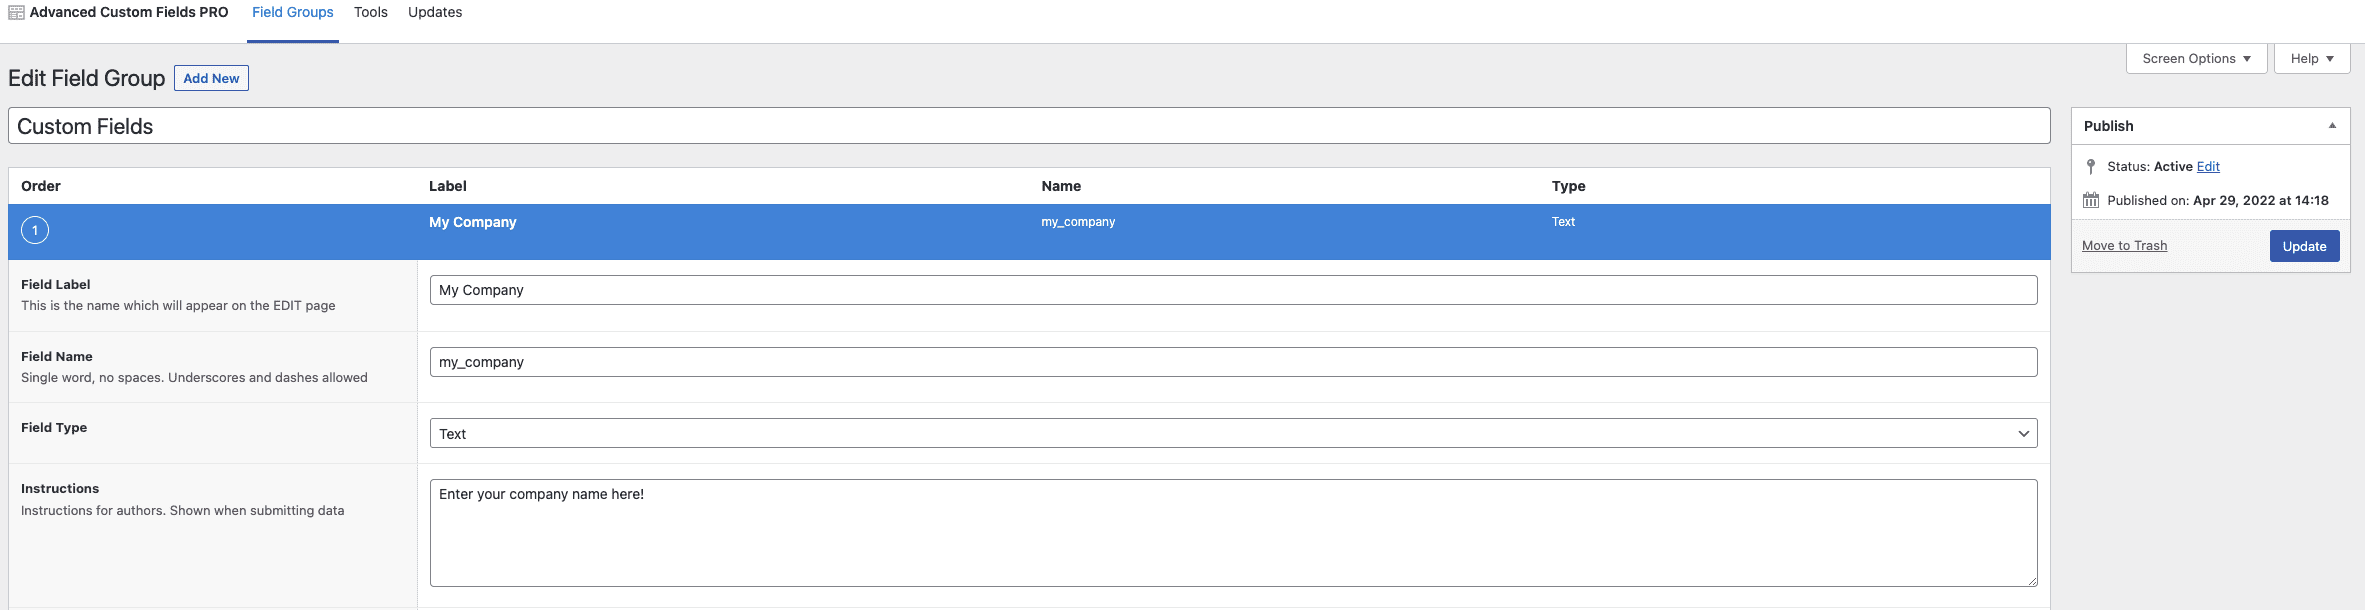
How to get the Advanced Custom Field name
If you can’t remember what you named your field, that is no problem as you may always reference this from the Advanced Custom Fields settings page.
Navigate to Custom Fields and locate the field group in question and edit this. You will then edit each field and you may see the Field Name option. This is the value you will use for the CSV.
You may navigate to your CSV file and add each custom field you would like to import, in its own column at the top of the CSV file. Repeat these steps for each custom field. Once this is done, download your file to CSV format.
Importing the CSV file
Navigate to Users inside the WordPress Dashboard and select the Import Users option. Upload your CSV file to the CSV File option and if your user already exists, you may choose the Users Update option of the CSV settings screen which will update the fields as per the above CSV screenshot.
There’s no need to select the Send to new users option in this case as we’re updating existing users. Your Import Users From CSV settings page may look like this:

Done!
That’s it! You’ve successfully updated your Advanced Custom Fields from CSV. Hopefully this guide was helpful and to the point. If you have any questions or run into any problems with the Import Users From CSV plugin, do not hesitate to reach out to our support team or leave a comment below.

Photo by Paul Teysen on Unsplash
