
Gravity Forms is a powerful WordPress plugin for creating forms, but did you know you can connect it to over 6,000 apps and services? With Zapier, you can automate your workflows and send data from your form submissions to other applications you use every day. This can save you a ton of time and effort, so you can focus on what matters most.
For example, imagine you have a “Contact Us” form on your website. When a potential customer fills it out, you can use Zapier to automatically:
- Add the customer’s information to your CRM (like Salesforce or HubSpot).
- Create a new card in Trello with the customer’s request.
- Send a notification to your team’s Slack channel.
- Add the customer to your email marketing list in Mailchimp.
All of this can happen automatically, without you having to lift a finger. In this post, we’ll show you how to connect Gravity Forms to Zapier, step by step.
Prerequisites
Before you get started, you’ll need a few things:
- WP Zapier & Webhooks plugin: This is our plugin that allows you to connect WordPress to Zapier.
- Gravity Forms: You’ll need to have purchased a license of Gravity Forms and installed and activated on your WordPress site.
- Zapier account: You can create a free account to get started.
- SSL certificate: Your website must have an SSL certificate installed.
Step 1: Install and Activate WP Zapier & Webhooks
First, you’ll need to install and activate the WP Zapier & Webhooks plugin. You can purchase it from our website here.
Once you’ve purchased the plugin, you can download it from your Yoohoo Plugins account page.
Then, in your WordPress dashboard, go to Plugins → Add New, click Upload Plugin, and upload the zip file. Install and activate the plugin.
Step 2: Create an Outbound Event in WP Zapier
Next, you’ll need to create an Outbound Event in WP Zapier. This will tell the plugin to send data to Zapier when a specific Gravity Form is submitted.
- In your WordPress dashboard, go to WP Zapier → Outbound Events.
- Click Add New.
- Give your Outbound Event a title (e.g., “Contact Form Submission”).
- Under “Trigger,” select the Gravity Form you want to connect to Zapier. You’ll see a list of all your Gravity Forms here.
- Under “Webhook URL,” you’ll need to get this from Zapier. We’ll do that in the next step.
Step 3: Create a Zap in Zapier
Now, you’ll need to create a Zap in your Zapier account.
- Log in to your Zapier account.
- Click the Make a Zap button.
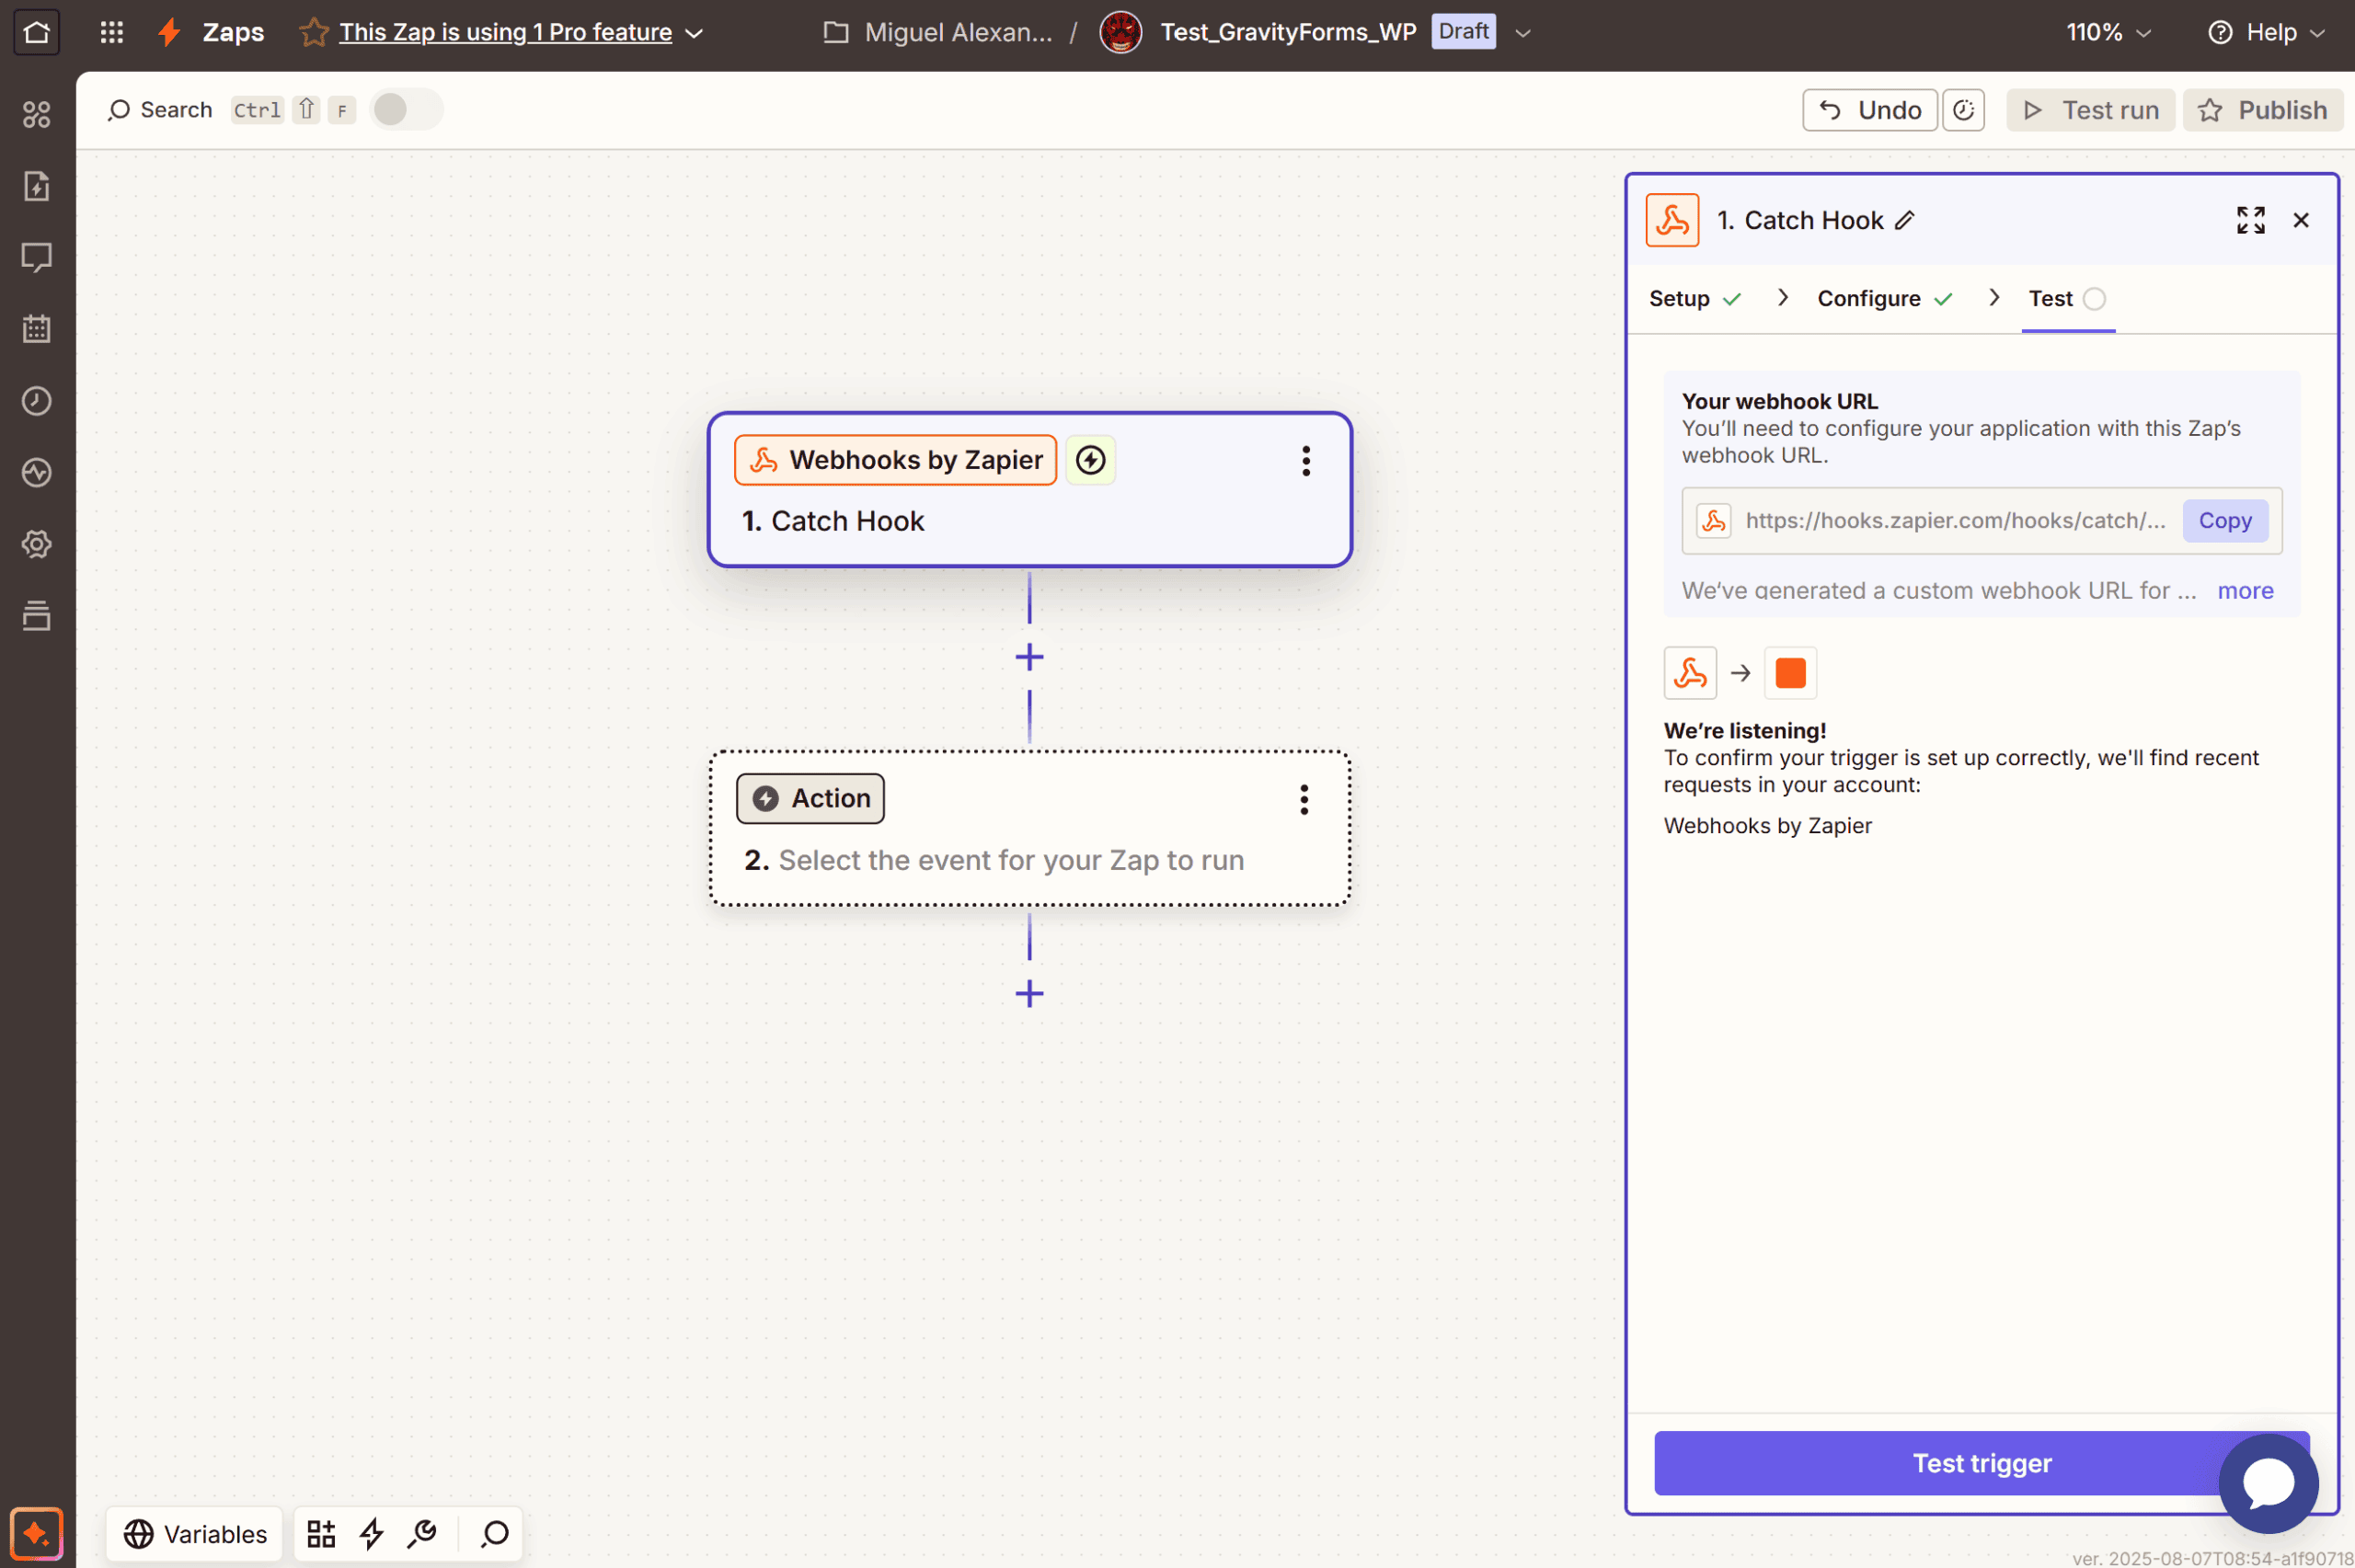
- For the trigger, search for and select Webhooks by Zapier.
- For the trigger event, choose Catch Hook.
- Click Continue.
- Leave the “Pick off a Child Key” field blank. This field is for advanced cases where you only want to grab a specific part of the data sent to the webhook.
- Zapier will now give you a custom webhook URL. Copy this URL.
Step 4: Connect WP Zapier to Zapier
Now, go back to your WordPress dashboard and paste the webhook URL from Zapier into the “Webhook URL” field of the Outbound Event you created in Step 2.
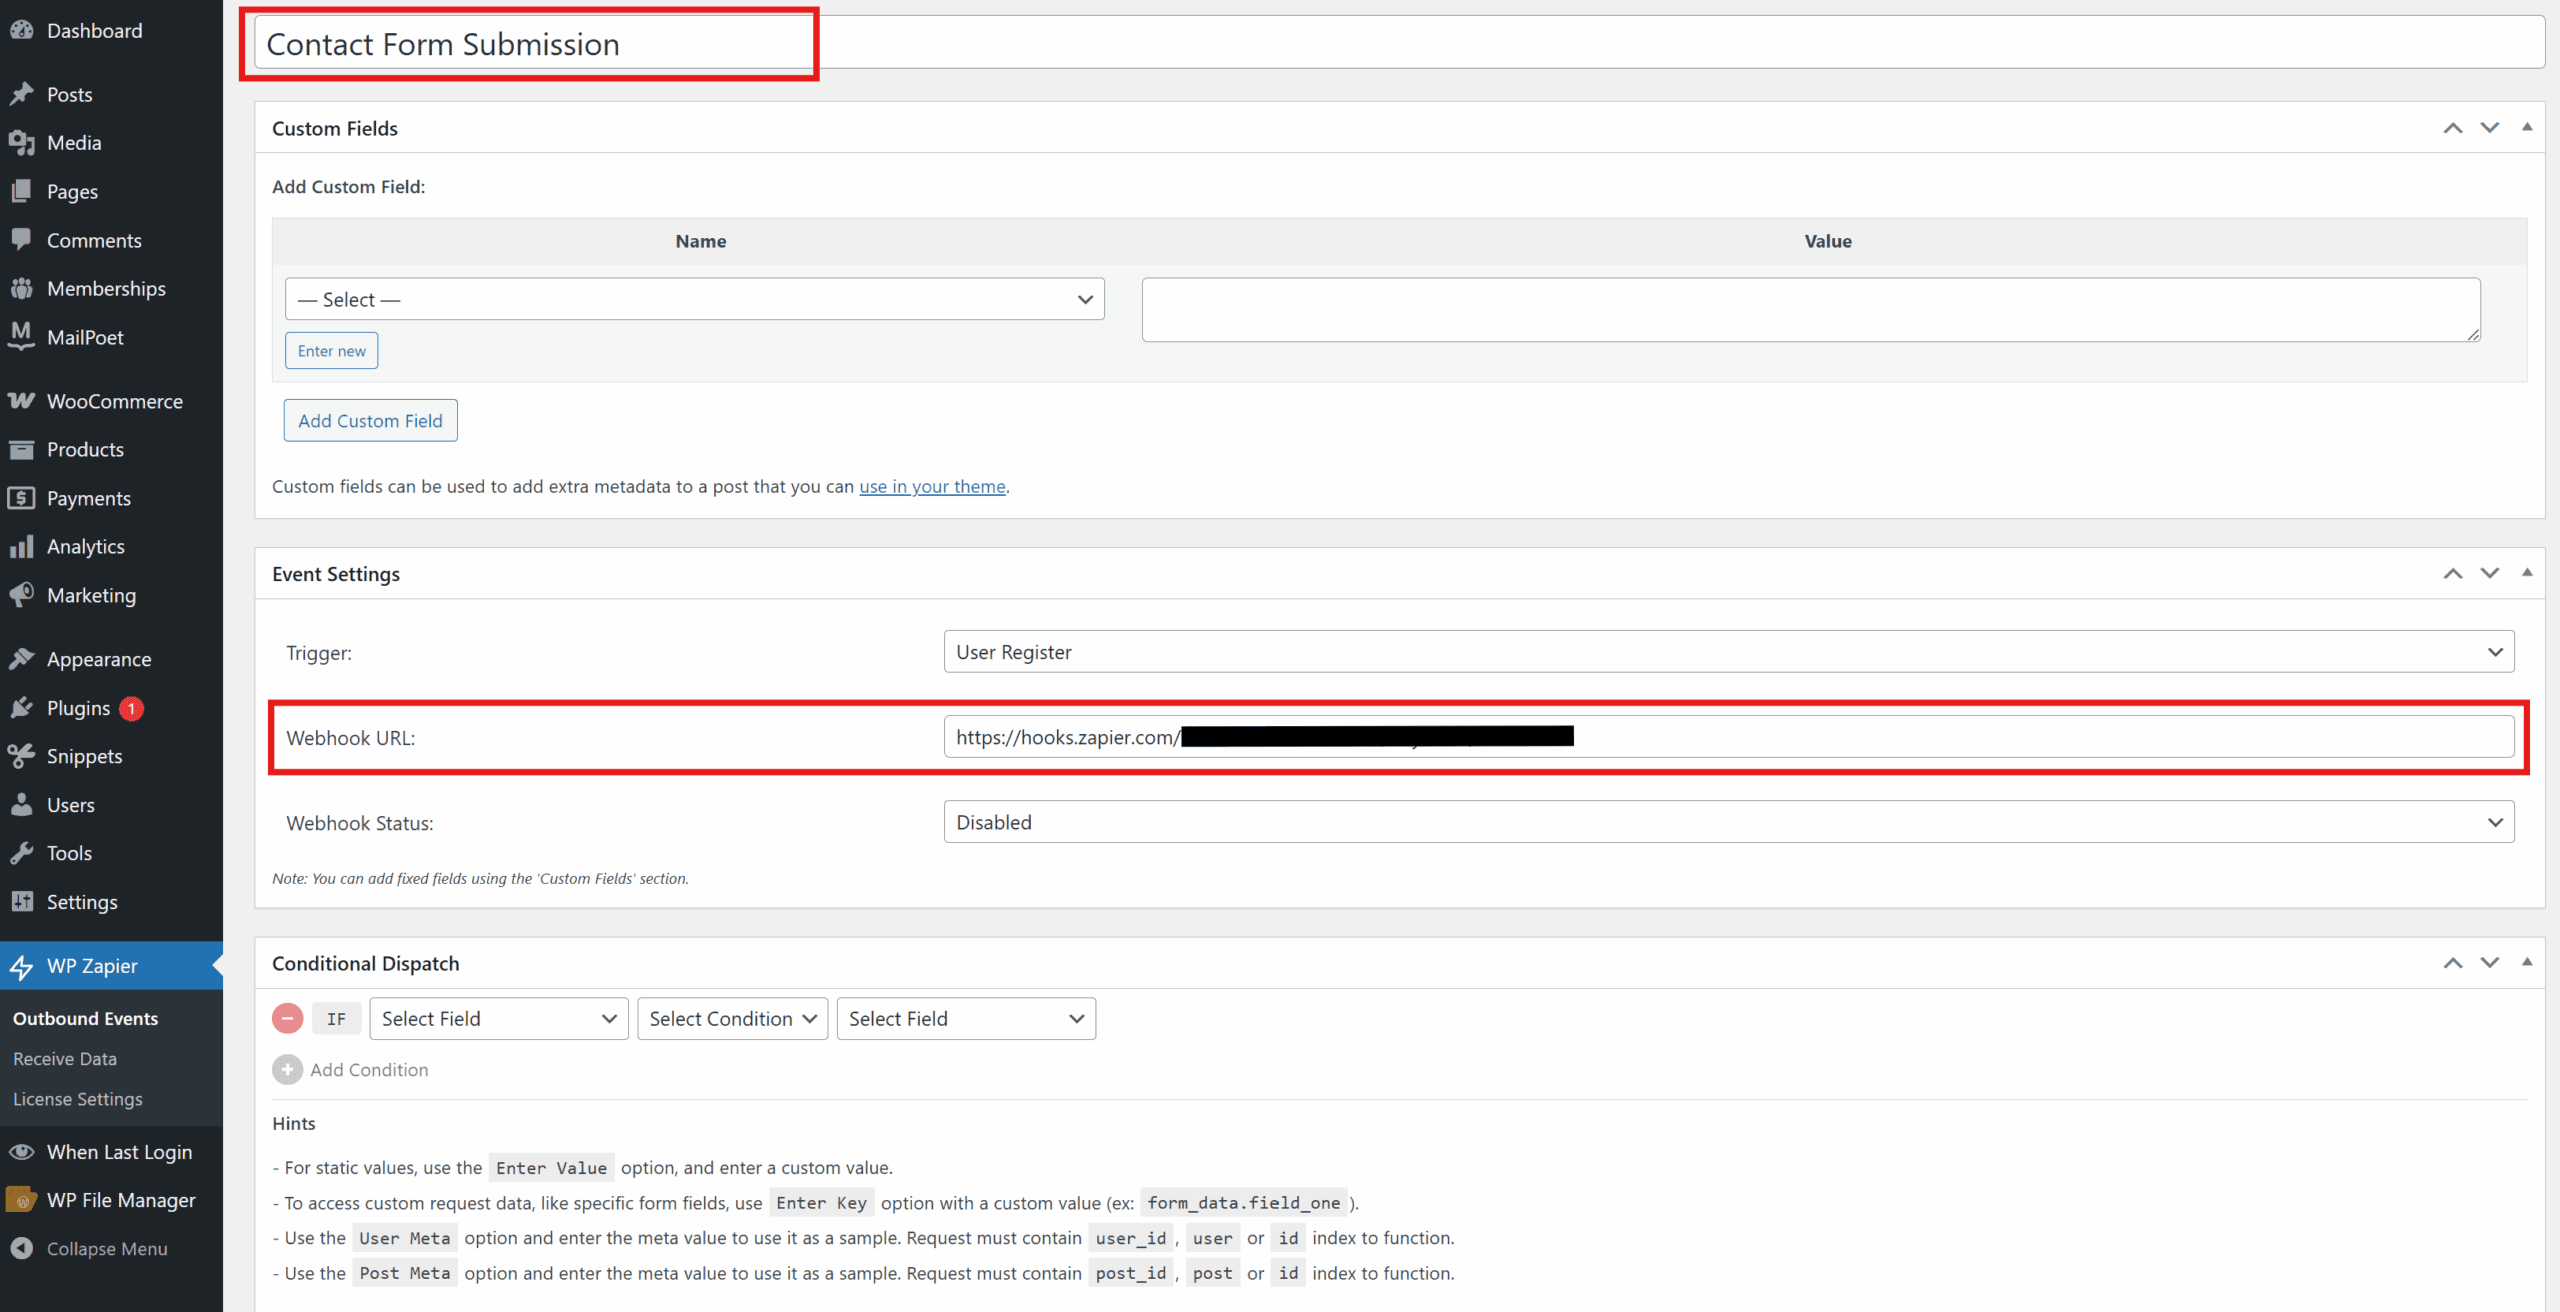
Click Publish to save your Outbound Event.
Step 5: Test the Connection
Now, you’ll need to test the connection to make sure everything is working correctly.
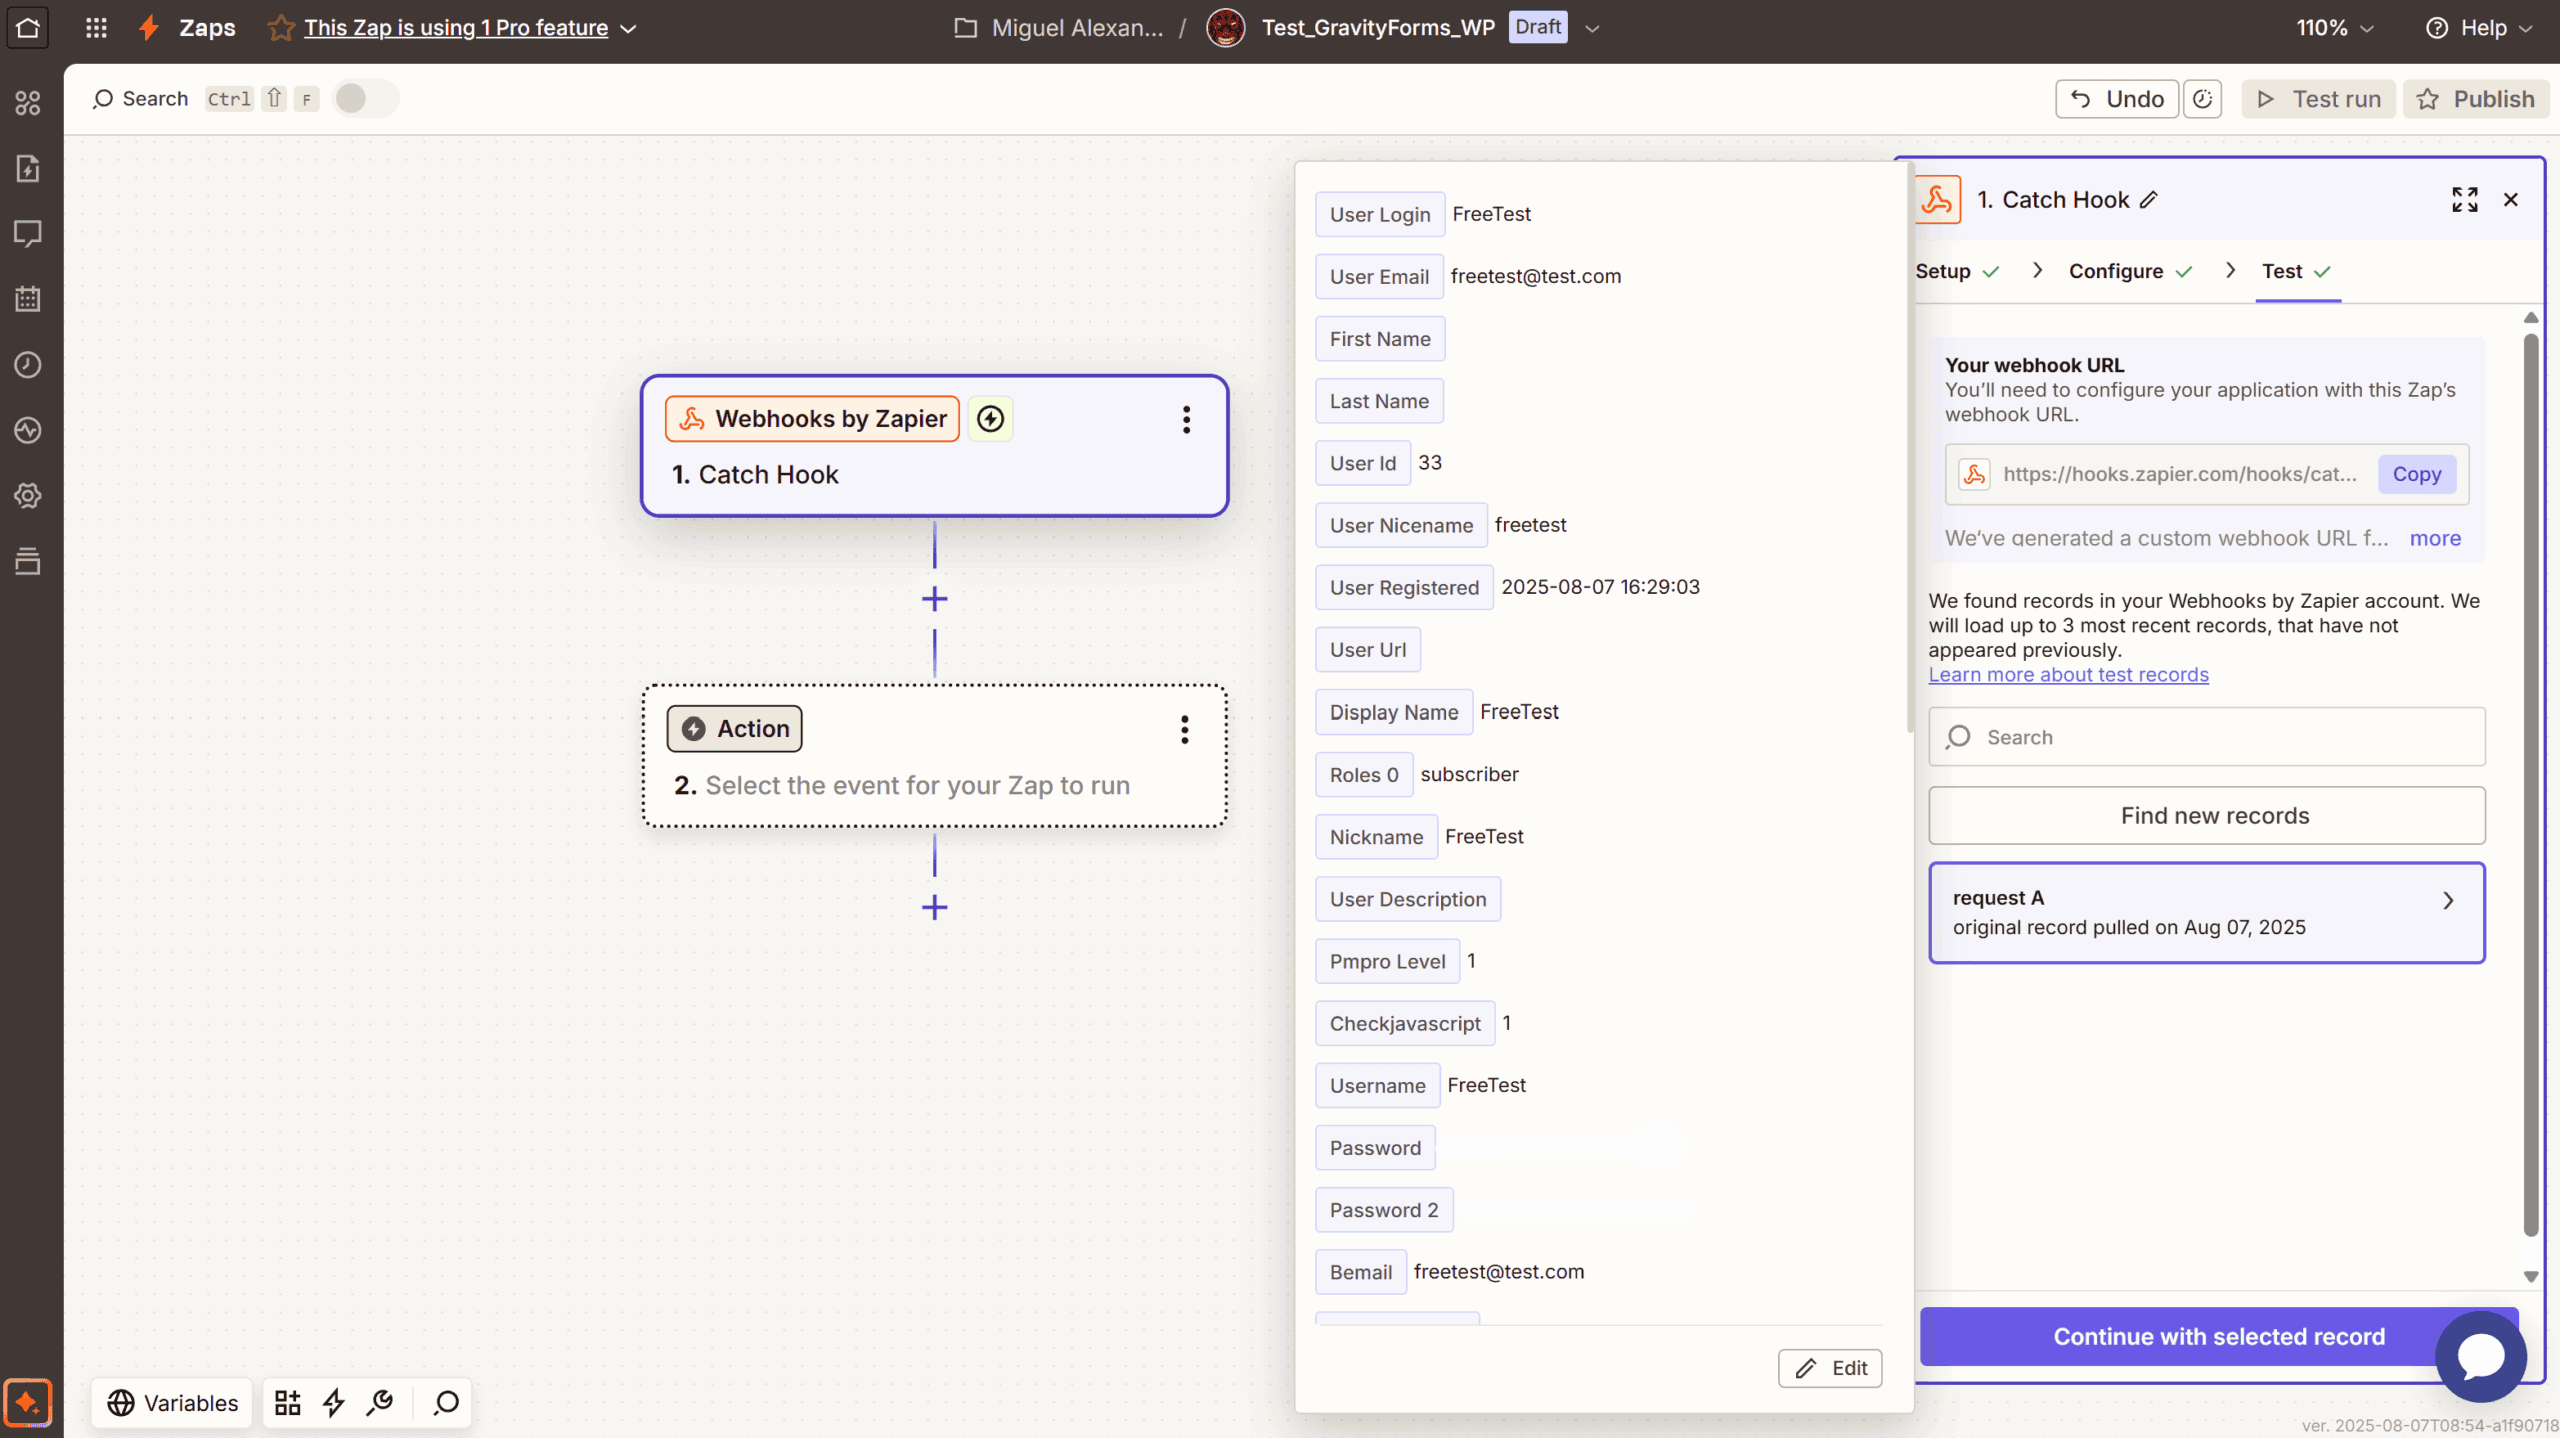
- Go to the Gravity Form on your website and submit a test entry.
- Go back to Zapier and click the Test trigger button.
- Zapier will now try to find the test submission. If it’s successful, you’ll see the data from your form.
Step 6: Set up the Action
Now that you’ve connected Gravity Forms to Zapier, you can set up the action. This is what you want to happen when the form is submitted.
For this example, we’ll create a Zap that sends data from a “Register” form to a Google Sheet.
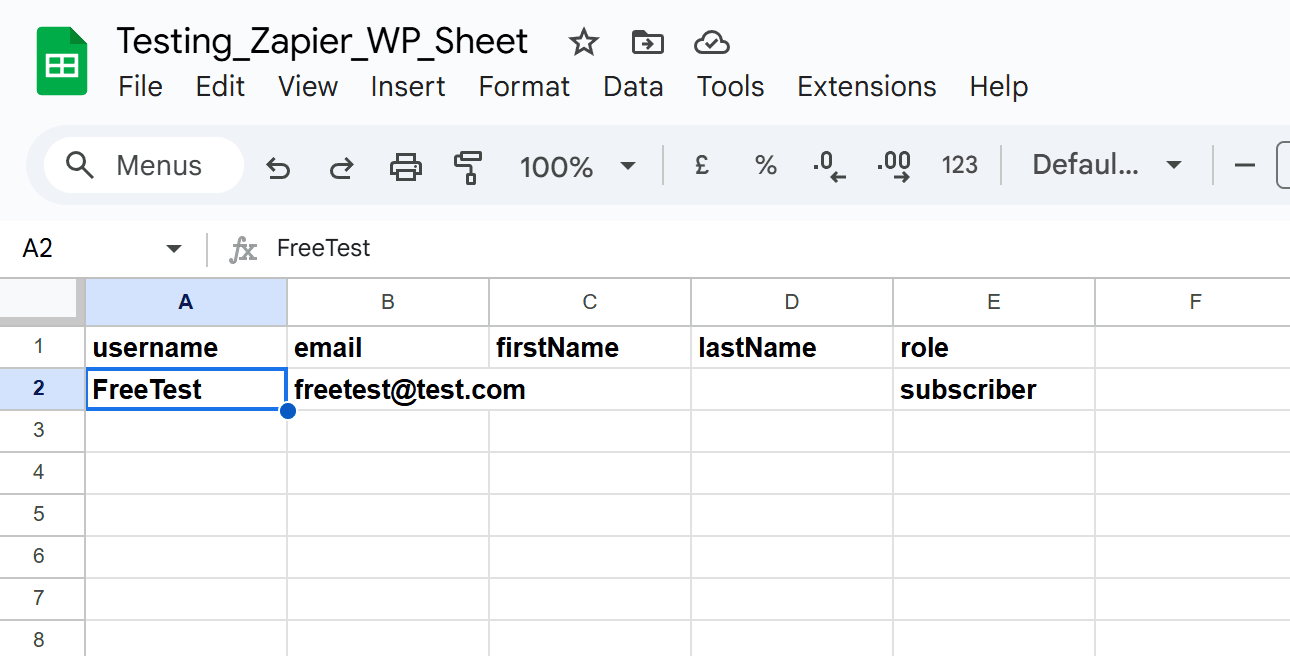
1. Set up your Google Sheet
First, create a new Google Sheet with columns for each piece of information you want to collect from your form. For example, you might have columns for “UserName”, “Email”, “FirstName”, “LastName” and “Role”.
2. Set up the Action in Zapier
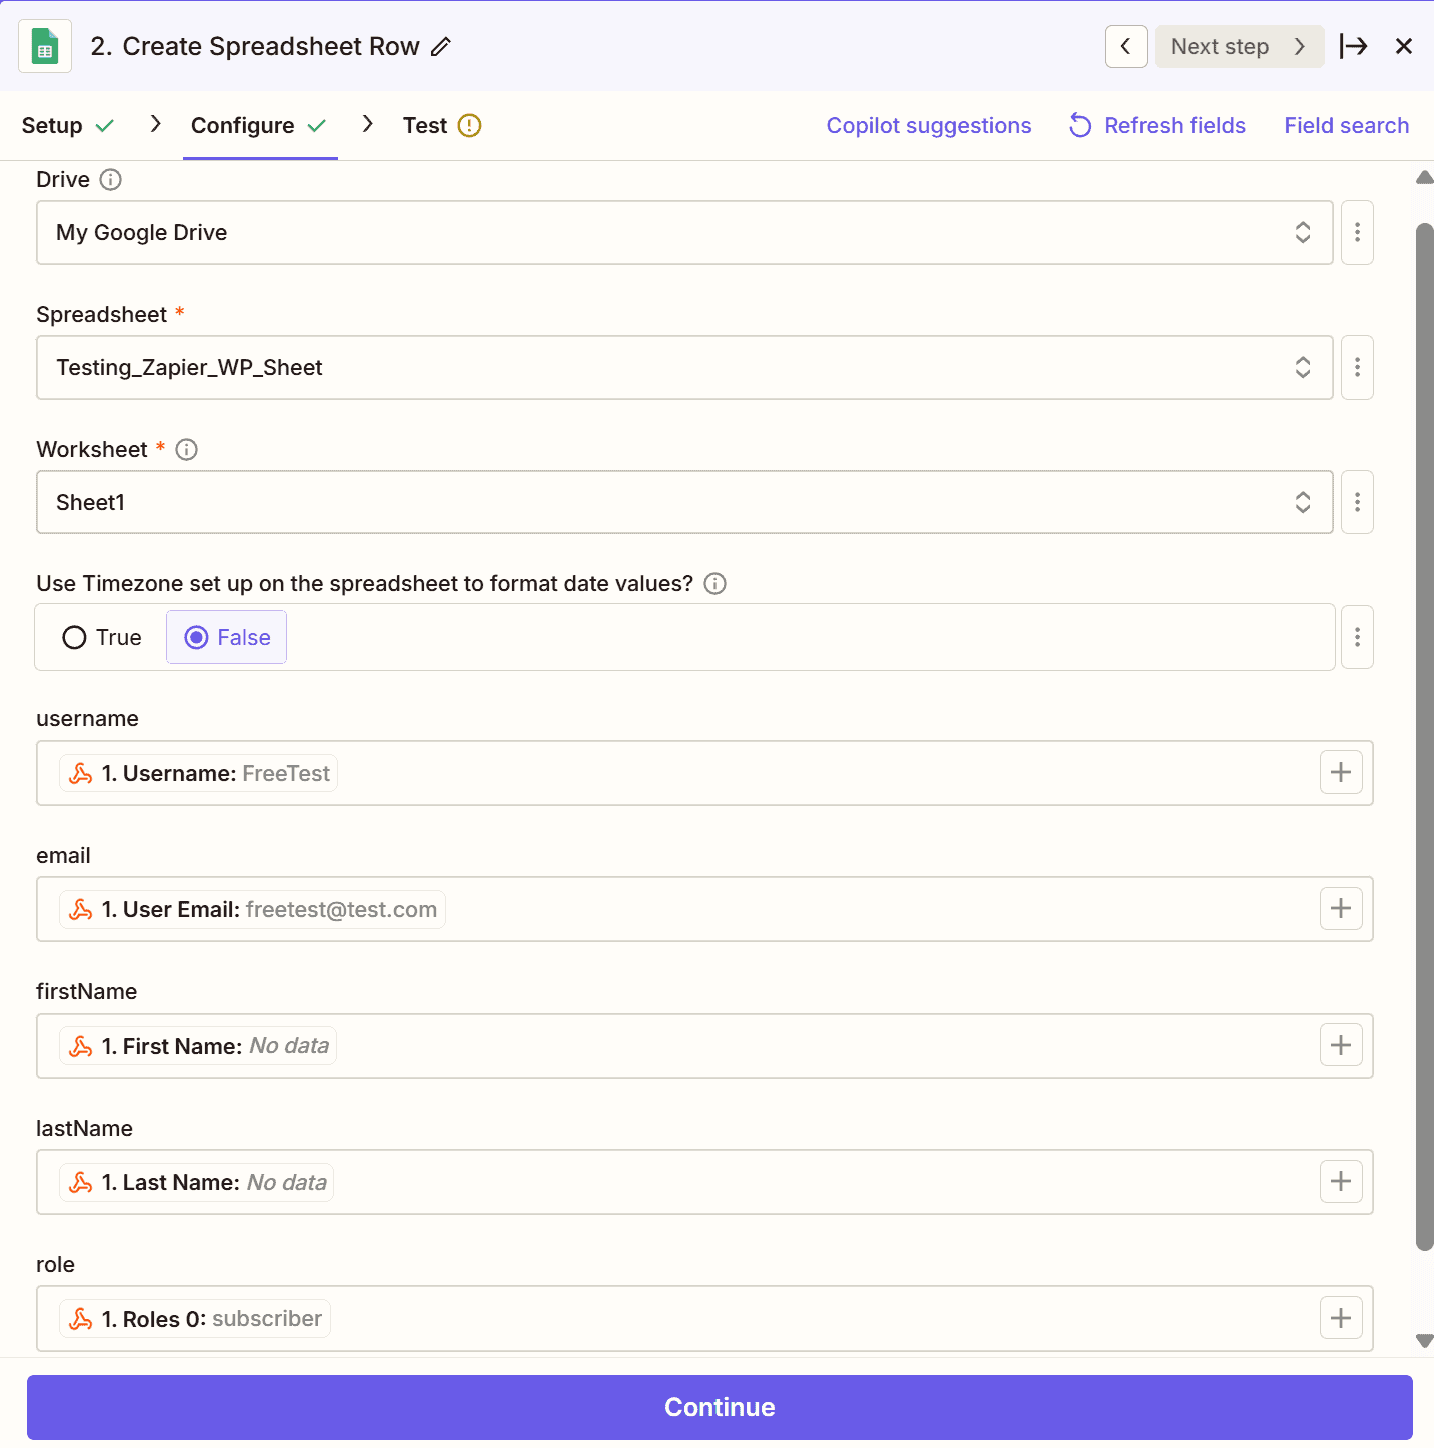
- In Zapier, choose Google Sheets as the action app.
- Select Create Spreadsheet Row as the action to be performed.
- Select your Google account and the spreadsheet you just created.
- Map the fields from your Gravity Form to the corresponding columns in your Google Sheet. For example, you would map the “FirstName” field from your form to the “First Name” column in your sheet.
- Test the action to confirm the data is sent correctly.
3. Turn on your Zap
Once you’re happy with your Zap, turn it on!
Now, every time someone registers on your site, the data will be automatically added to your Google Sheet.
Conclusion
Connecting Gravity Forms to Zapier is a great way to automate your workflows and save time.
With our WP Zapier & Webhooks plugin, it’s easier than ever. With over 6,000 apps to choose from, the possibilities are endless.
So what are you waiting for? Give it a try!