
In this getting started guide you will learn how easy it is to integrate your WordPress user base with MailChimp using the WP Zapier plugin. We will assume that a MailChimp list has been setup, a Zapier account created and have WP Zapier installed and activated.
Please note: WP Zapier has been updated from When Last Login Zapier Integration Add On. The settings may appear to be slightly different in this guide but will still follow these guidelines and be updated accordingly. If you are unsure about any settings, please reach out to one of our support staff.
Make A Zap!
Zapier uses ‘zaps’ and these are basically connections that will automate a process for you, in this case, we will automate adding users to our MailChimp list. Free accounts for Zapier allow for a 2-step zap which is perfect for this scenario. In our case, the zap will consist of a trigger and an action.
Setting Up A Webhook In Zapier
Triggers are used to activate the zap, in our case we will use the webhook option. This option is used for all zaps that WP Zapier will use.
Step 1 – Login to your Zapier account on zapier.com
Step 2 – Select MAKE A ZAP which can be found near the top of the screen.
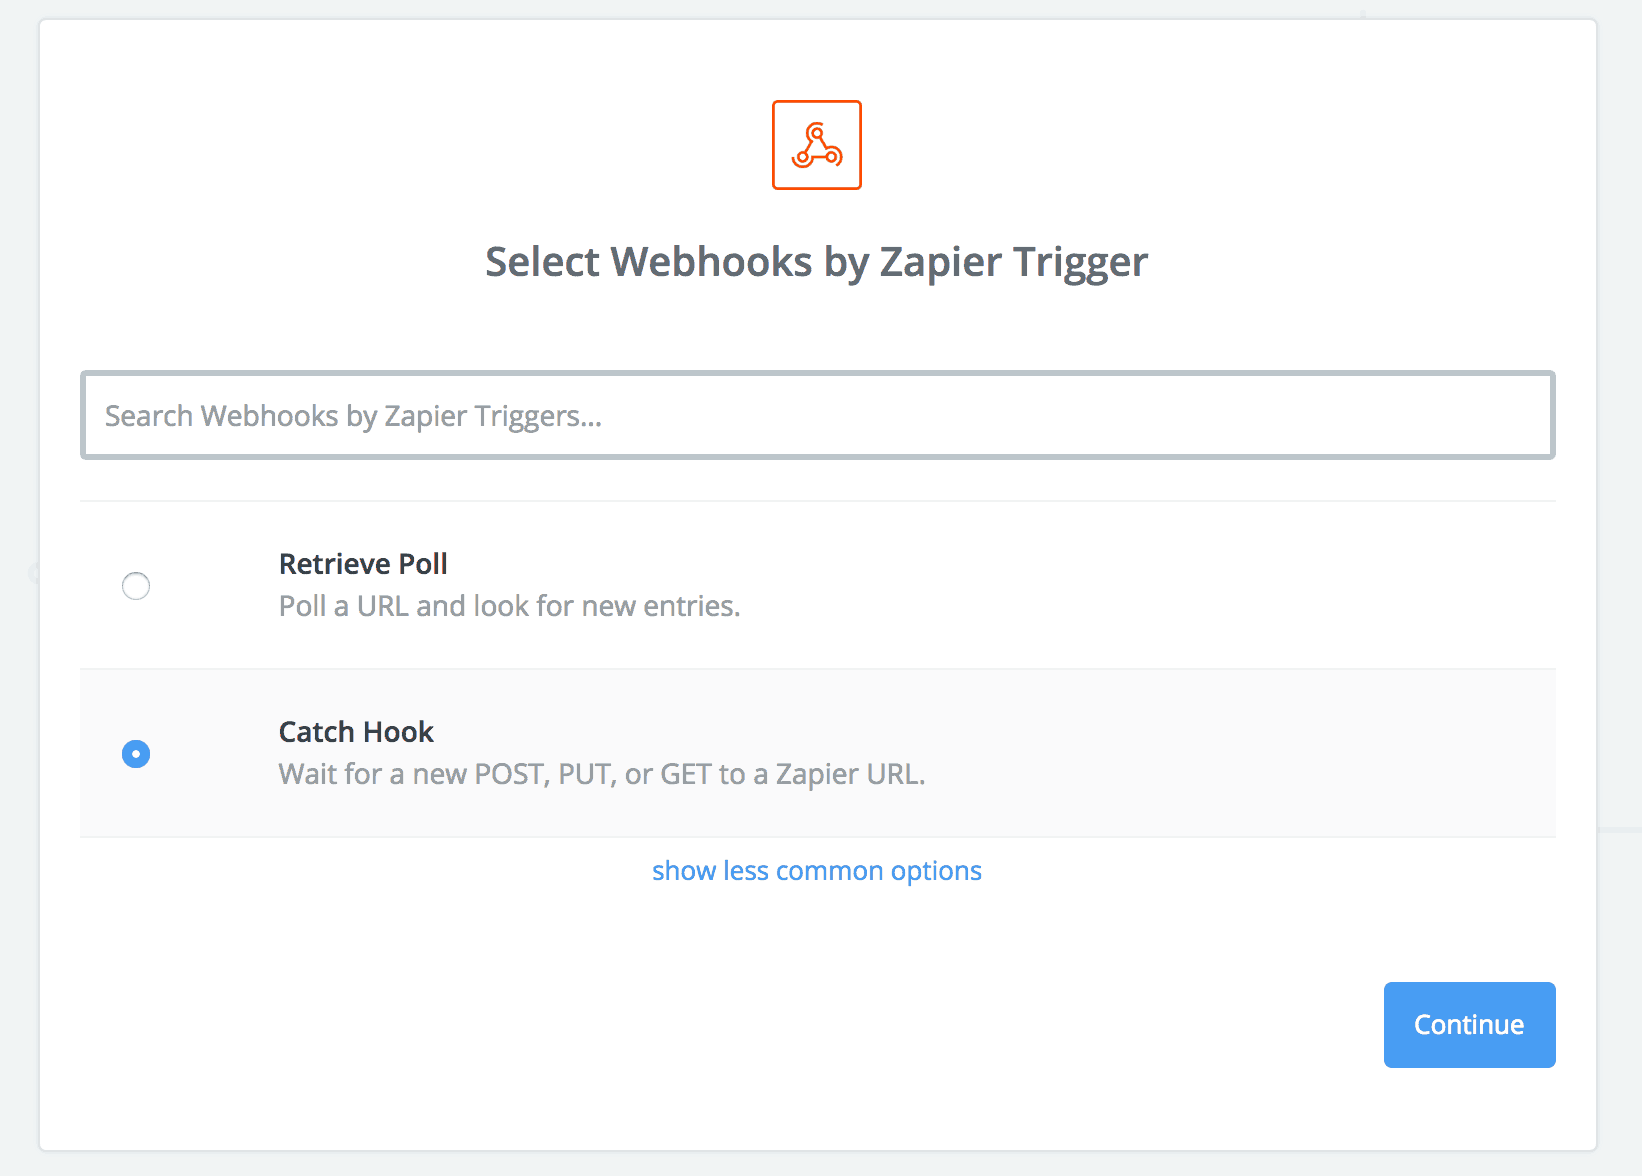
Step 3 – Under the Choose A Trigger App, select Webhooks.
Step 4 – Select Catch Hook and click Save + Continue.
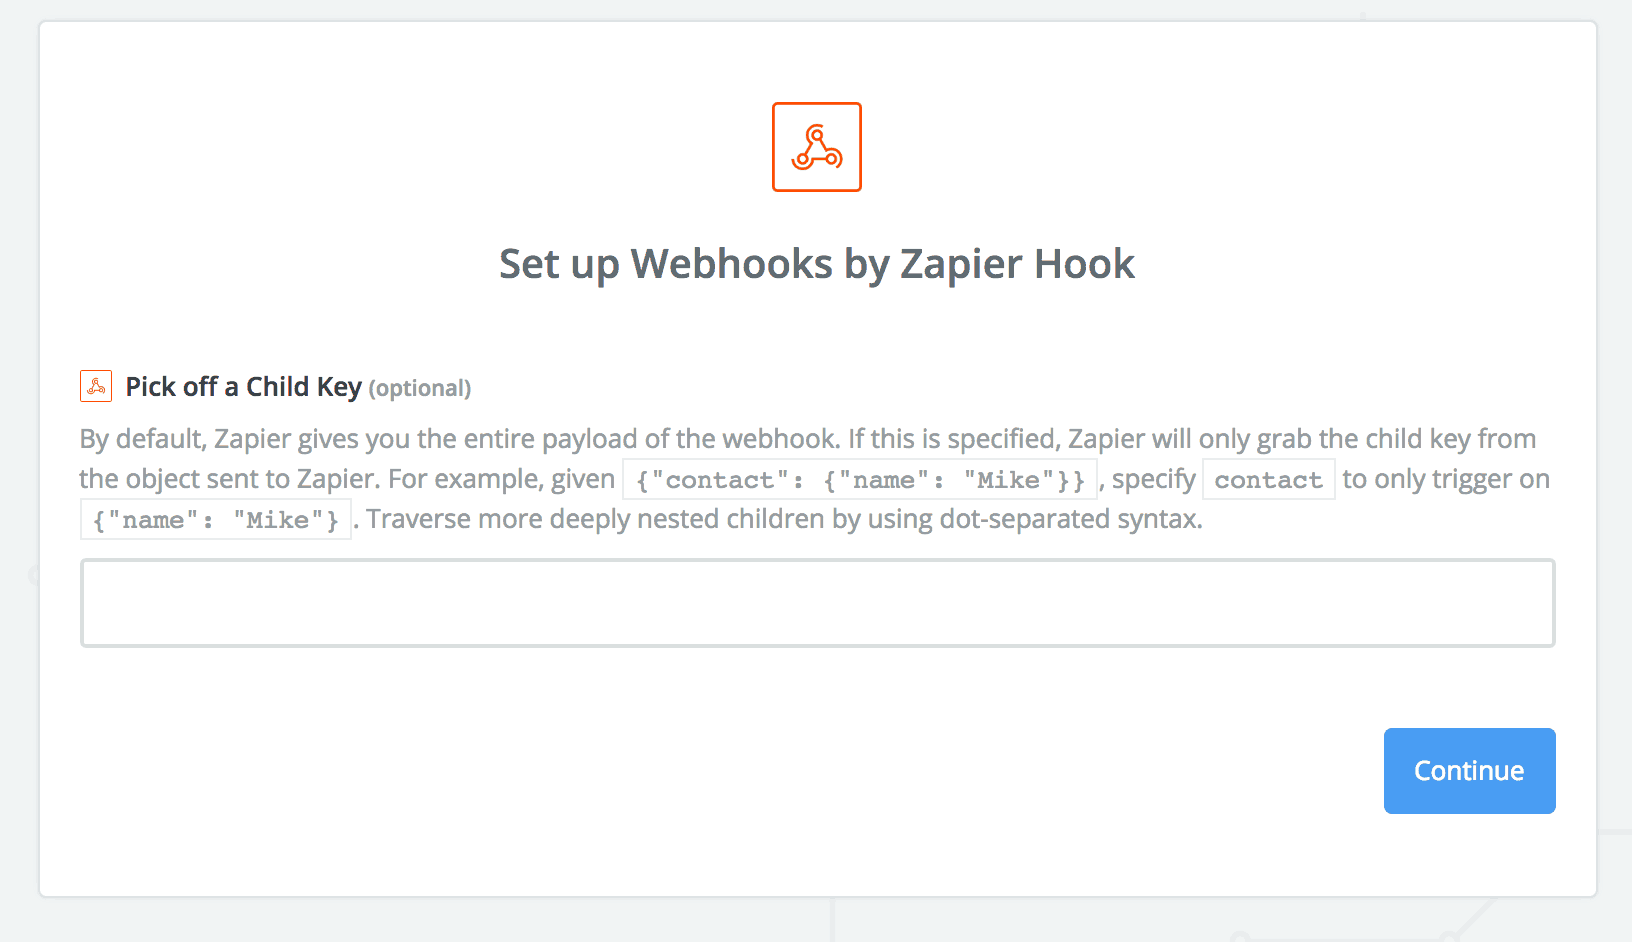
Step 5 – Leave the Pick Off A Child Key blank and click Continue.
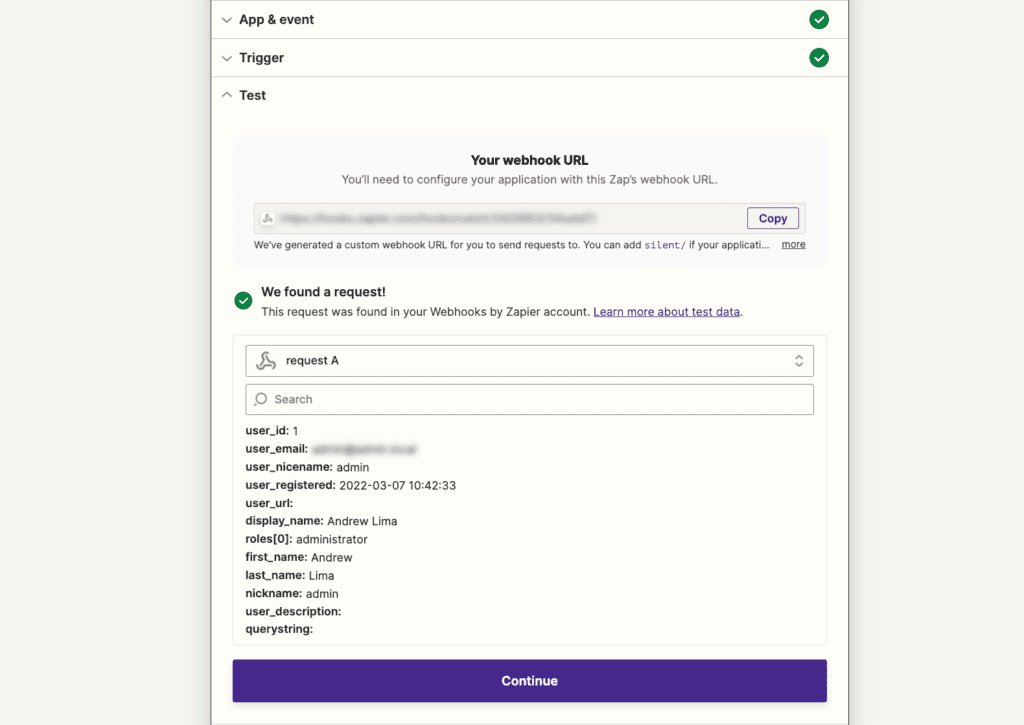
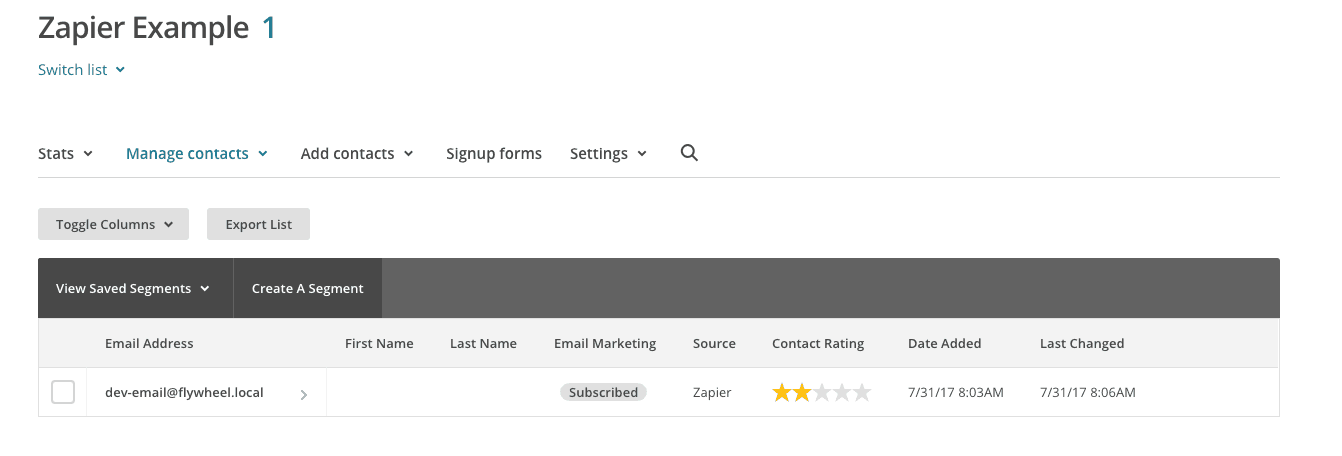
Step 6 – Copy the webhook to your clipboard using CTRL + C or CMD + C – we will need to paste this into the WP Zapier Zapier settings page which is found under Settings inside the WordPress dashboard you may paste it into the respective field. In this example, I have pasted it inside the Register function. Based on this example, once the URL has been entered into the Webhook field, you will need to run a registration on your website while Zapier ‘tests’ your Webhook after clicking ‘continue’. The same will apply for a user login or profile update. Whenever a new user registers, they are automatically added to our Zapier Example MailChimp List.
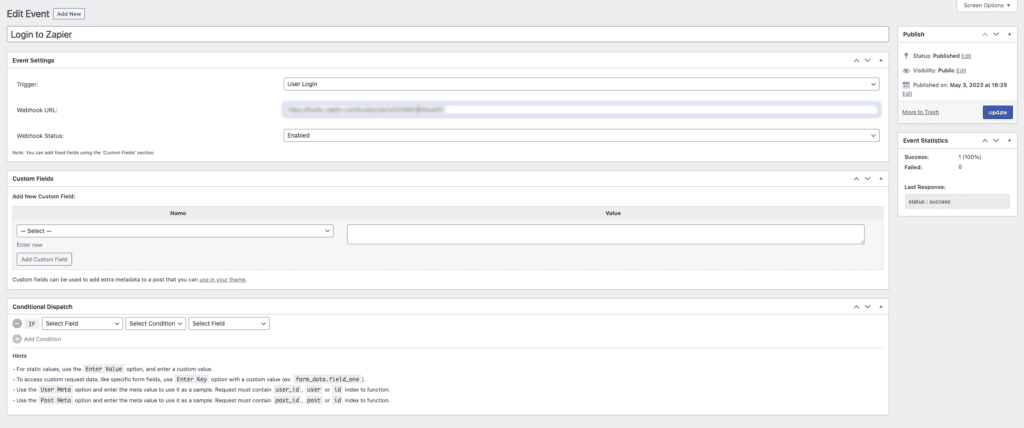
The WP Zapier Integration supports multiple Outbound Events across a dozen popular WordPress plugins and Zapier as well as any service that supports webhook connectivity . You may create as many Outbound Events as you wish or need across Zapier and Zapier-like services.
Step 7 – Once the webhook URL is pasted into the relevant field click OK, I did this.
Step 8 – Zapier will now try to Test This Step, you may need to either register, login or update an existing user’s profile (or trigger the Outbound Event) in order to test this step successfully. You have the option to Skip This Step. (It’s a good idea to test this step as the action requires the WordPress data to be worked with when integrating the application in the upcoming steps).
Setting Up An Action In Zapier
An action is usually a result you are trying to achieve, in the example we mentioned we want to automatically add users to our MailChimp List.
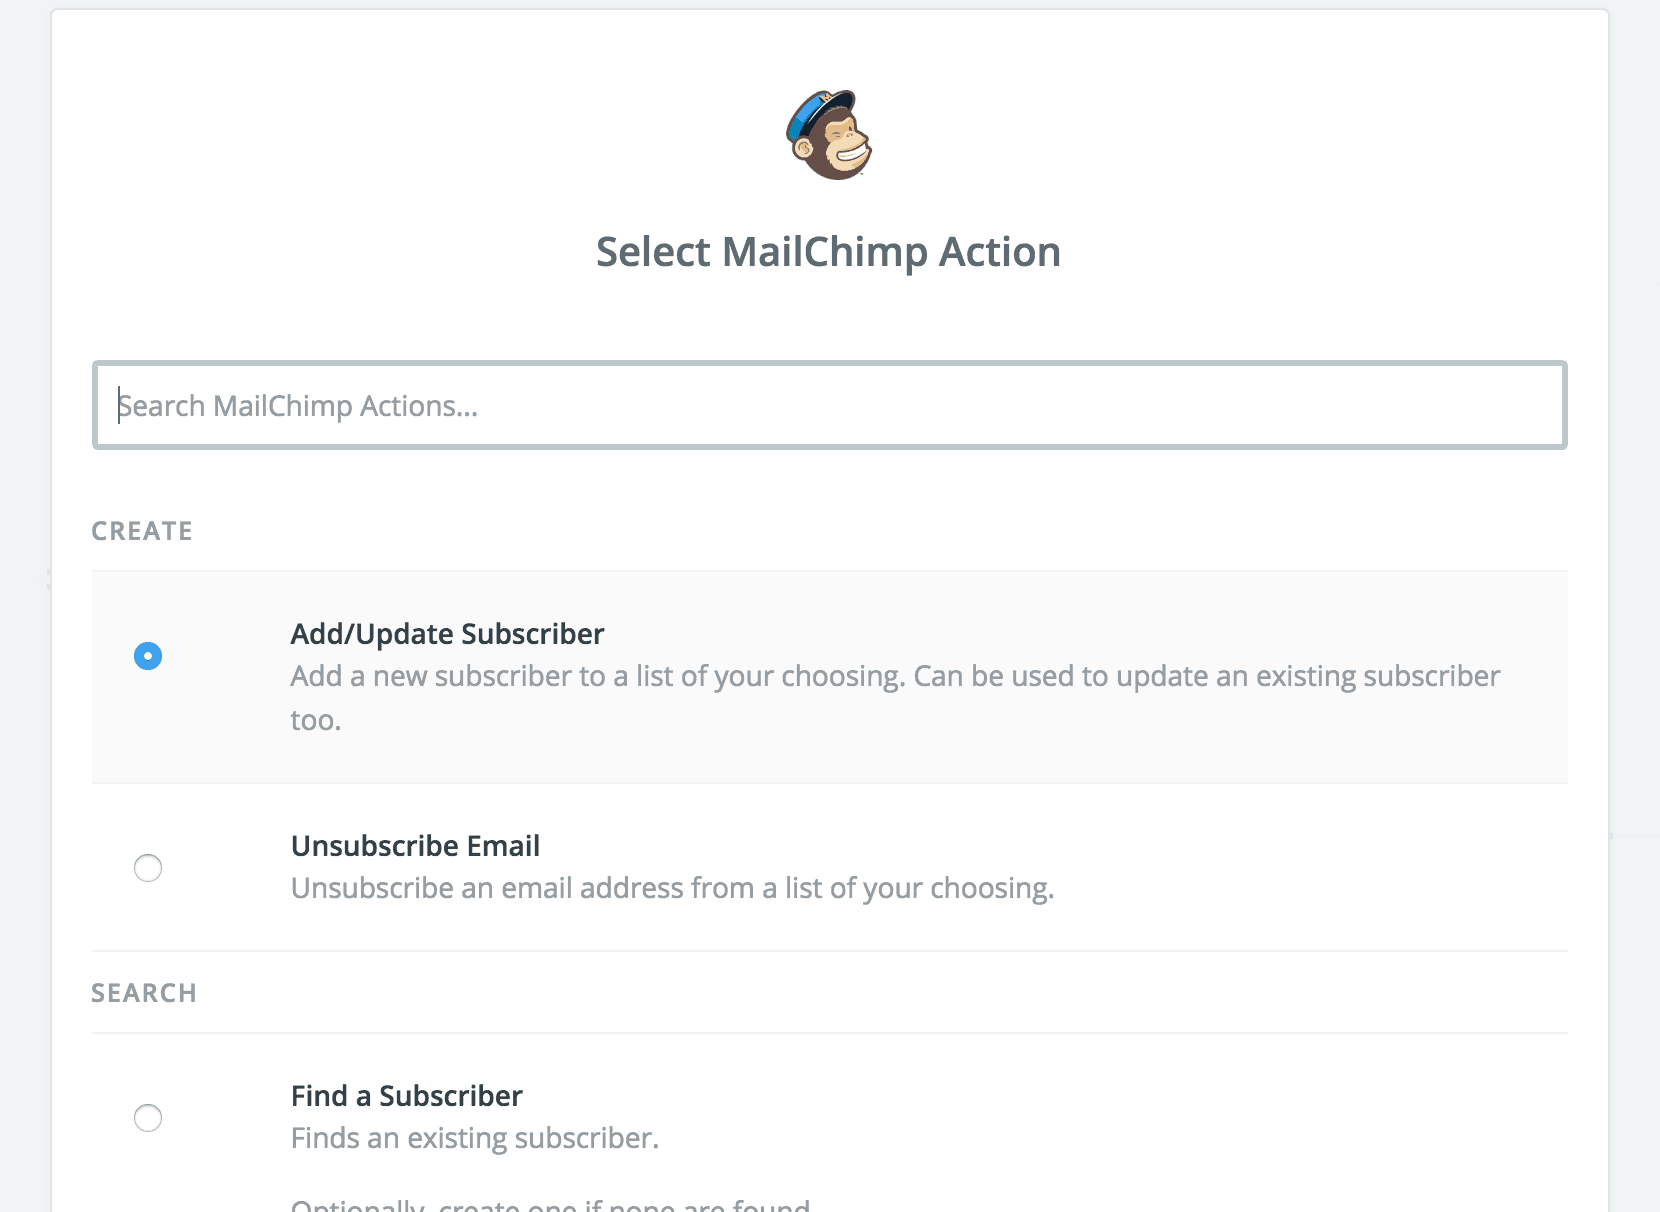
Step 1 – Search for MailChimp and select this option from the available apps.
Step 2 – Select Add/Update Existing Subscriber option. This is ideal for registrations or when a user updates their profile inside WordPress. Click Continue.
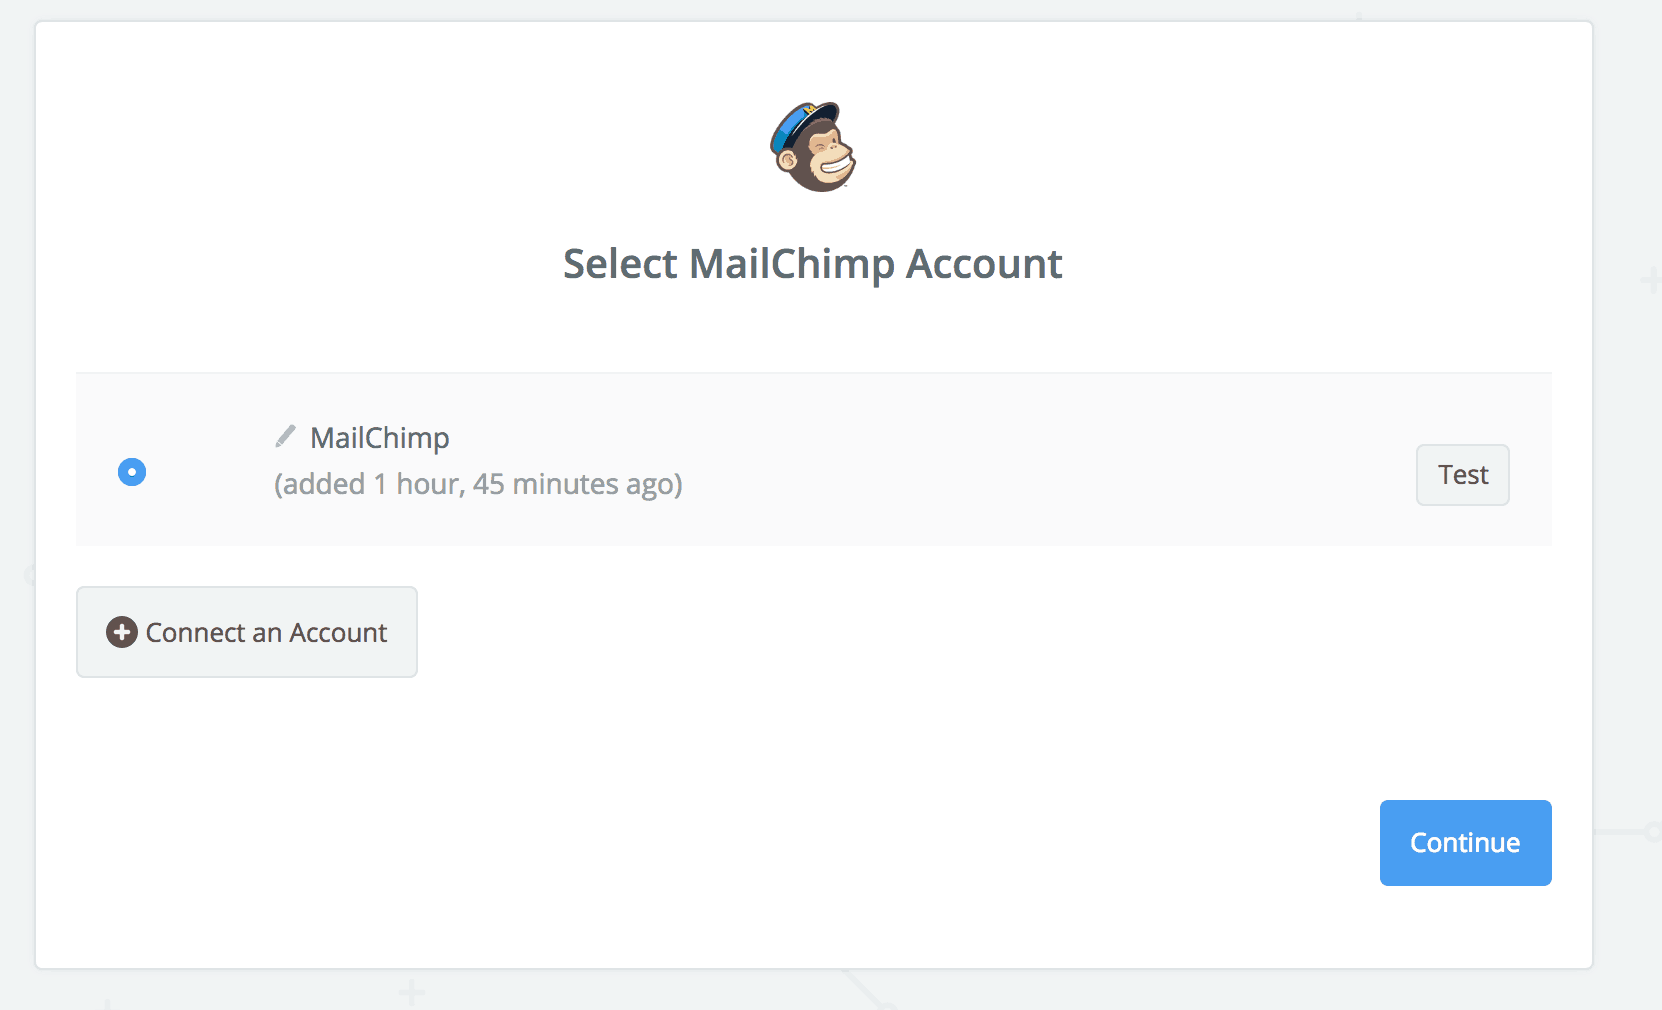
Step 3 – Connect your MailChimp account to the action by logging into your MailChimp account when prompted. Click Continue.
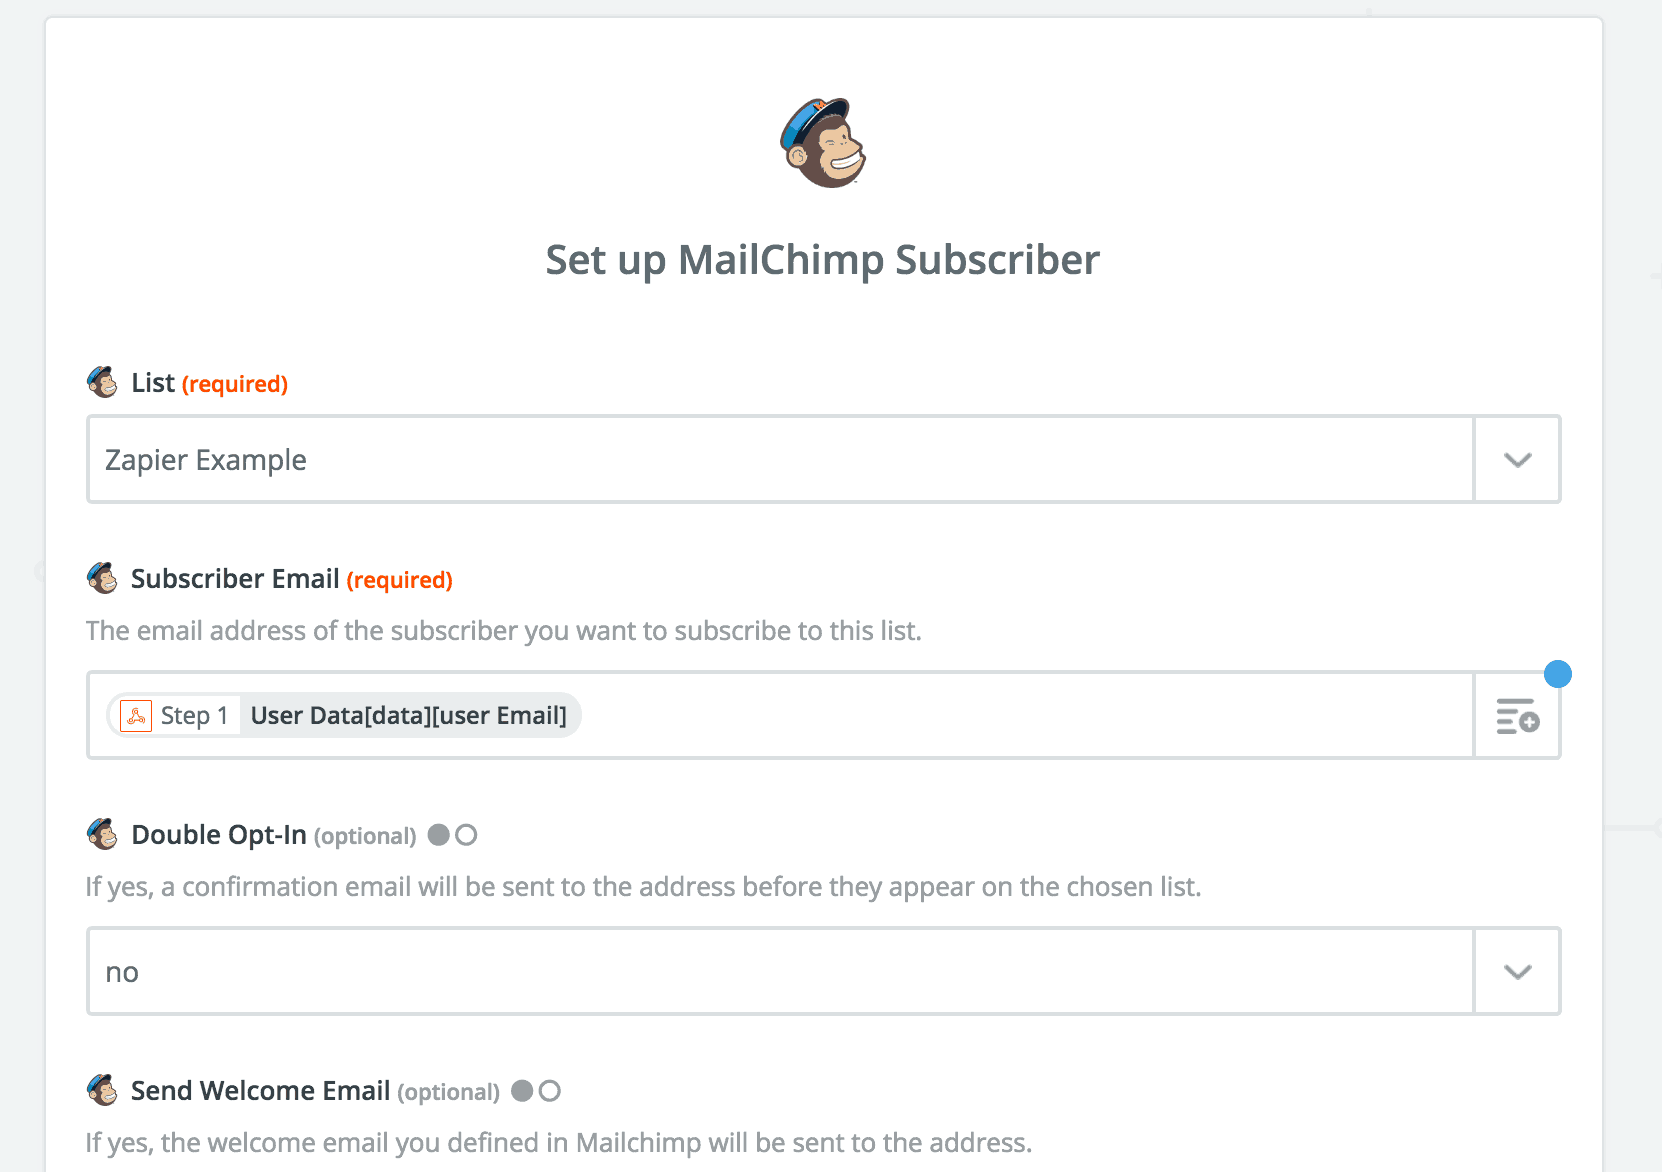
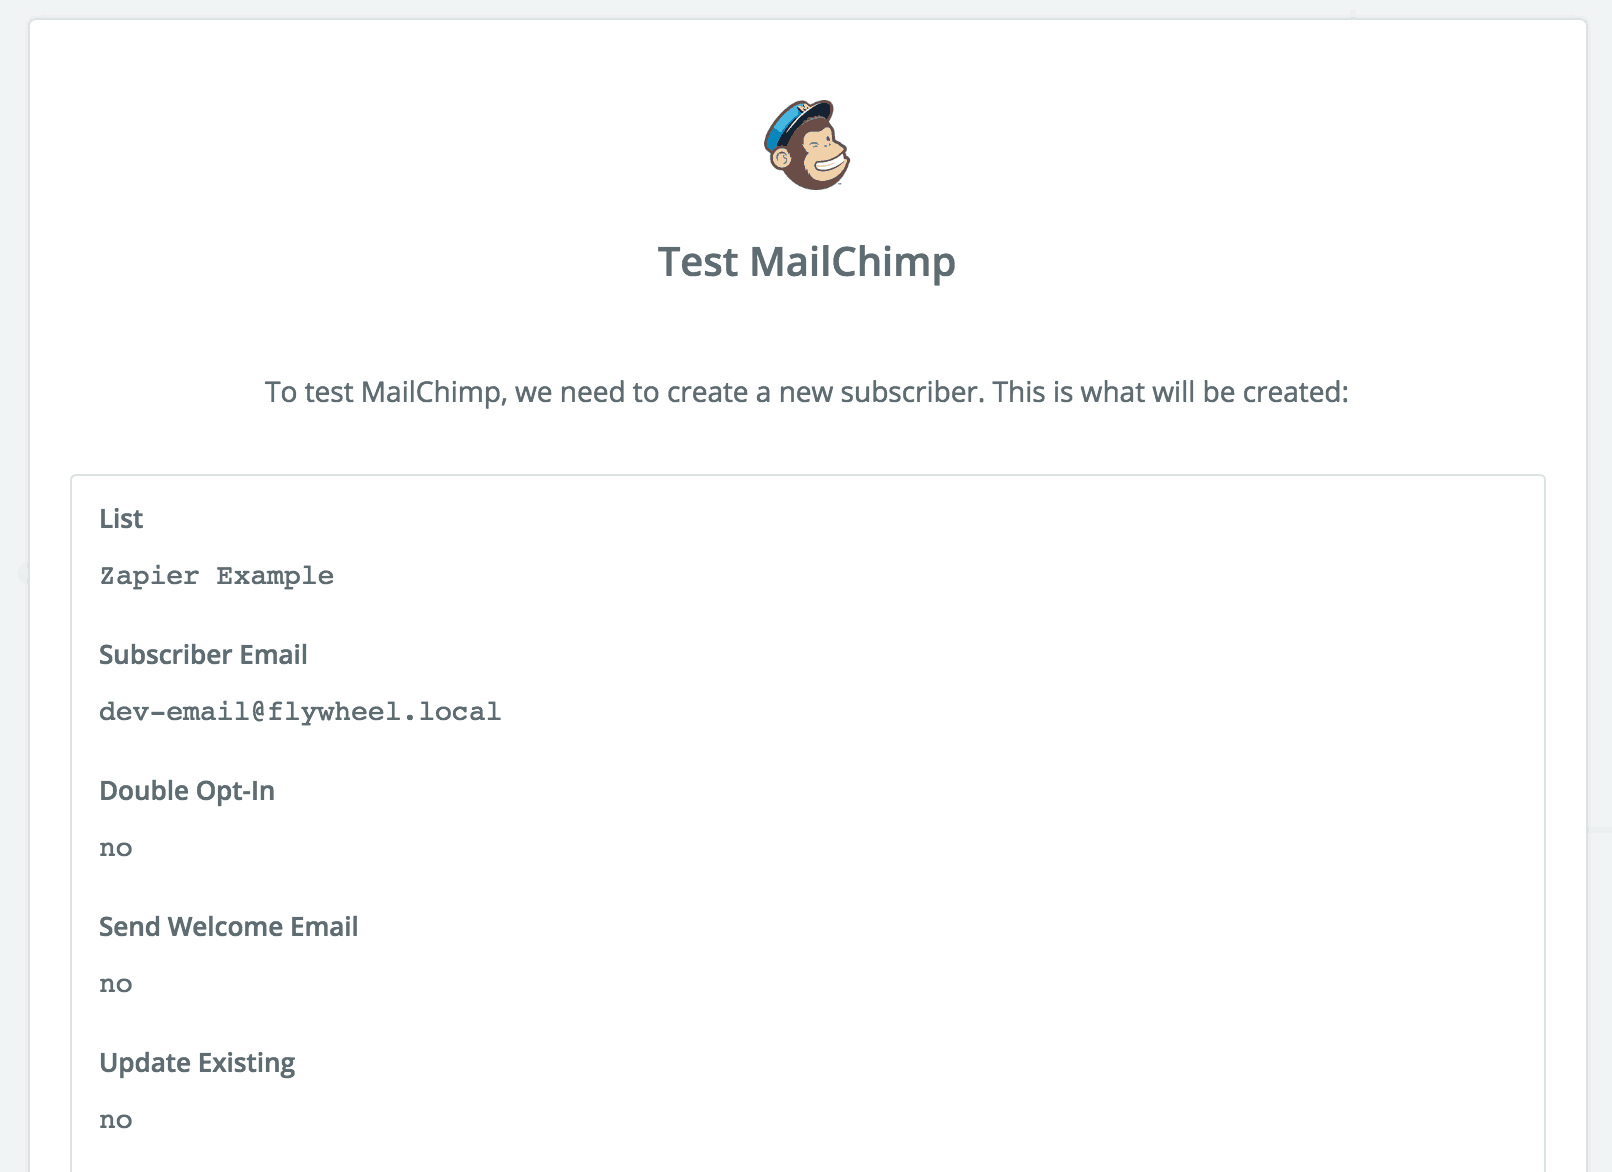
Step 4 – The Edit Template is where you link your data from your trigger to your MailChimp list. Select your list and set the Subscriber Email equal to the test webhook user’s email, it should be labelled under User Data or something similar. Do not worry if some data is missing, when you start posting real data to your list it will update accordingly. Click Continue.
Step 5 – Test This Step, this will post the data from your webhook from your trigger into MailChimp to see if there are any issues. Click Finish.
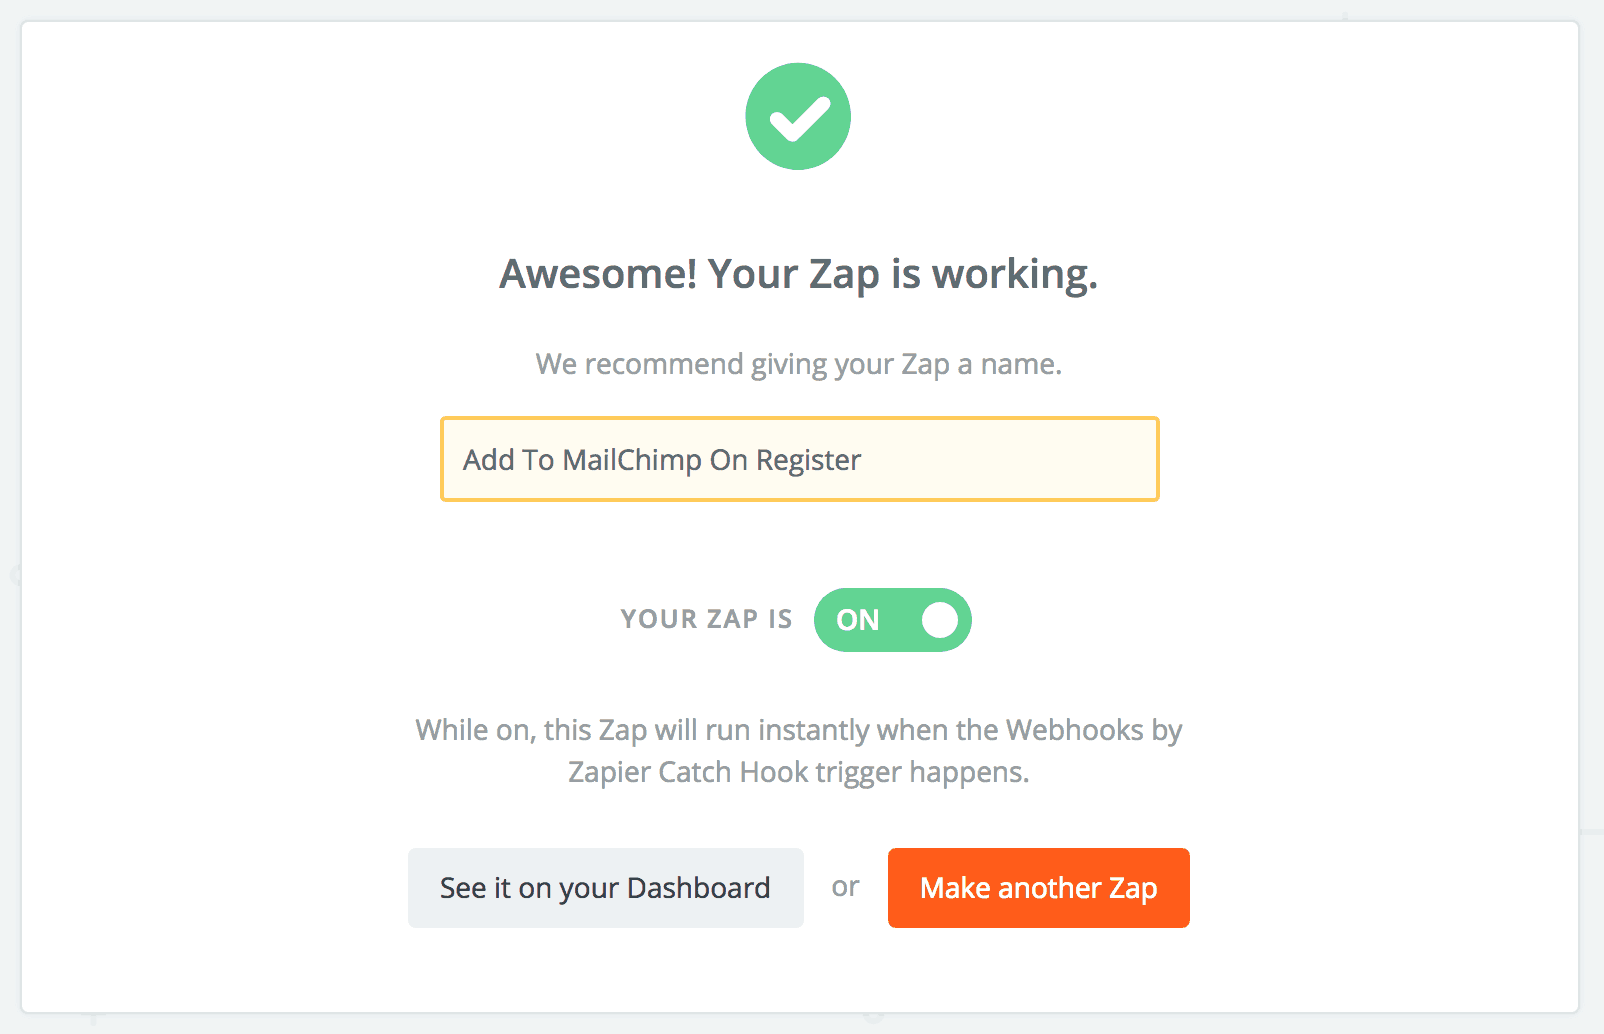
Step 6 – Once this is done you will be required to name your Zap and Activate it. That’s it!
Automation Isn’t So Bad
So now that you’ve created your first zap following our guide, not only will you be able to automatically add your users to MailChimp whenever they register, login or update. You will be able to integrate into any application that Zapier supports! So get creative and start automating your WordPress user information with the many applications Zapier offer.
If you need assistance, please feel free to reach out to our dedicated support team for any further questions.
