
In the ever-evolving world of e-commerce, offering flexibility can be a game-changer. While traditional fixed pricing works for many, what if you could empower your customers to set their own price? Imagine the possibilities: accepting donations, running “pay-what-you-want” campaigns, or even allowing customers to pay custom invoice amounts directly on your WooCommerce store.
This might sound complex, but thanks to the ingenious Name Your Price for WooCommerce plugin by Yoohoo Plugins, it’s incredibly easy to implement. This powerful tool opens up a world of dynamic pricing strategies, fostering customer engagement and potentially boosting your sales in unique ways.
In this comprehensive guide, we’ll dive into how to set up and leverage the Name Your Price for WooCommerce plugin, transforming your store into a more flexible and customer-centric platform.
Why “Name Your Price” is a Game-Changer for Your Store
The concept of letting customers name their price might seem unconventional, but it offers a plethora of benefits for various business models:
- Accepting Donations: Perfect for non-profits, charities, or simply allowing customers to contribute an amount they feel comfortable with.
- “Pay What You Want” Sales: Ideal for digital products like e-books, music, or online courses, where perceived value can vary. This can encourage more purchases and positive customer sentiment.
- Custom Invoice Payments: Allow clients to pay specific, pre-agreed invoice amounts directly through your WooCommerce checkout.
- Market Research: Discover what your customers genuinely believe your products are worth, providing invaluable data for future pricing strategies.
- Clearing Old Stock: Offer older inventory with a “name your price” option to move it quickly.
- Increased Engagement: Giving customers agency over pricing can create a more interactive and memorable shopping experience.
Meet the Solution: Name Your Price for WooCommerce by Yoohoo Plugins
When it comes to implementing flexible pricing, you need a plugin that’s robust, easy to use, and integrates seamlessly with WooCommerce. Name Your Price for WooCommerce from Yoohoo Plugins checks all these boxes and more. It’s a premium plugin (and a worthwhile investment for the flexibility it provides!), designed to give you full control while offering your customers pricing freedom.
You can learn more and purchase the plugin here: https://yoohooplugins.com/plugins/name-your-price-woocommerce/
Ready to give your customers the power to decide? Let’s get started!
Step 1: Purchase, Download, and Install the Plugin
- Visit the Name Your Price for WooCommerce product page on the Yoohoo Plugins website and complete your purchase.

- After purchasing, you’ll receive a download link for the plugin’s
.zipfile. Save this to your computer.
- To Install the plugin, log in to your WordPress dashboard.
- Navigate to Plugins > Add New.
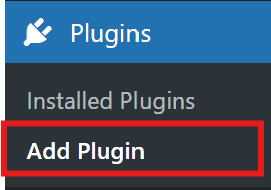
- Click on the “Upload Plugin” button at the top.
- Click “Choose File”, select the
.zipfile you downloaded, and click “Install Now”.
- Click “Choose File”, select the
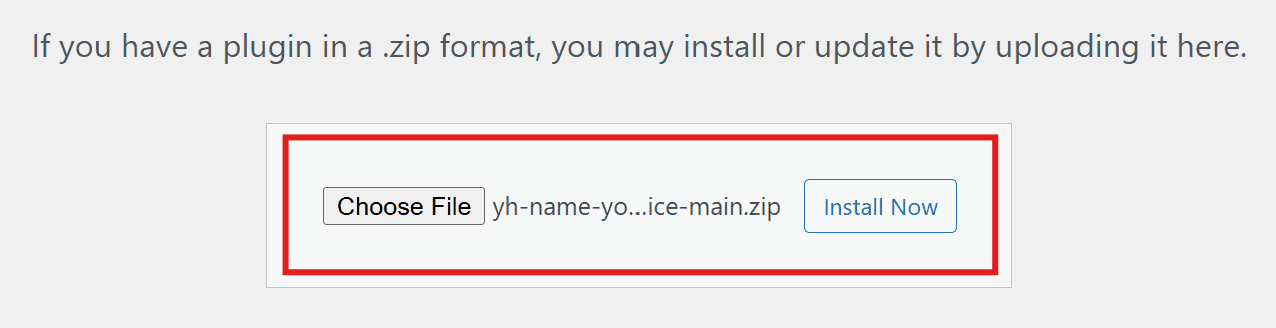
- Once installed, click “Activate Plugin”.

Step 2: Enabling “Name Your Price” for Individual Products
This is where you designate which products allow customers to set their own price.
- Go to Products > All Products in your WordPress dashboard.
- Edit the product you want to apply the “Name Your Price” option to.
- Scroll down to the “Product data” meta box.
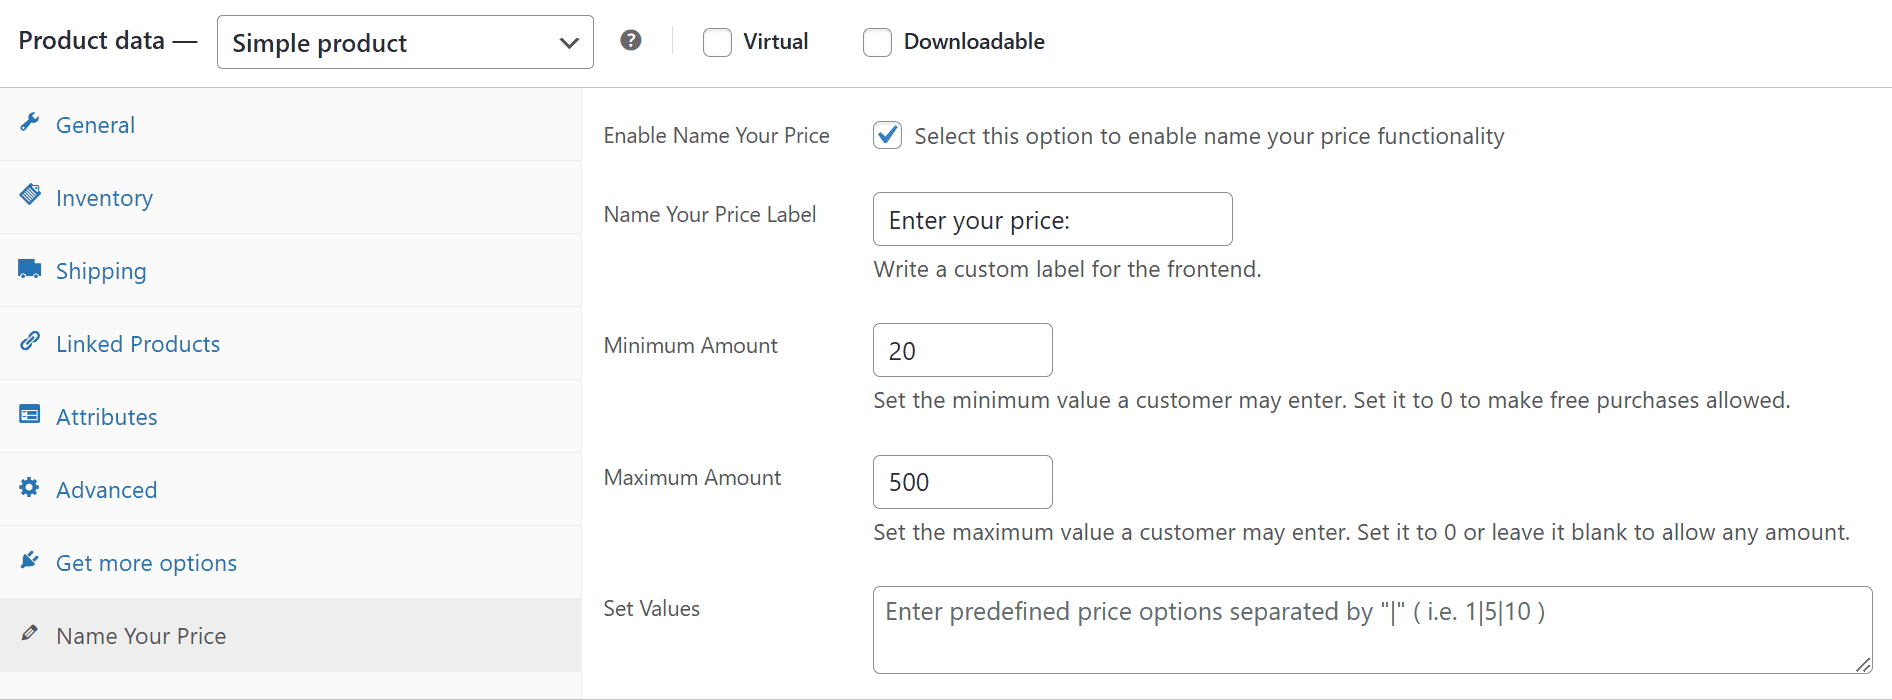
- Within the “Product data” box, you’ll now see a checkbox or a tab labeled “Enable Name Your Price”. Tick this checkbox.
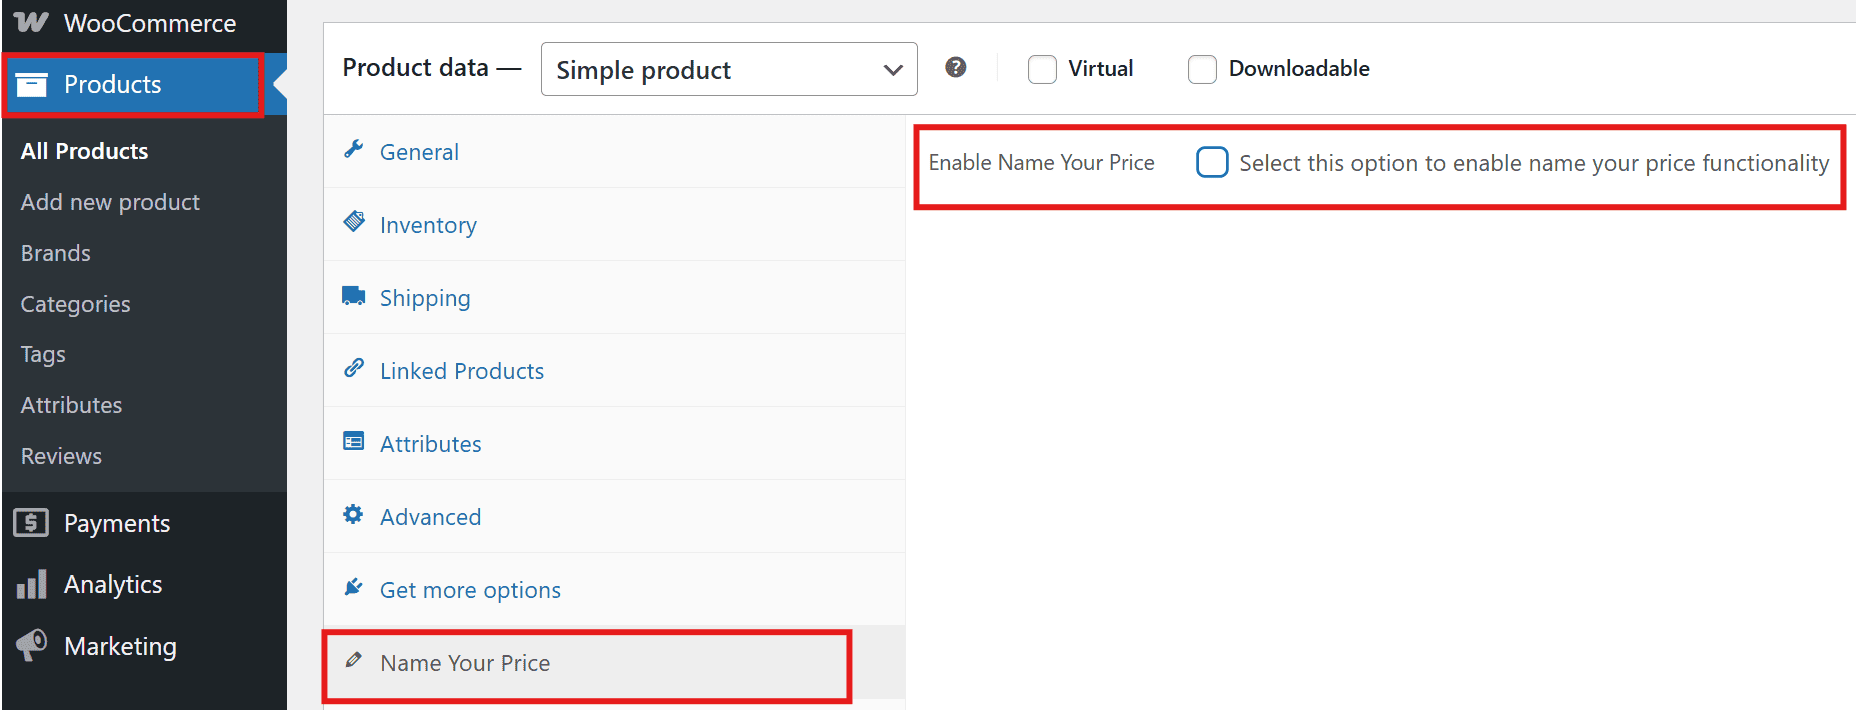
- Once enabled for the product, you’ll see options to define:
- Name Your Price Label: A field to customize the text that appears above or before the price input field
(e.g., “Enter your price:”, “How much would you like to pay?”, “Your donation amount:”). - Minimum Amount: The lowest price a customer can enter for the product. Setting the minimum price to 0 will allow the product to be purchased for free.
- Maximum Amount: The highest price a customer can enter. Useful for preventing potentially erroneous entries.
- Set Values: Used to create predefined price options for the customer to choose.
- Name Your Price Label: A field to customize the text that appears above or before the price input field
- Click “Update” to save your changes.
Step 3: Test Your “Name Your Price” Products
After configuration, always test your products on the front end of your website to ensure everything is working as expected.
- Visit the product pages where you’ve enabled “Name Your Price.”
- Test entering different amounts – below the minimum, above the maximum, and within the allowed range.
- Verify that the correct messages are displayed for invalid entries.
- Add the product to the cart with a “named” price and proceed to checkout to ensure the pricing flows through correctly.
Creative Ways to Use “Name Your Price”
- Digital Product Bundles: Offer a bundle of e-books or resources and let customers decide what they pay.
- Consultation Services: Allow clients to pay a custom amount for a consultation session, perhaps based on time or service agreed upon offline.
- Events/Workshops: For certain events, let attendees pay what they can afford to encourage participation.
- Gift Card Purchases: Allow customers to specify the value of a digital gift card they wish to purchase.
Final Thoughts
The Name Your Price for WooCommerce plugin by Yoohoo Plugins is a powerful and flexible tool that can significantly enhance your WooCommerce store’s capabilities. Whether you’re looking to accept donations, run unique sales campaigns, or simply offer more flexibility, this plugin makes it straightforward and effective.
Want to see it in action? Visit our demo website to explore its features firsthand. Start leveraging the power of pay-what-you-want pricing today and elevate your WooCommerce store!
