
Hey there, WordPress fans! So, you’ve decided it’s time to change your WordPress username, maybe it’s for security, a fresh rebrand, or just because “admin123” doesn’t vibe with you anymore. Whatever the reason, I’ve got your back!
WordPress doesn’t make this super obvious (no “change username” button here), but don’t worry, I’m here to break it down into simple, beginner-friendly steps. As someone who’s been around the tech block, I’ll keep this fun, clear, and easy to follow, so even if you’re not a tech wizard, you’ll feel like one by the end. Let’s dive in!
Why Change Your Username Anyway?
Before we get to the how-to, let’s chat about why this matters. Sticking with a default username like “admin” is like leaving your front door unlocked, hackers love it because it’s an easy guess for brute force attacks. Or maybe you’re rebranding your site and want a username that screams you.
Whatever your goal, changing it is totally doable, and I’ll show you three awesome ways to make it happen:
- Using a plugin (the easiest way)
- Creating a new user (safe and simple)
- Editing the database (a bit techy but cool if you’re up for it)
Method 1: Change Your Username with a Plugin (The Easiest Way)
If you’re new to WordPress or just want the simplest path, this is for you. Plugins are like little helpers that do the heavy lifting, and we’re going to use one called Easy Username Updater. It’s free, beginner-friendly, and takes about five minutes. Here’s how:
Step 1: Install the Plugin
- Log in to your WordPress dashboard
- On the left sidebar, click Plugins > Add New.
- In the search bar (top right), type “Easy Username Updater”.
- When you see it pop up, hit Install Now. It’ll take a sec to download.
- Once it’s installed, click Activate. Boom, it’s ready to roll!
Step 2: Update Your Username
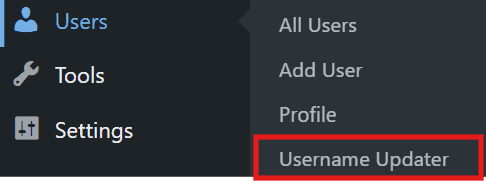
- Head to Users > Username Updater in the sidebar. (This shows up after activating the plugin.)
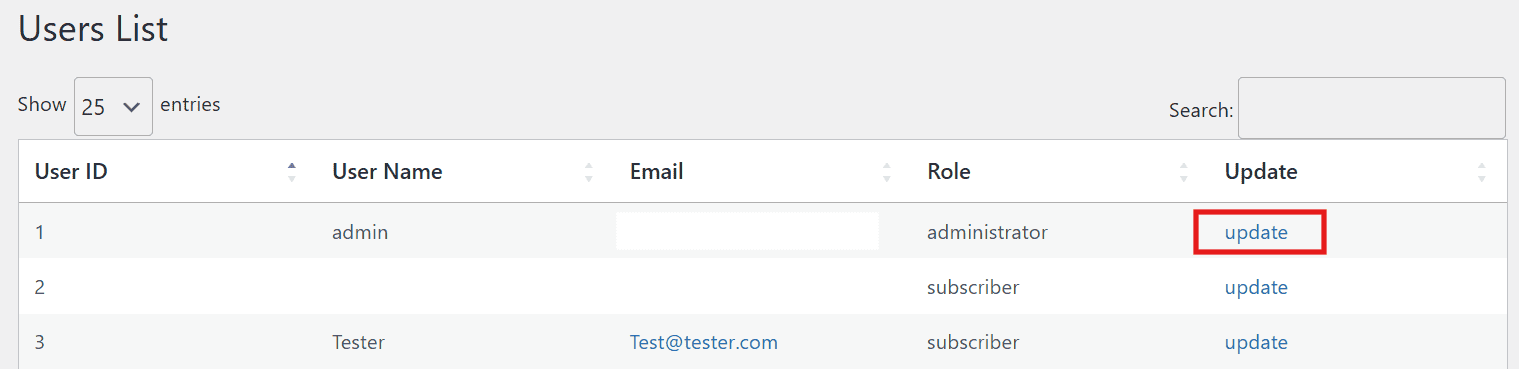
- You’ll see a list of users. Find your name (or the one you want to change) and click Update next to it.
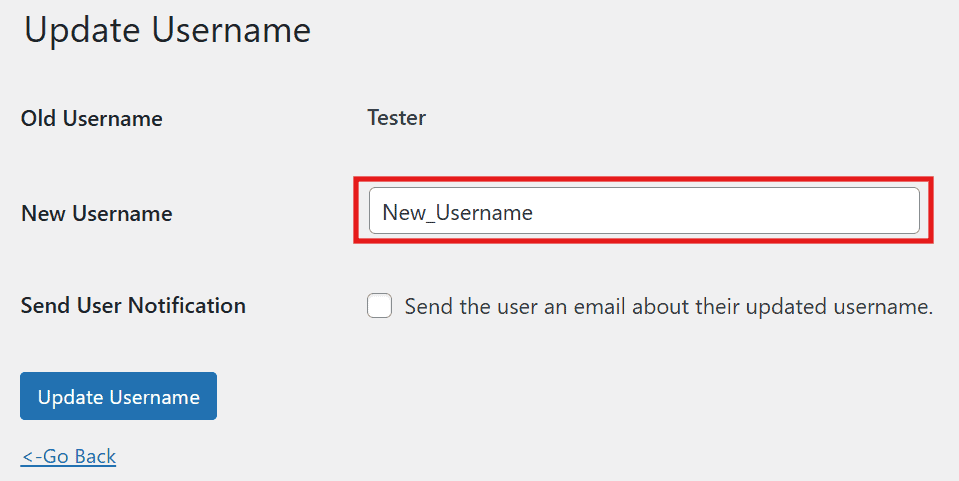
- Type your shiny new username in the box. Want to get an email confirmation? Check the “Send User Notification” box (optional but handy).
- Click Update Username, and voilà, you’re done!
Step 3: Clean Up (Optional)
- Don’t need the plugin anymore? No problem! Go to Plugins, find the Easy Username Updater plugin, click Deactivate, then Delete. Keeps your site nice and tidy.
Method 2: Create a New User and Delete the Old One (The Safe Swap)
Not into plugins? No worries, this method is still super simple and keeps your site secure. You’ll make a new user with your dream username and kick the old one to the curb. Here’s the play-by-play:
Step 1: Make a New You
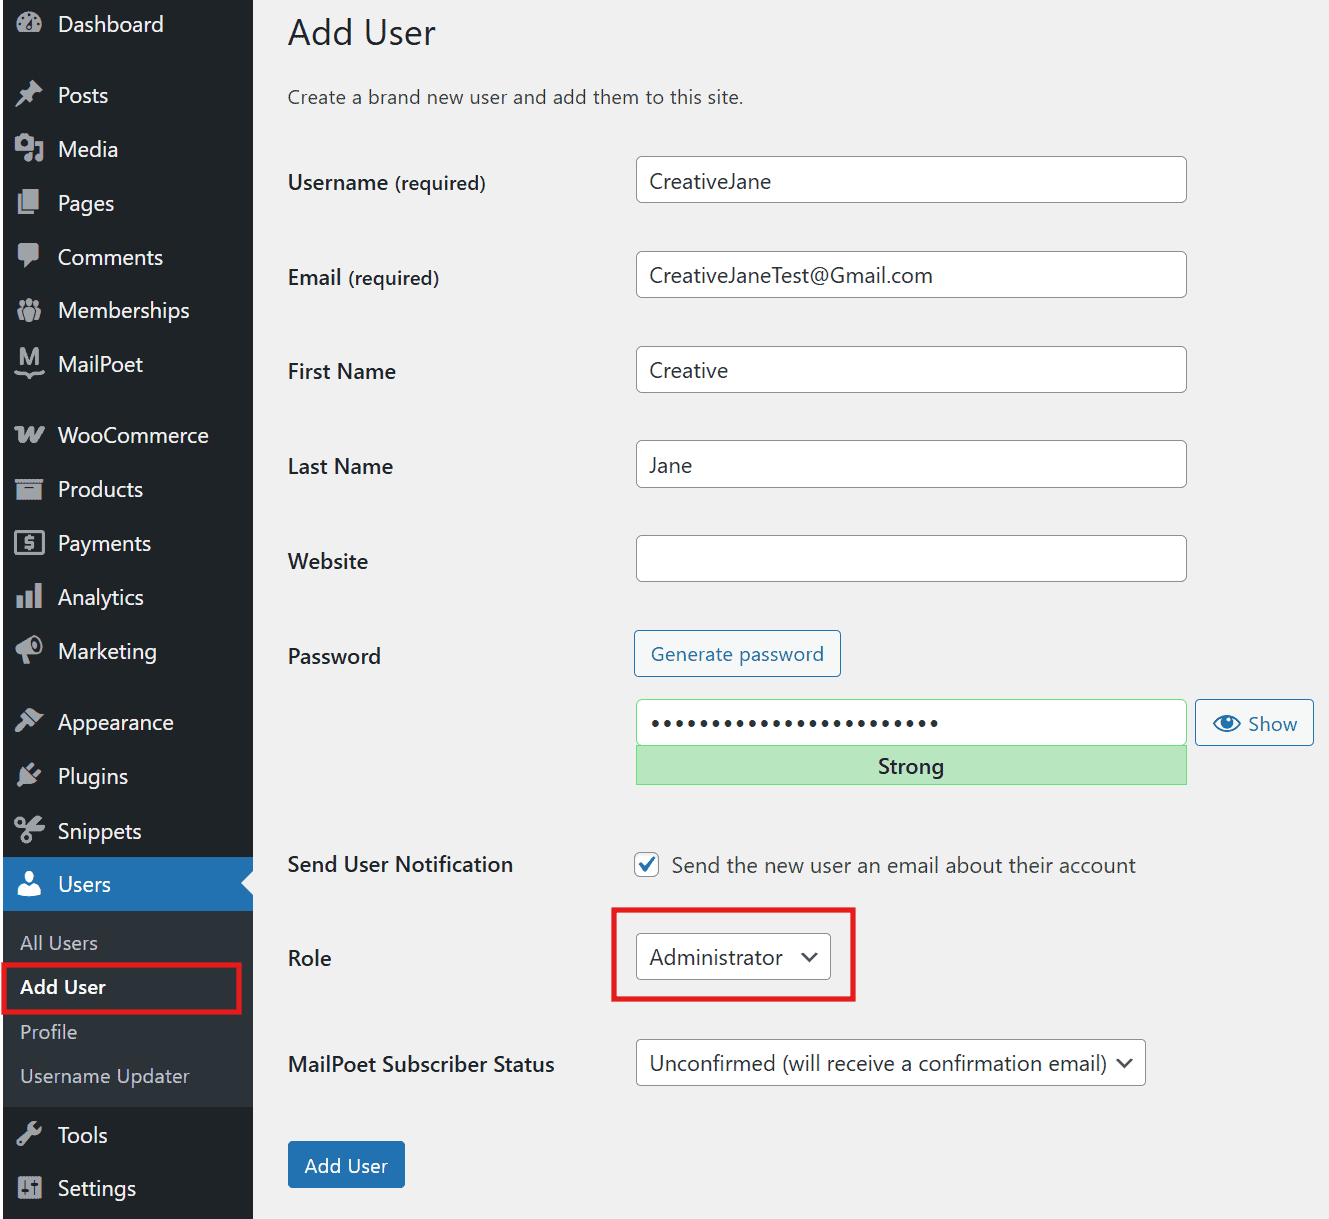
Log in as an admin, then go to Users > Add New.
Fill out the form:
- Username: Your new, awesome username (e.g., “CreativeJane”).
- Email: Use a different email from your current user (grab a free one from Gmail if you need to).
- Role: Set it to Administrator so you keep full control.
Hit Add New User. Done!
Step 2: Test the New Login
- Log out (top right corner, click your name, then “Log Out”).
- Log back in with your new username and password. This makes sure everything’s working smoothly.
Step 3: Say Bye to the Old User
- Back in the dashboard, go to Users.
- Find your old username, hover over it, and click Delete.
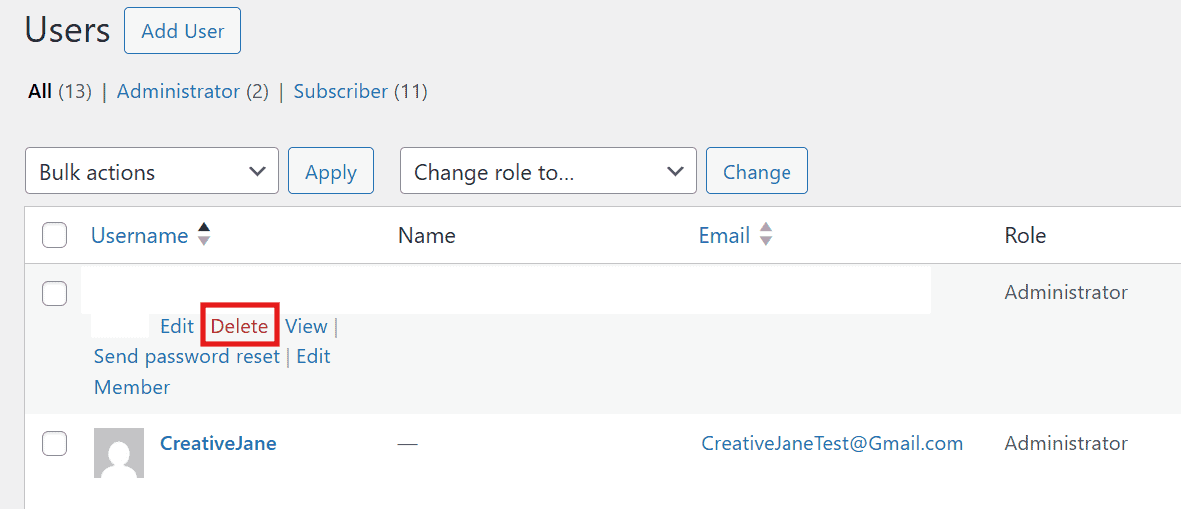
- WordPress will ask what to do with your old content (posts, pages, etc.). Choose “Attribute all content to” and pick your new user from the dropdown. This keeps everything yours!
- Click Confirm Deletion, and that’s it, old you is history!

Pro Tip: Double-check you can access the new email for password resets. This method is great because it’s safe, straightforward, and doesn’t touch any scary tech stuff.
Method 3: Edit the Database (The Techy Adventure)
Okay, this one’s for the brave souls who don’t mind a little tech magic. You’ll dive into your site’s database using a tool called phpMyAdmin. It’s powerful but risky, so we’ll go slow and safe. (Heads-up: back up your site first!)
Step 1: Get into phpMyAdmin
- Log in to your hosting account (like Bluehost, SiteGround, etc.) this is where your site lives.
- Look for phpMyAdmin under “Databases” in your control panel (e.g., cPanel). Click it to open.
Step 2: Find Your Database
- On the left, you’ll see a list of databases. Click the one your WordPress site uses. (Not sure? Peek at your wp-config.php file via your hosting’s file manager, it’ll say something like define(‘DB_NAME’, ‘wp_yoursite’);.)
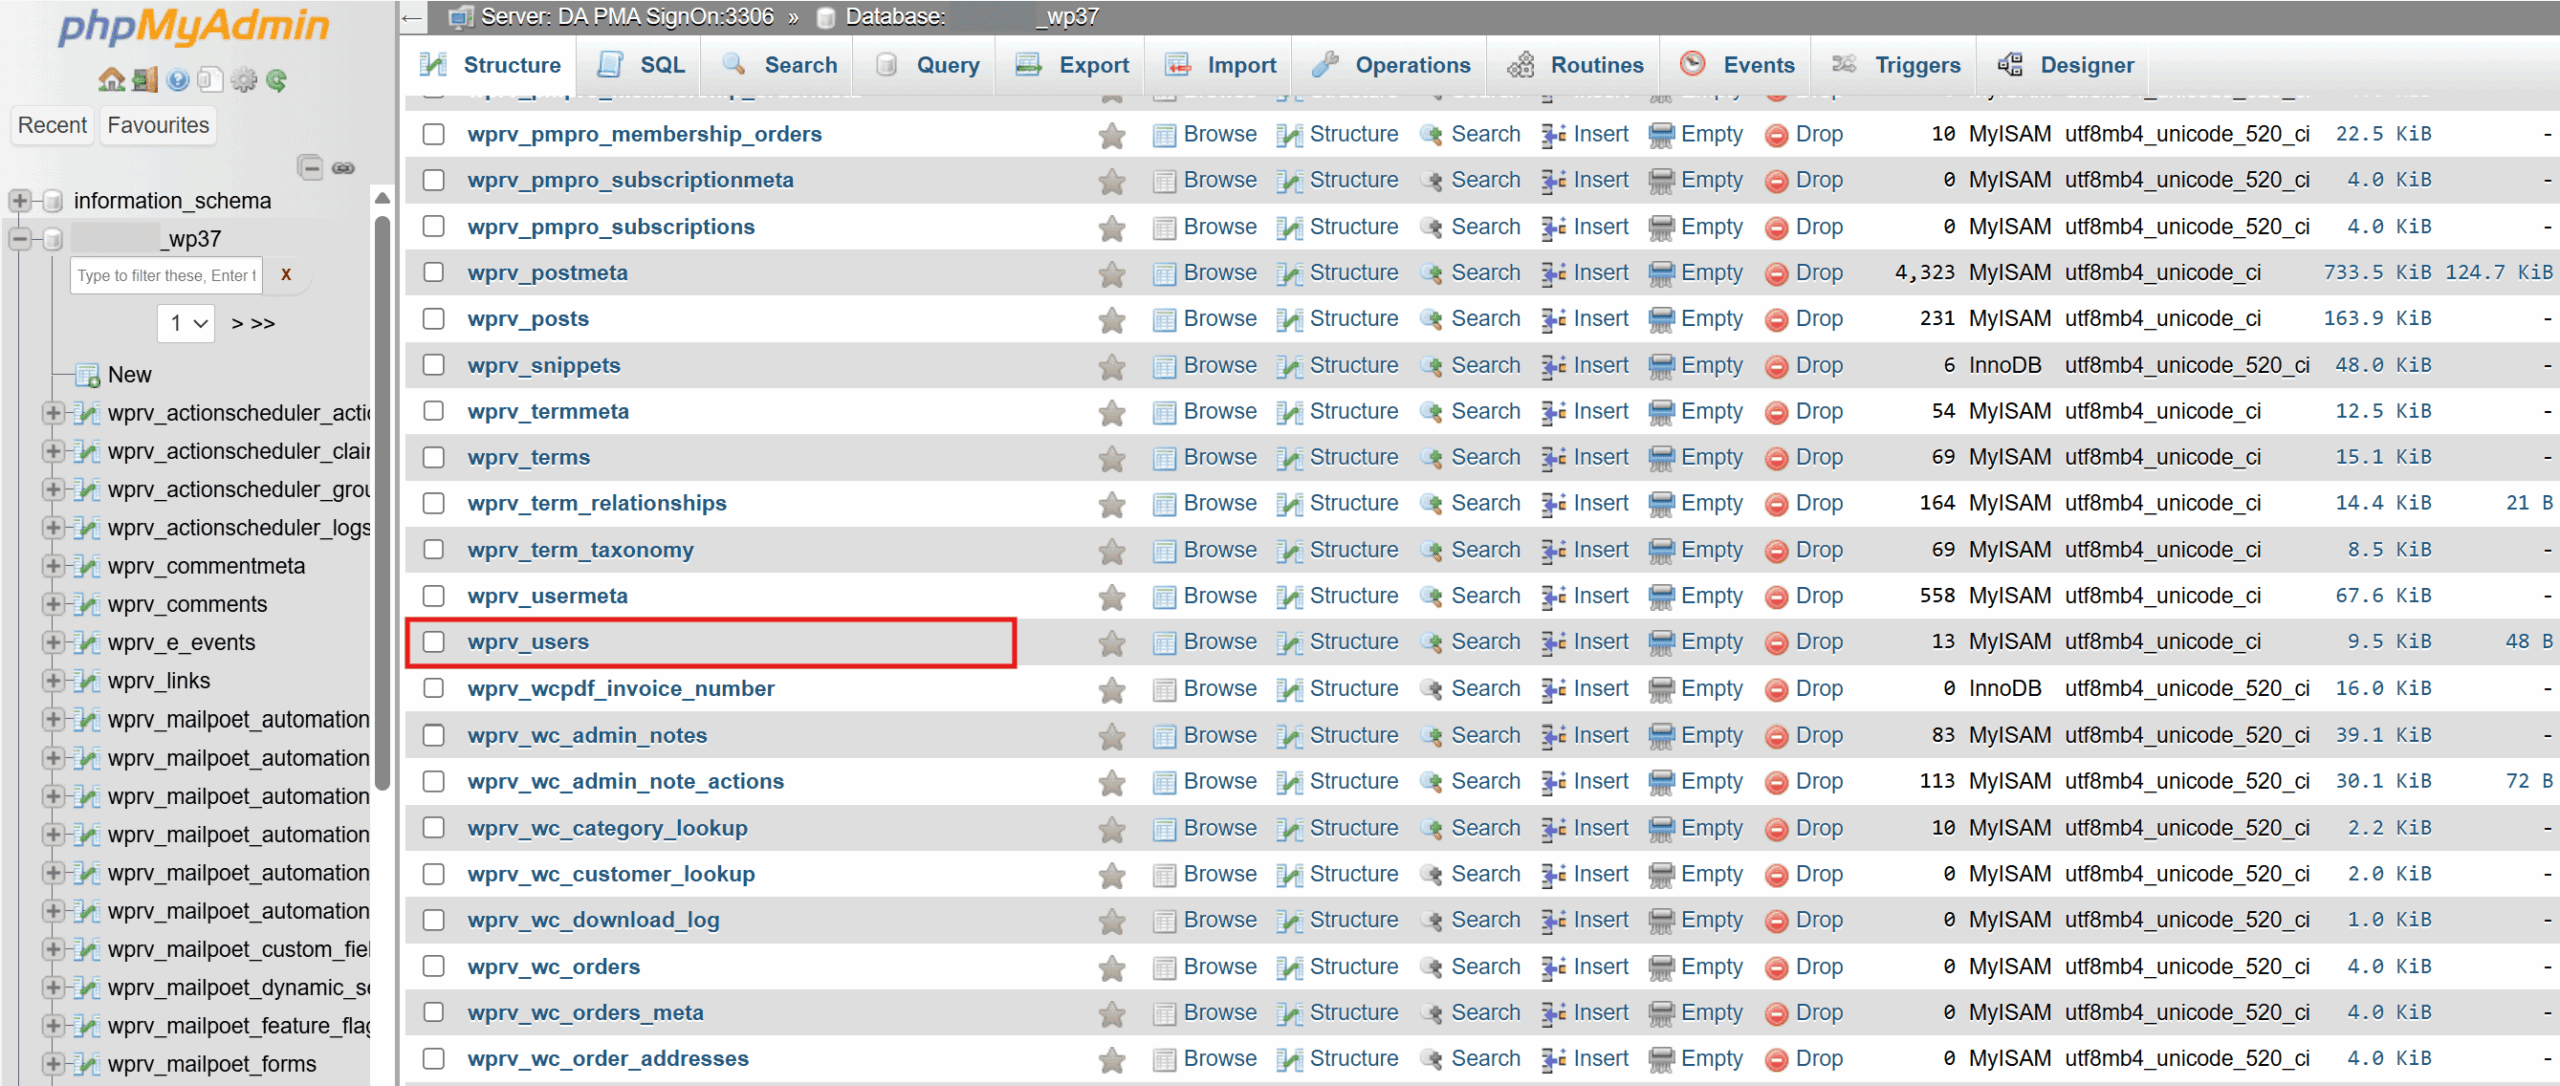
Step 3: Open the Users Table
- Look for a table called wp_users (the “wp_” part might be different, like “wp123_users” – that’s normal).
- Click it to see all your site’s users.
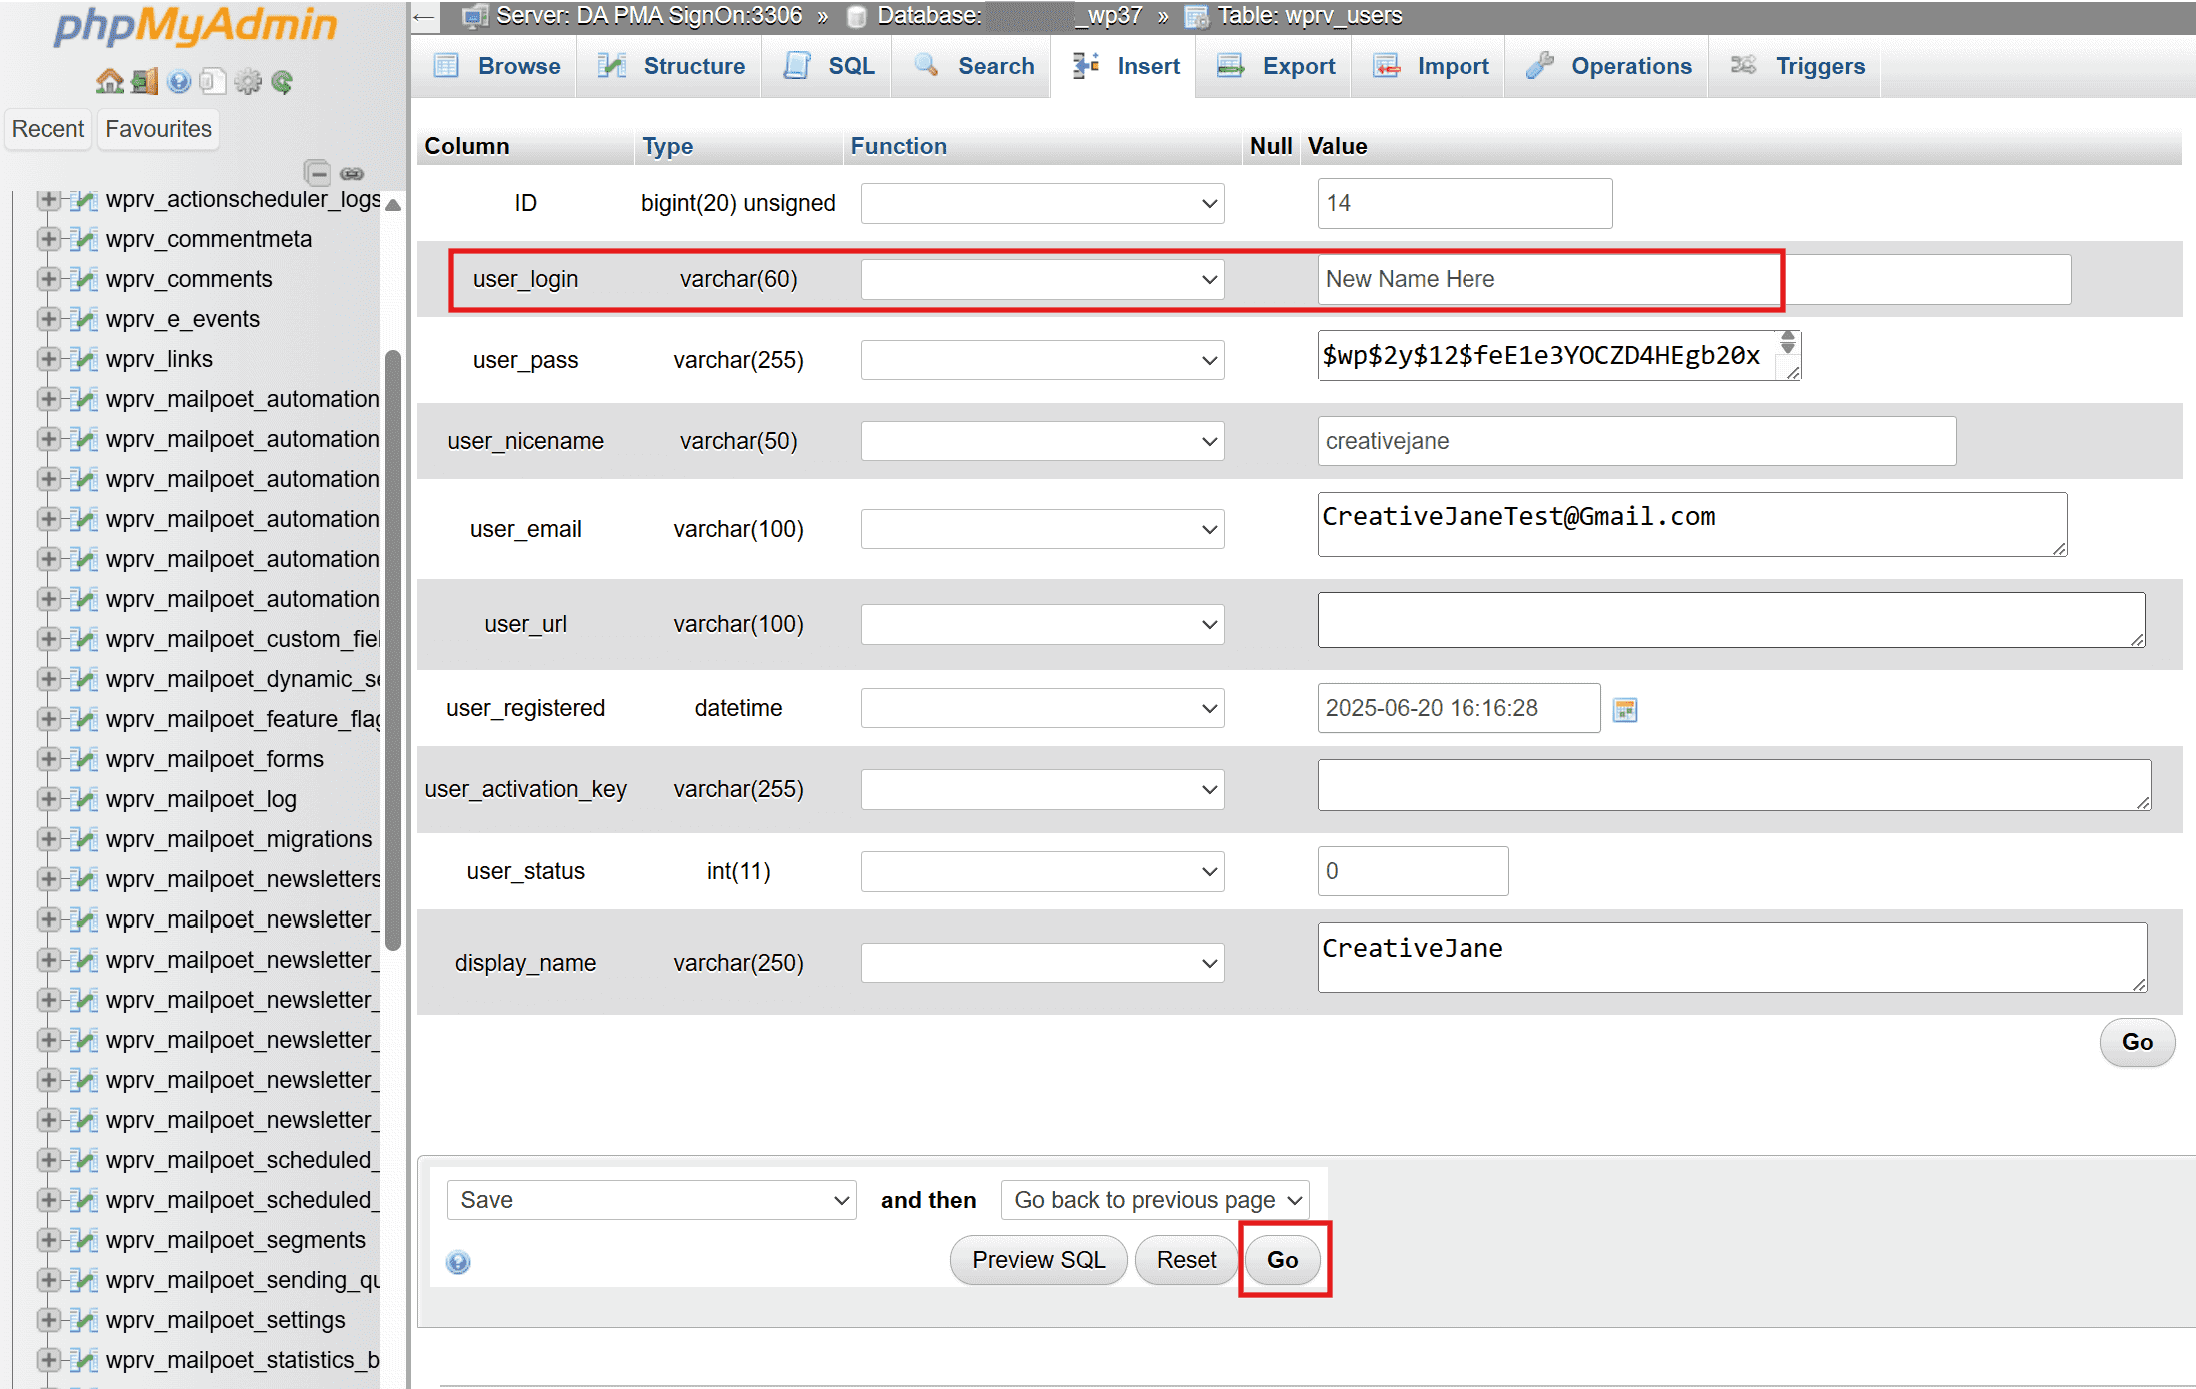
Step 4: Change the Username
- Find your user by checking the user_login or user_email column. Click Edit (usually a pencil icon) next to it.

- In the user_login field, type your new username. Leave everything else alone unless you’re sure what you’re doing!
- Click Go (bottom of the screen) to save.
Step 5: Test It Out
- Log out of WordPress and log back in with your new username and old password. If it works, you’re a database rockstar!
Fair Warning: Always back up your site before messing with the database (try a plugin like UpdraftPlus if you’re new to this). One wrong move can mess things up, so this is best for intermediate users who like a challenge.
Which Method Should You Pick?
Still not sure? Here’s a quick cheat sheet:
- Plugin Method: Fastest and easiest, great for beginners or anyone who wants zero stress.
- New User Method: Safe and simple, perfect if you’re plugin-shy or want a clean switch.
- Database Method: Cool and direct, but only if you’re comfy with tech and have a backup ready.
No matter what, I’d say start with the plugin, it’s like training wheels for WordPress tweaks. Once you’re feeling bold, try the others!
Extra Tips to Keep You Winning
- Stay Secure: Skip obvious usernames like “admin” or “user.” Mix it up with something like “JaneTheWriter2023” to keep hackers guessing.
- Back Up First: Especially for the database method, think of it like saving your game before a big boss fight.
- Trouble Logging In? Double-check your new username for typos. If you’re stuck, your hosting support can help reset things.
You’ve Got This!
There you go, three foolproof ways to change your WordPress username, no tech degree required! Whether you go with the plugin shortcut, the new-user swap, or the database dive, you’re now in control. Pick what feels right for you, follow the steps, and enjoy your freshly updated WordPress life.
Got questions or a cool username idea to share? Drop it in the comments, I’d love to hear from you!
Happy WordPressing.