
Installation
- Purchase and download the Name Your Price for WooCommerce plugin.
- Upload the plugin files to the ‘/wp-content/plugins’ directory, or install the plugin through the WordPress plugins screen directly.
- Activate the plugin through the ‘Plugins’ screen in WordPress.
Using the Name Your Price Plugin
Once this plugin is activated, it will add an extra product meta section under each WooCommerce product with the title “Name Your Price”.
This allows you to enable the user input functionality of the Name Your Price plugin for any pre-existing product or create a new WooCommerce product to add this functionality to.
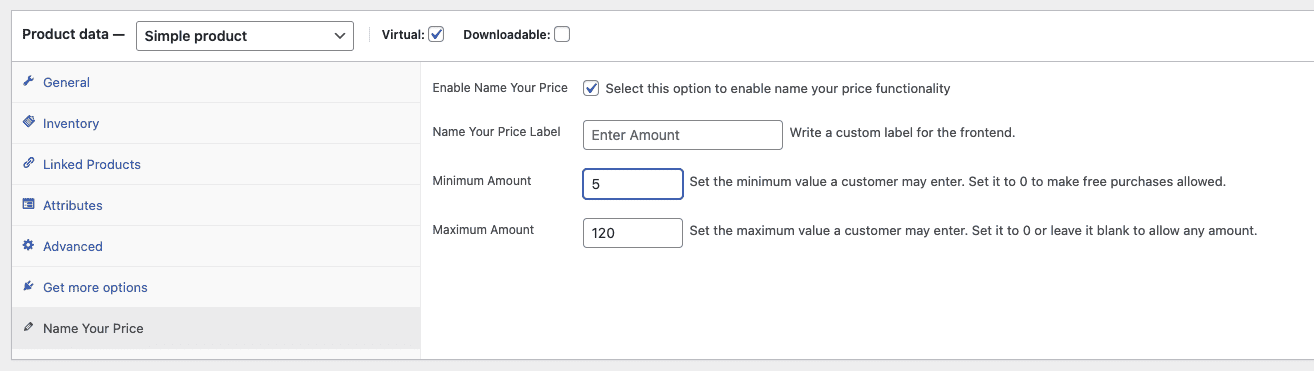
Name Your Price Setting Fields
The following settings are available under Name Your Price functionality:
- Enable Name Your Price – Check this box if you want your product to overwrite pricing functionality with the Name Your Price settings.
- Name Your Price Label – Manipulate the text label displayed on the product page to make instructions clearer to customers and potential customers.
- Minimum Amount – This field is optional, enter a minimum amount if you want customer’s to enter this amount or higher. Leave blank or set it to 0 to allow free checkouts.
- Maximum Amount – This field is optional, enter a maximum amount if you want customer’s to enter an amount no larger than this amount. Leave blank to set it to an infinite amount to be entered.
You may do a combination of minimum and maximum values for products. This gives you flexibility to setup the following payment options:
- Enter amount greater than.
- Enter an amount less than.
- Enter an amount between X and Y.
- Enter any amount (including 0 values).
If you need any assistance with the Name Your Price plugin, please do not hesitate to open a support ticket on our Support Page.
