In this getting started guide, you will learn how to setup and configure the Lead Times For WooCommerce plugin.
Table of contents
Installation
Download the attached plugin files from your confirmation purchase email, or navigate to the File Downloads section of your account page on yoohooplugins.com to download the file.
Once downloaded, you can upload the .zip file of Lead Times For WooCommerce via the Plugins > Add New > Upload Plugin screen.
Or, upload the unzipped ‘yh-lead-times‘ plugin folder to the /wp-content/plugins/ folder of your site’s web hosting environment.
Once the plugin is installed in your WordPress site:
- Navigate to the Plugins screen in the WordPress admin.
- Locate “Lead Times For WooCommerce” in the list of plugins.
- Click “Activate” to activate the plugin.
Initial Plugin Setup
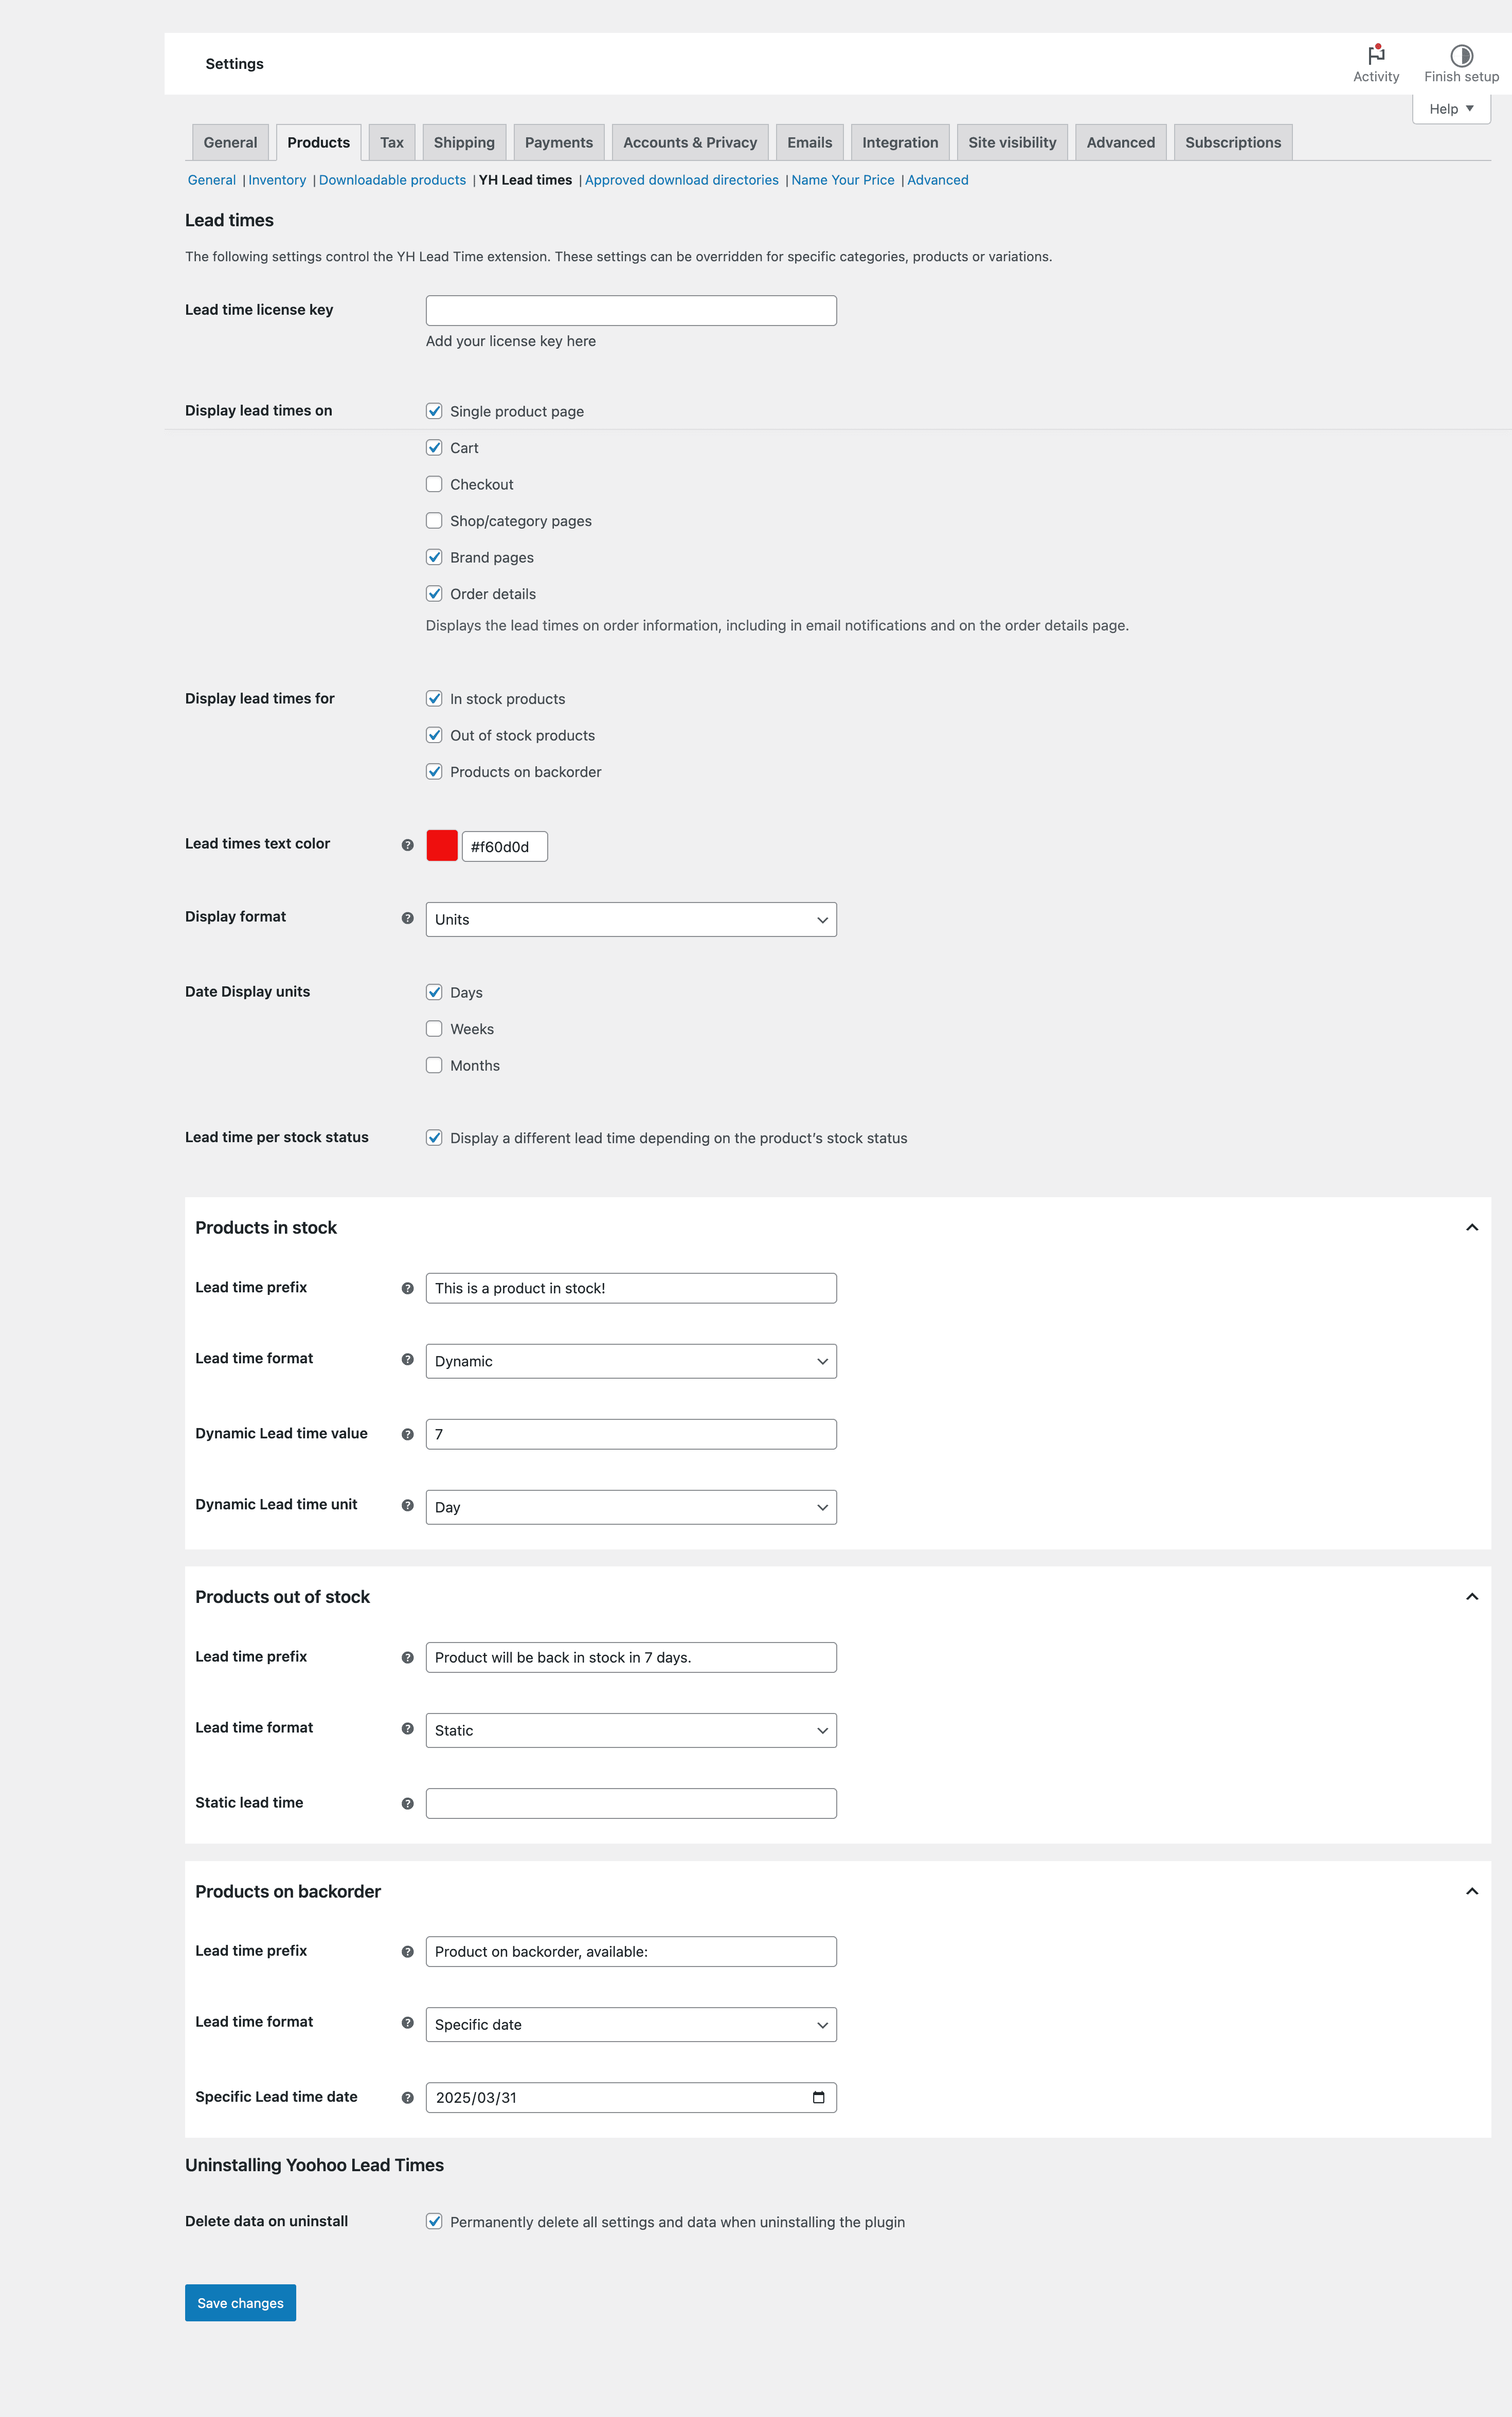
After successfully activating the Lead Times For WooCommerce plugin, you may navigate to WooCommerce > Settings > Products and choose the YH Lead Times submenu.
From this screen, you may set global settings for your WooCommerce store.
Settings
These settings will be applied globally to your entire WooCommerce store, for the relevant products where applicable.
- License key – A license key is required for automatic updates and support for Lead Times for WooCommerce. This can be obtained from your account page or your purchase confirmation email.
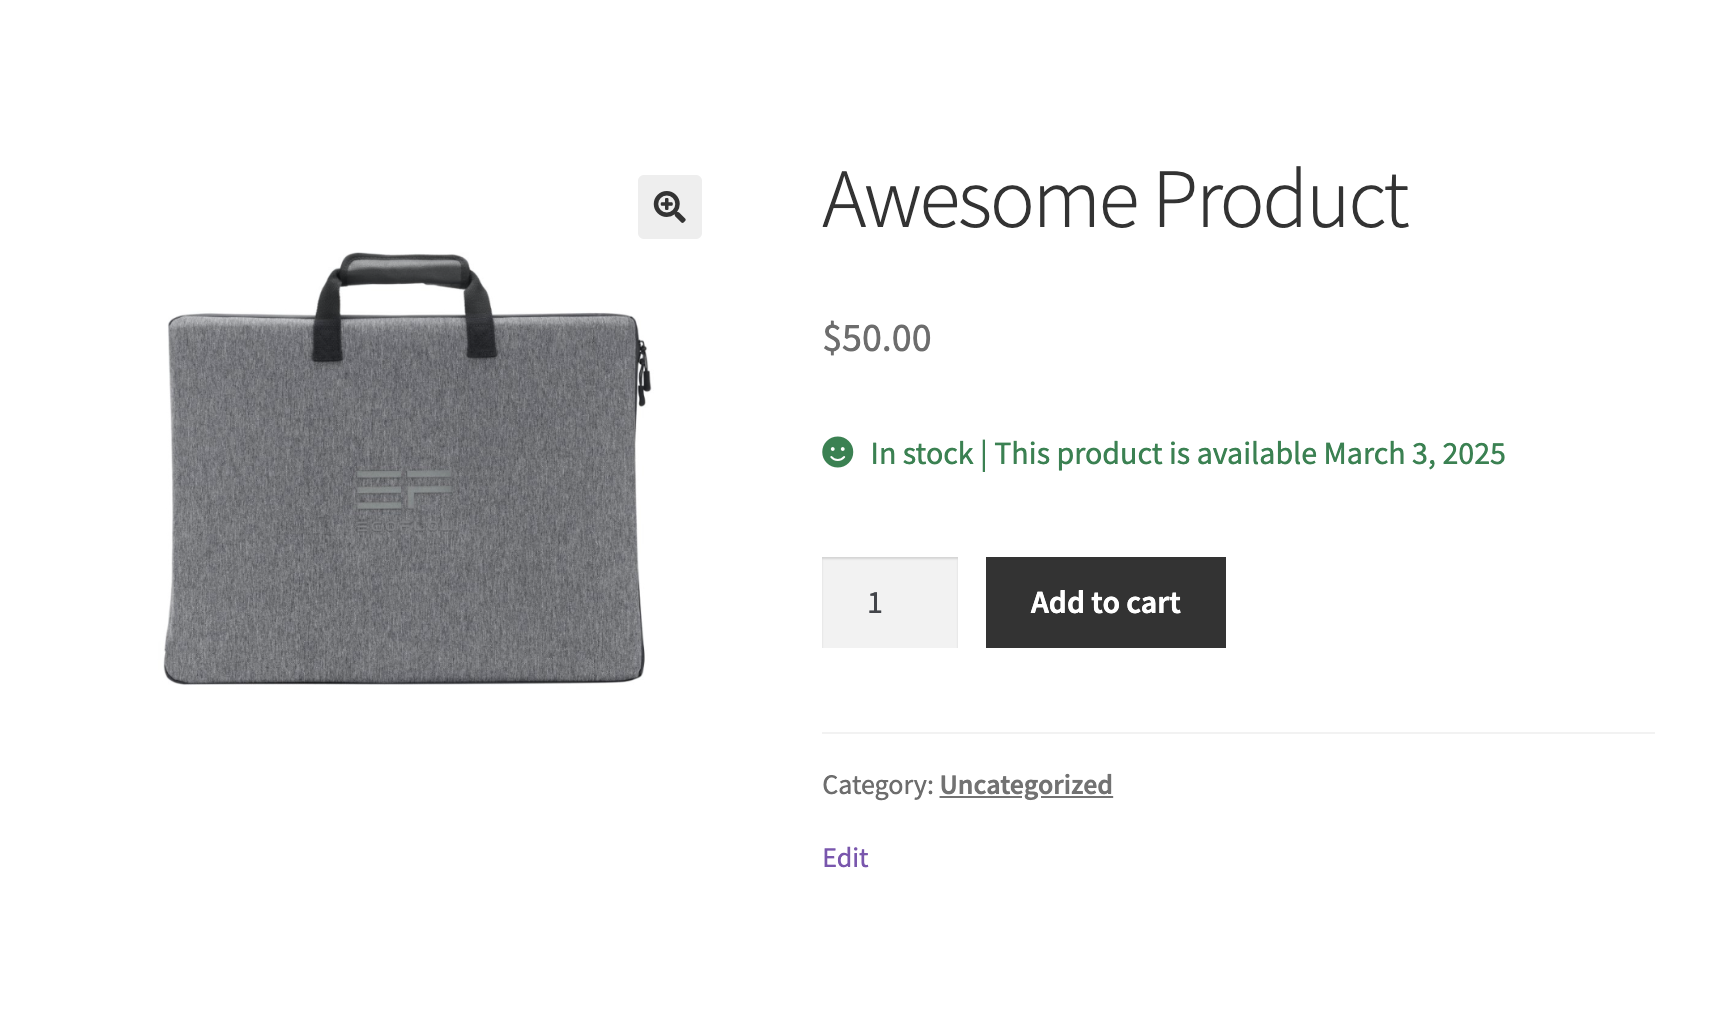
- Display lead times on – Choose where you would like to display the lead time content: Single product page, Cart, Checkout, Shop or category pages, Brand pages or Order details (This will include the information within the confirmation email sent to your customer and the confirmation purchase page).
- Display lead times for – Choose what inventory type to show the lead time for.
- Lead times text color – The color of the lead time text, for all inventory types.
- Display format – Determine the output for the dynamic content:
- Units – The specified display units will be shown (i.e. 8 Weeks)
- Date – A calculated date will be shown (i.e. March 3, 2025)
- Date display units – Choose what unit type to use: Days, weeks or months. This will only affect the unit display format.
- Lead time per stock status – Set a unique lead time based on products in stock, products out of stock or products on back order.
- Lead time prefix – The text shown before the text calculation.
- Lead time format – The type of lead time you would like to use: Static, Dynamic or Specific Date.
- Dynamic: Set a rolling lead time that automatically adjusts based on the customer’s order or viewing date. Choose from various timeframes—such as 7 days, 30 weeks, or 5 months—and display them in an easy-to-read format. You can show the lead time in units (e.g., weeks or months) or convert it into an estimated availability date for a clearer customer experience.
- Specific Date: Define a fixed date for product availability, ensuring customers know exactly when to expect it. Unlike dynamic lead times, this date remains unchanged, making it ideal for setting order deadlines, indicating stock availability, or marking the end of a product’s supply.
- Static: Perfect for products that don’t require a specific lead time. Instead of dates, display a custom message or note that remains unchanged. This option is ideal for adding important product details or special instructions without automated adjustments.
Product Specific Settings
Following the same principles and settings as the global settings, these options are available to each product to allow overriding of the lead time content.
Any values entered on the product level will override any global setting or lead time set. The
To navigate to the Product specific lead times you may navigate to edit the specific product and select the “Inventory” tab. Below is an example of setting the lead time using the New Product Editor for WooCommerce.
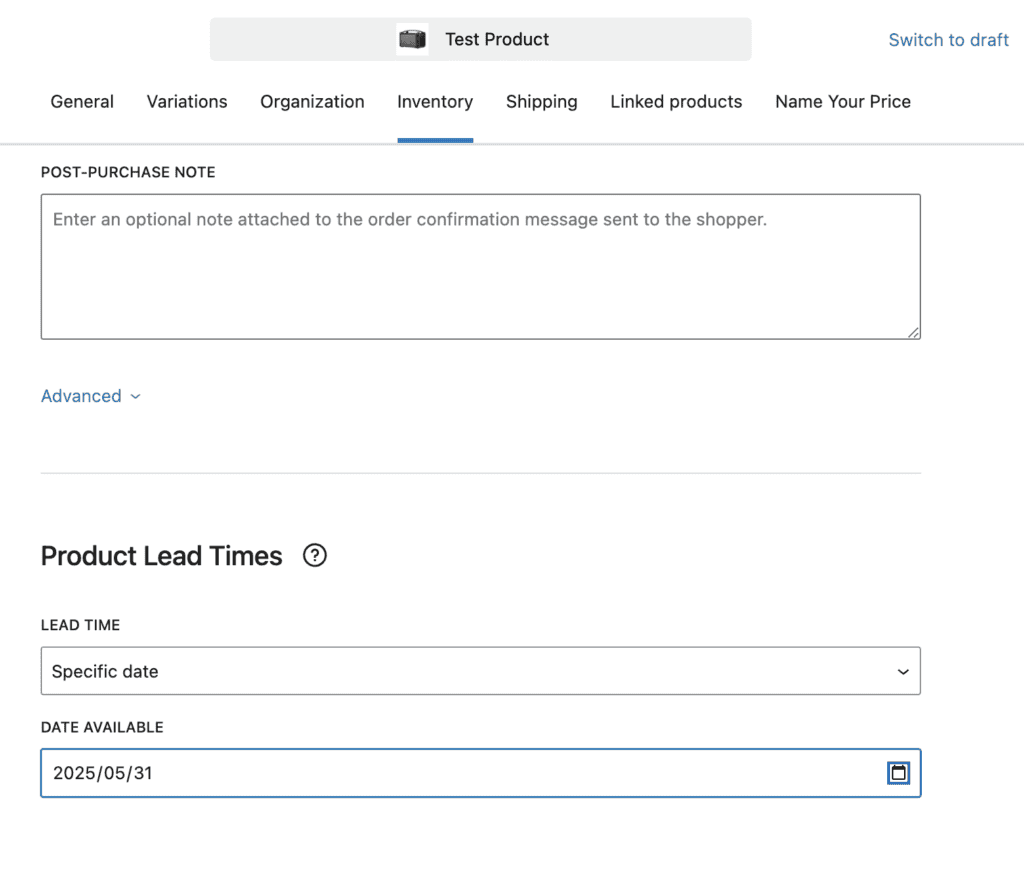
Once configured, lead times will automatically display inline where the inventory values or status would show.