
Ever ordered something online, only to find out after clicking “buy” that it’s actually going to take weeks to arrive? As e-commerce store owners, we know that kind of surprise results in frustrated customers and potentially, lost sales. Transparency is key, and that’s where product lead times come in.
For WooCommerce store owners, effectively communicating when a product will ship or be ready is crucial for managing customer expectations. While WooCommerce handles basic “in stock” or “out of stock” messages, what if you offer made-to-order products, items with varying shipping times, or products that aren’t immediately available?
That’s where a fantastic plugin called Lead Times for WooCommerce from Yoohoo Plugins steps in. This powerful, yet incredibly easy-to-use plugin allows you to clearly display lead times on your product pages, carts, and even checkout, ensuring your customers are always in the know.
In this guide, we’ll walk you through how to set up and utilize the Lead Times for WooCommerce plugin to add accurate and helpful lead time information to your products.
Why You Need Product Lead Times
Adding lead times isn’t just about providing information, it’s about strategically enhancing your entire customer journey and boosting your bottom line.
Before we dive into the “how-to,” let’s quickly recap why adding lead times is a game-changer for your WooCommerce store:
- Improved Customer Satisfaction: No more guessing games! Customers appreciate knowing exactly when to expect their purchase.
- Reduced Support Inquiries: Fewer “where’s my order?” emails and calls free up your time.
- Increased Conversions: Clear communication builds trust, which can lead to more sales.
- Better Inventory Management: Helps you visualize and manage your shipping pipeline.
- Professionalism: Shows your customers you’re organized and transparent.
Introducing: Lead Times for WooCommerce by Yoohoo Plugins
We’ve scoured the WordPress plugin repository and tried various solutions, and for sheer ease of use and robust features, Lead Times for WooCommerce truly stands out. It’s a premium plugin (and well worth the investment!), designed specifically to integrate seamlessly with your WooCommerce store.
You can find the plugin and more details here: Lead Times for WooCommerce
Now, let’s get down to setting it up!
Your Step-by-Step Guide: Adding Lead Times to Your WooCommerce Products
Step 1: Purchase, Download, and Install the Plugin
- Purchase: Head over to the Lead Times for WooCommerce product page on the Yoohoo Plugins website and complete your purchase.

- Download: Once purchased, you’ll receive a download link for the plugin’s
.zipfile. Save this to your computer. - Install:
- Log in to your WordPress dashboard.
- Navigate to Plugins > Add New.
- Click on the “Upload Plugin” button at the top of the page.
- Click “Choose File”, select the
yh-lead-times.zipfile you just downloaded, and click “Install Now”. - Once installed, click “Activate Plugin”.

Step 2: Configure Your Global Plugin Settings
After activation, you’ll want to set up the global options for your lead times. These global settings provide a powerful baseline that can be overridden for specific products or variations later.
Navigate to WooCommerce > Settings > Products > YH Lead Times
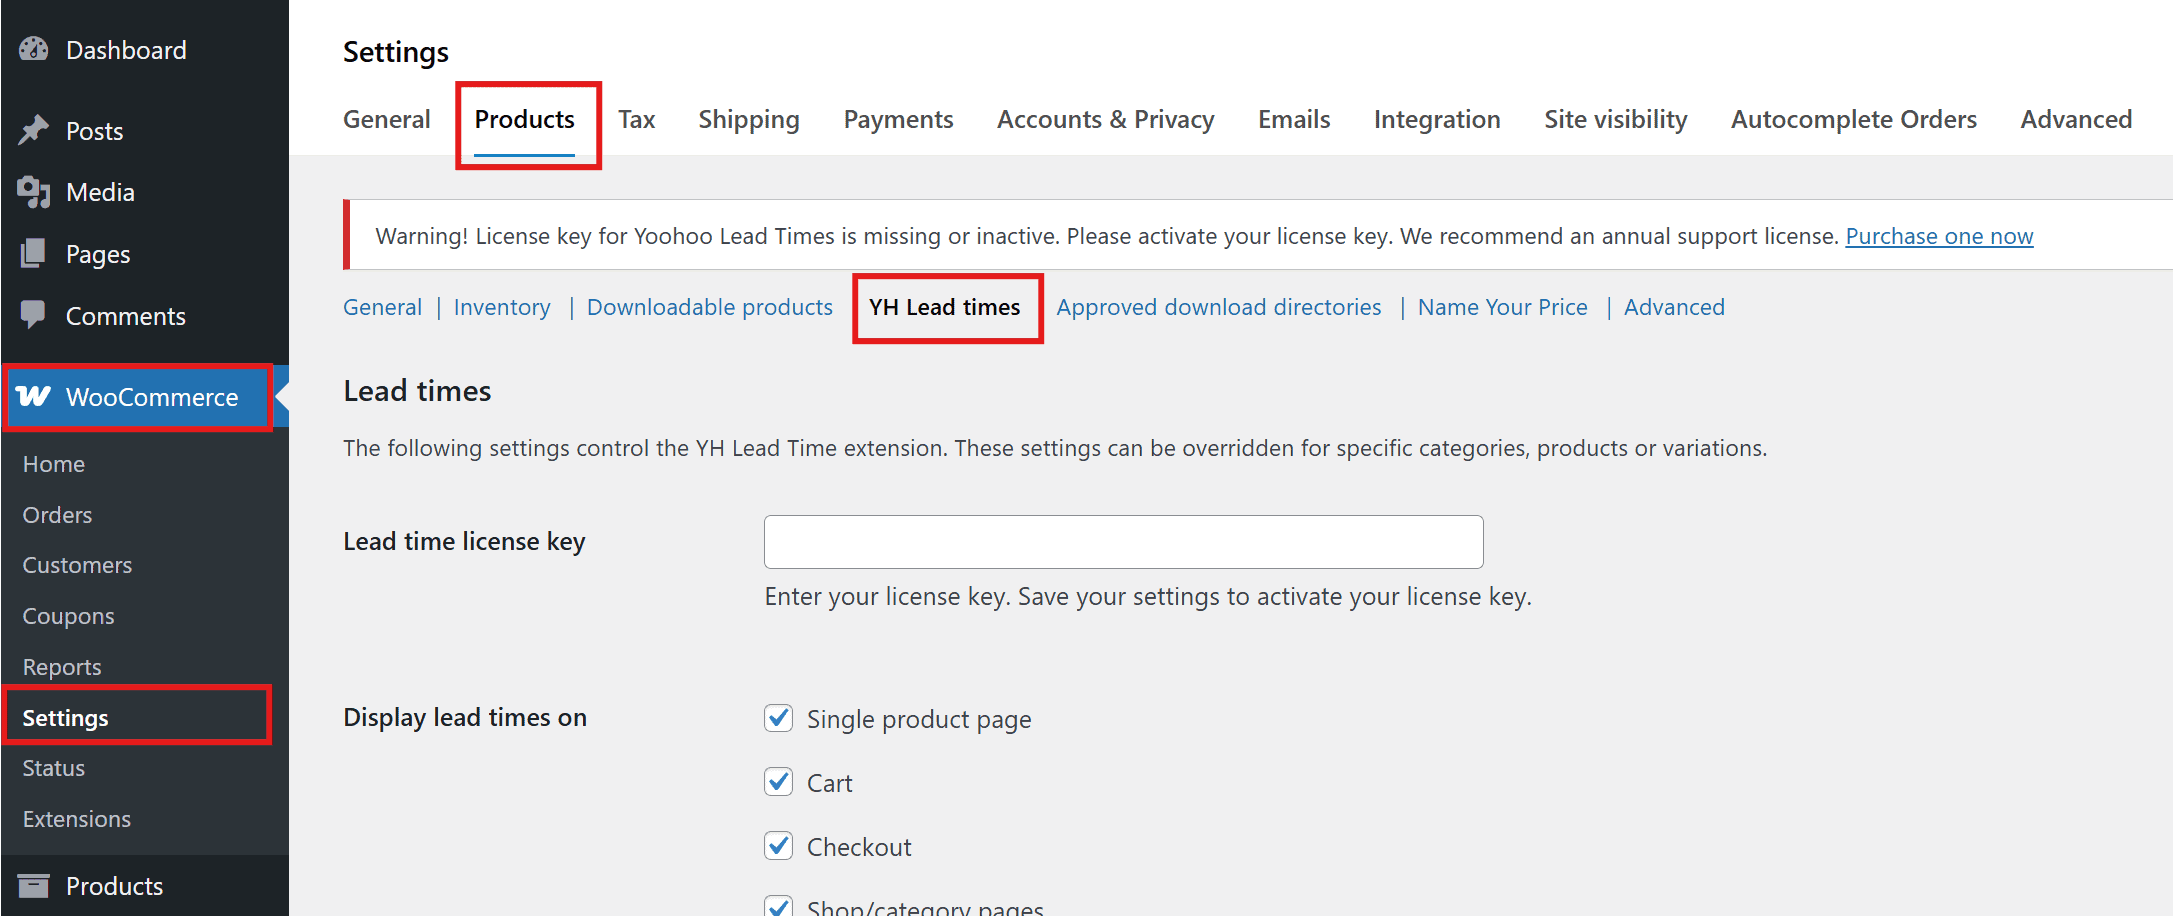
Here, you’ll find a range of general settings to customize how lead times are displayed:
- Display Lead Times On: Make sure this is checked to activate the feature. This crucial setting allows you to select exactly where lead times will be visible to your customers. Choose From:
- Single product pages
- Cart
- Checkout
- Shop/category pages
- Brand pages
- Order details (this includes displaying lead times on order information, within email notifications, and on the customer’s order details page.)
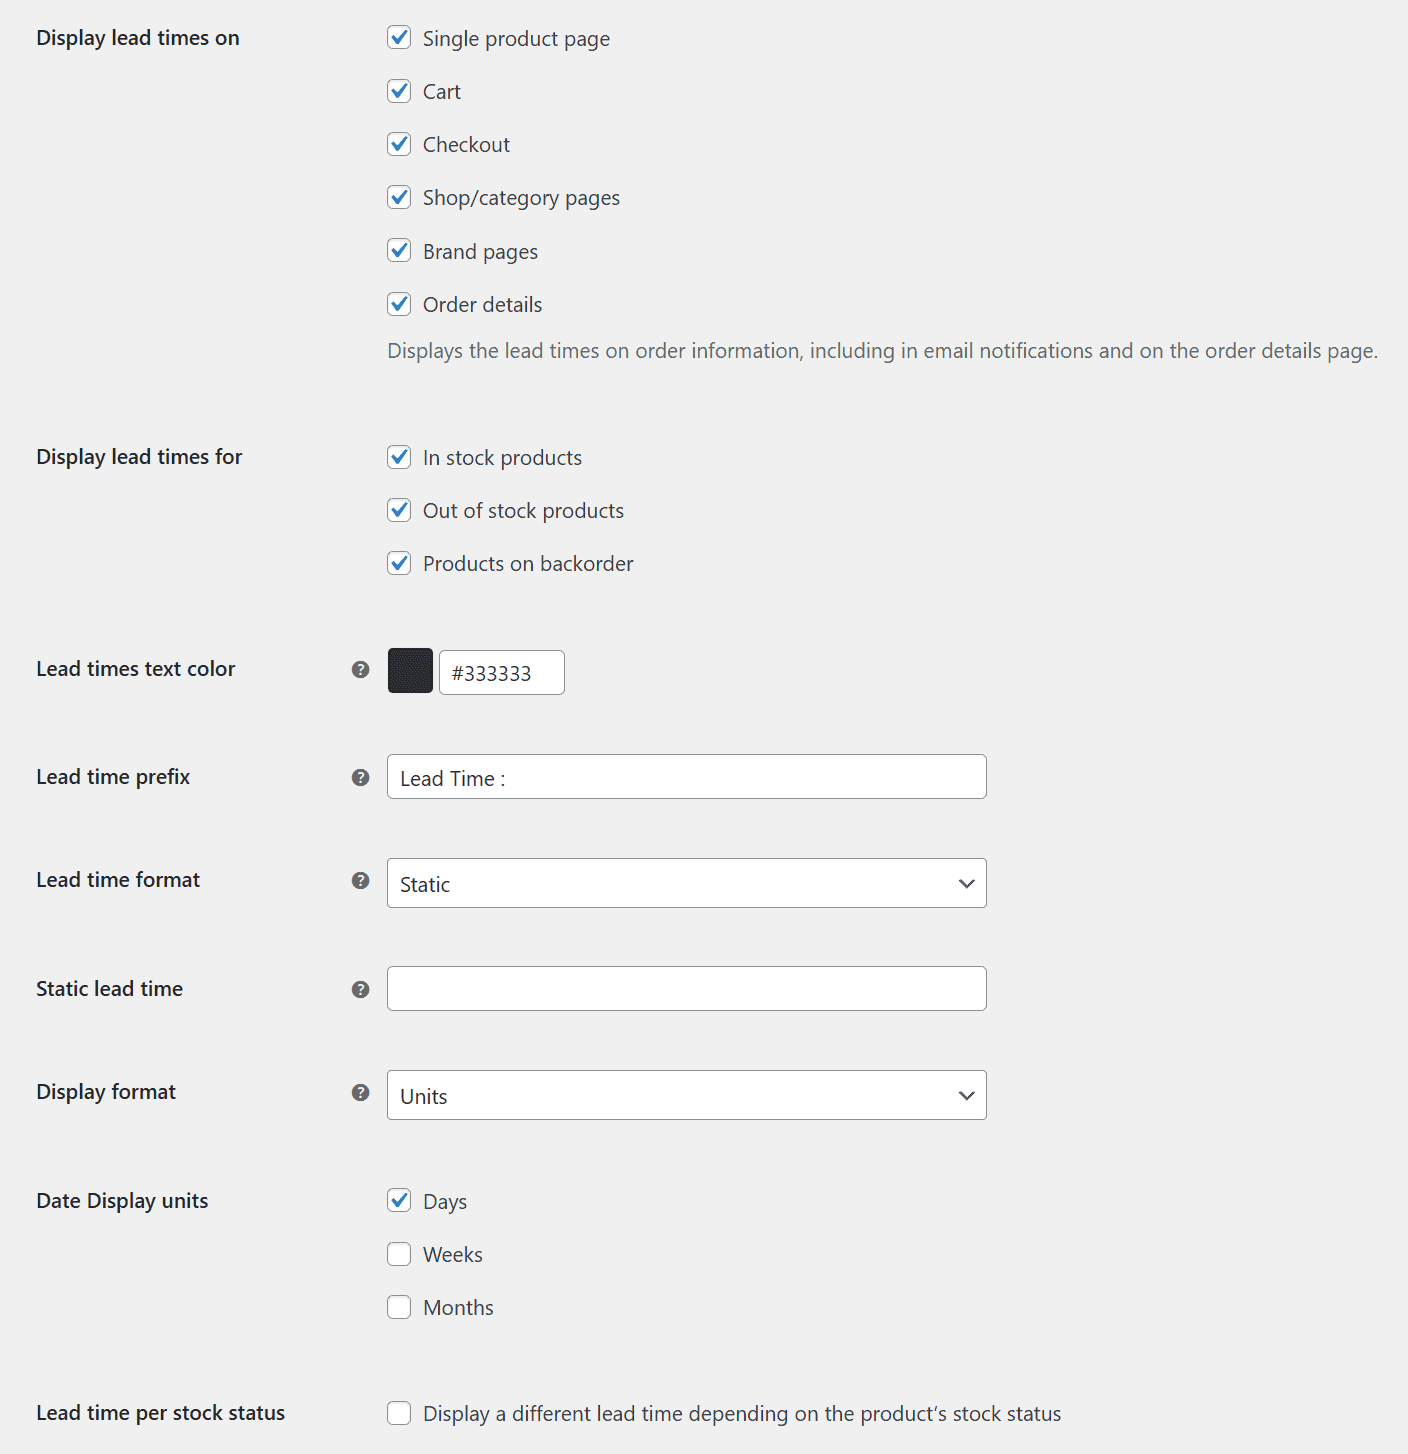
- Display Lead Times for: Gain granular control over which product stock statuses will show lead times.
- In stock products
- Out of stock products
- Products on backorder
- Lead Times Text Color: Customize the visual appearance by setting a specific color for your lead time text, ensuring it seamlessly integrates with your store’s branding and theme.
- Lead Time Prefix: Customize the text that appears before your lead time. Examples include “Ships in:”, “Available in:”, or “Delivery takes approximately:”. This adds clarity and context for your customers.
- Lead Time Format: This is where the flexibility of Yoohoo Lead Times truly shines, allowing you to define the default lead time for your entire store with three powerful options:
- Static: Ideal for consistent messages like “Usually ships within 24 hours” or “Made to order.” Simply enter your custom text string.
- Specific Date: Perfect for pre-order items or products with a known availability date. Select a precise date, and the plugin will automatically calculate and display the remaining time (e.g., “Available by July 15th”).
- Dynamic: For lead times based on a numeric value and unit. Enter a number (e.g., “5”) and select a unit (Day, Week, Month, Year). The plugin will dynamically display the lead time (e.g., “5 Days”, “2 Weeks”).
- Lead Time Per Stock Status: For ultimate control, enable this option to define entirely different lead times based on a product’s current stock status (e.g., a shorter lead time for “In Stock” items versus “On Backorder” items).
Spend a few minutes going through these settings and tailor them to your store’s needs. Don’t forget to “Save changes”!
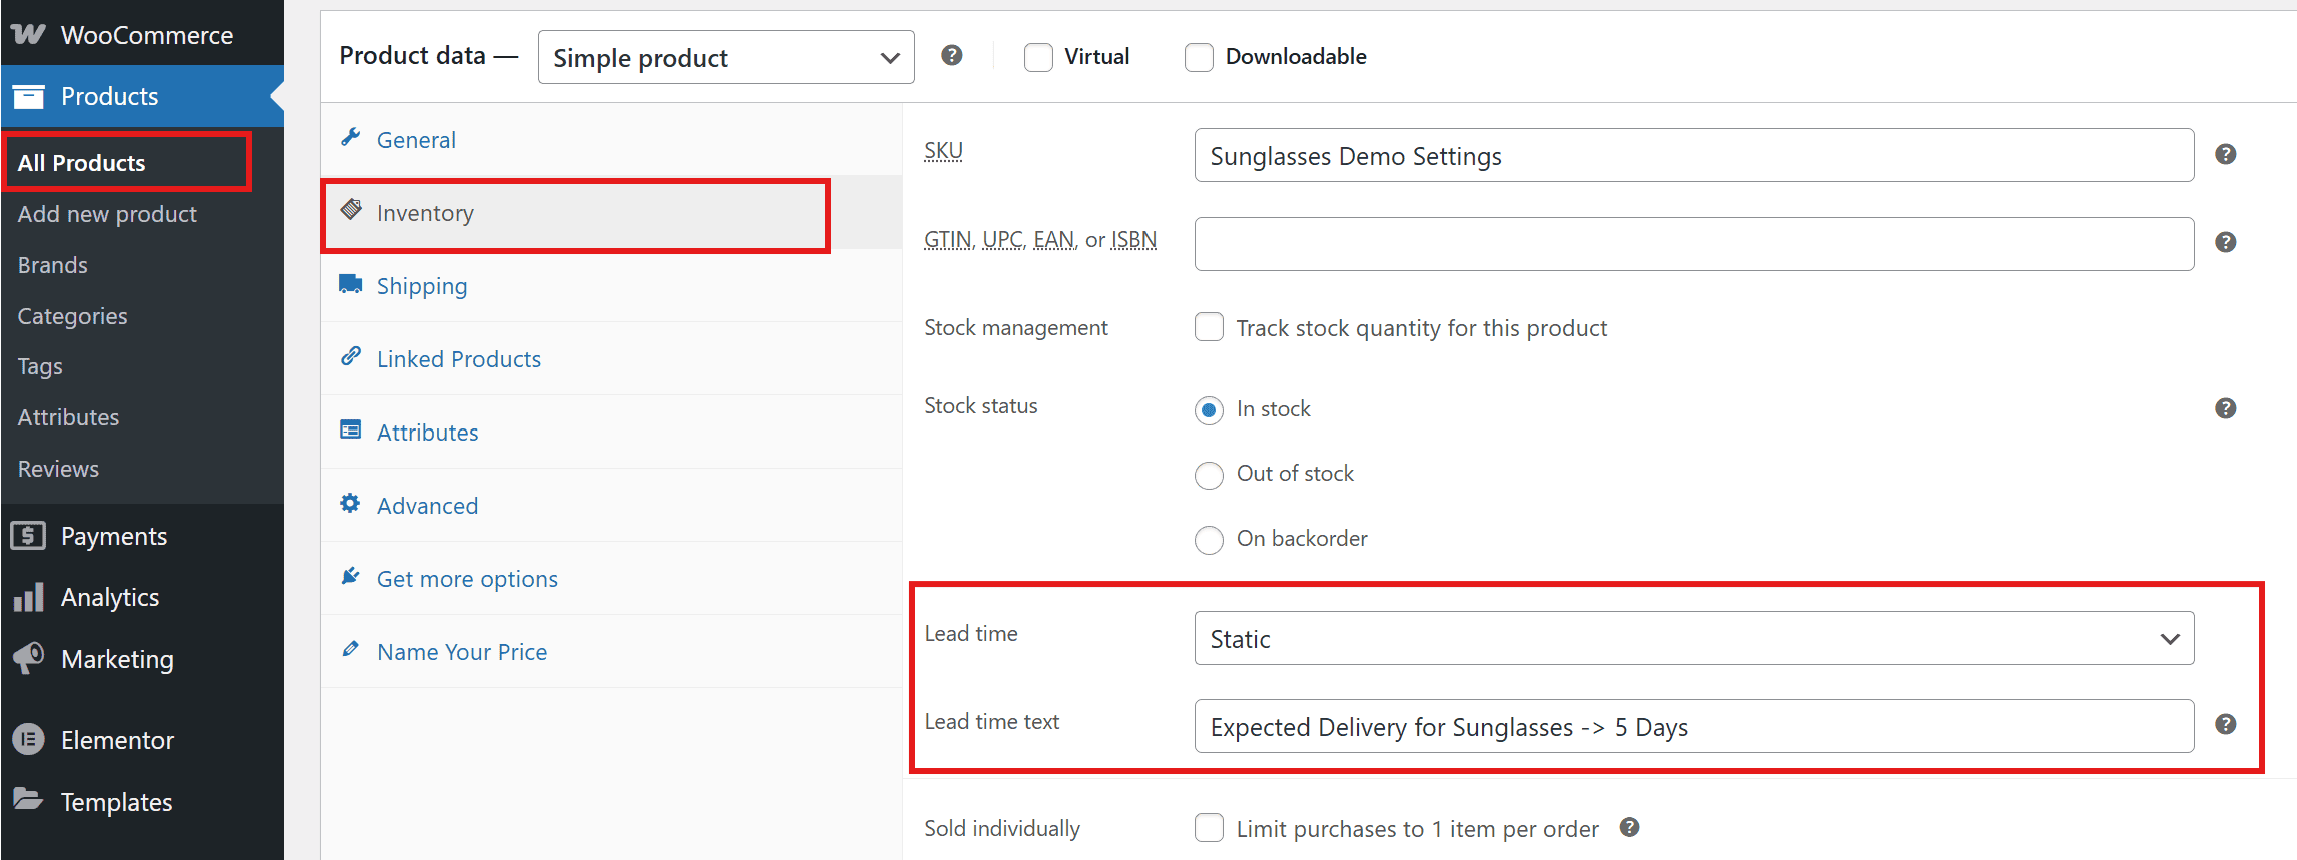
Step 3: Setting Lead Times for Individual Products
This is where the magic happens! You can set specific lead times for individual products, overriding the global default.
- Go to
Products > All Productsin your WordPress dashboard. - Edit the product you want to add a lead time to.
- Scroll down to the “Product data” meta box (usually below the main product description).
- Click on the “Inventory” tab on the left-hand side within the Product data box.
- You’ll now see a new option: “Product Lead Times”.
- You have a few options here:
- Static: Enter a custom lead time text unique to this product.
- Specific Date: Select a precise availability date for this particular item.
- Dynamic: Input a numeric value and select a unit (Day, Week, Month, Year) for a dynamic lead time.
- Important: If you leave these fields empty for an individual product, the plugin will automatically revert to and display your global lead time settings.
Once you’ve set your desired lead time for the product, click “Update” (or “Publish” if it’s a new product).
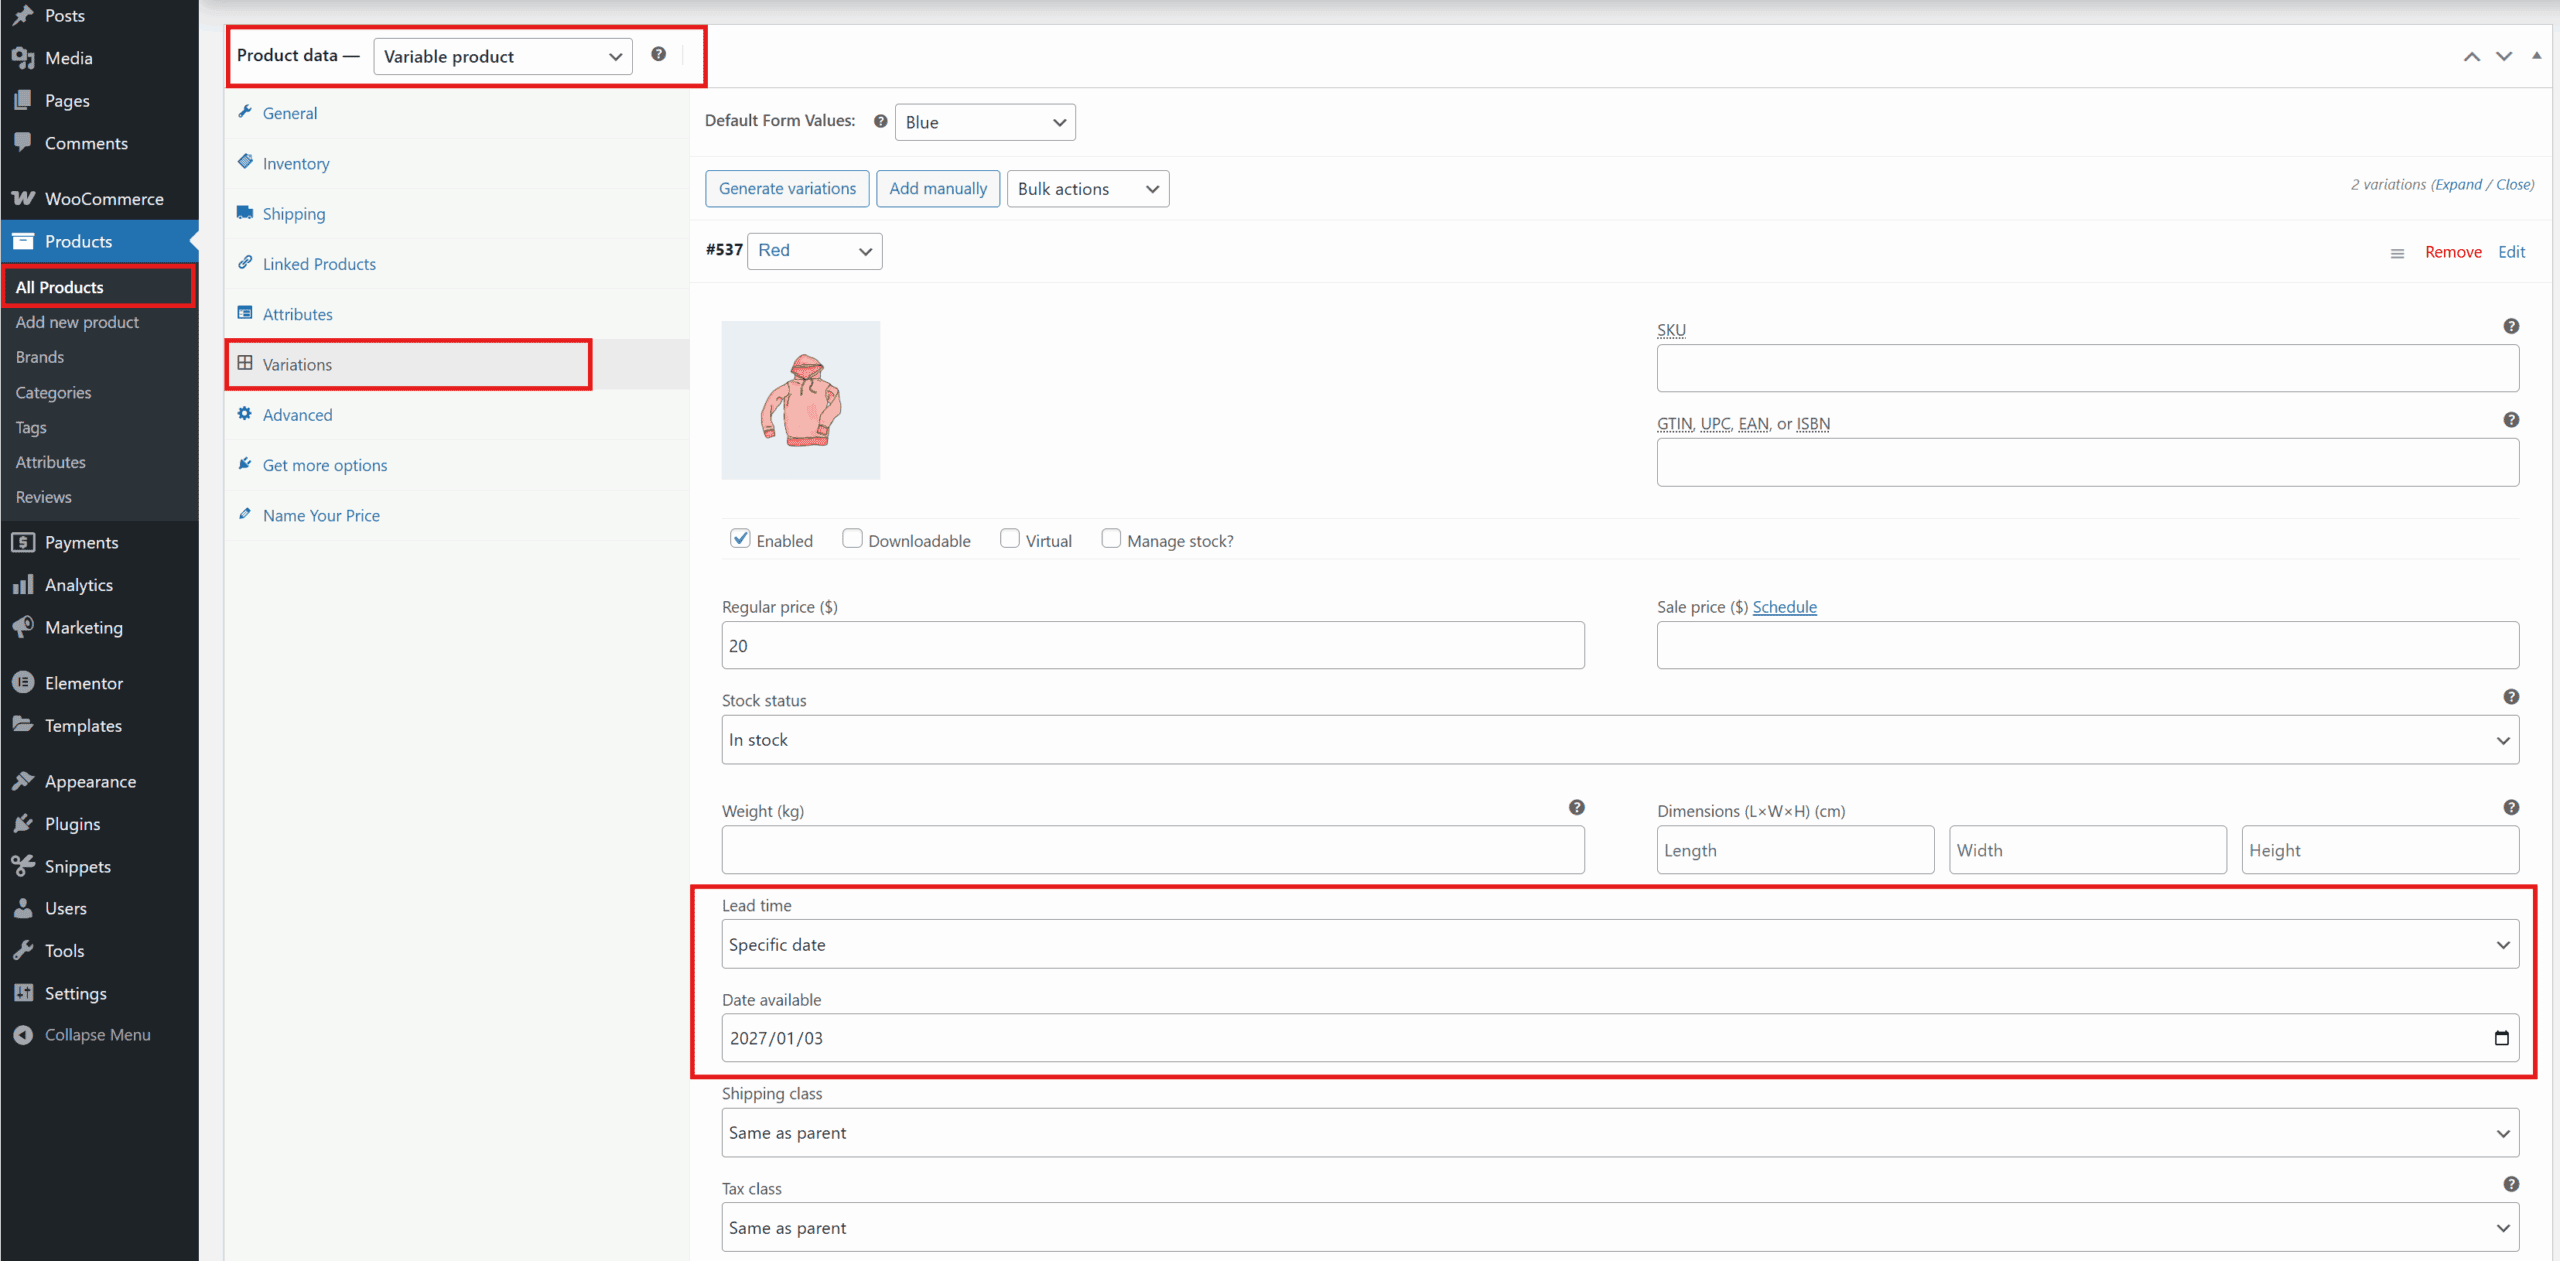
Step 4: Setting Lead Times for Product Variations (for Variable Products)
If you sell variable products (e.g., different sizes, colors or materials), the Lead Times for WooCommerce plugin allows you to set lead times per variation!
- When editing a variable product, go to the “Variations” tab within the “Product data” meta box.
- Expand each variation by clicking on it.
- Within each expanded variation, you’ll see a “Lead Time” field for each variation, similar to the simple product settings.
- Set the lead time for each variation as needed. This ensures customers receive accurate information regardless of the product option they choose.
- Save changes for the product.
Step 5: Test and Refine!
Once you’ve set up your lead times, it’s crucial to test them.
- Visit your product pages, shop pages, cart, and checkout on the front end of your website. Pay close attention to how lead times are presented.
- Ensure the lead times are displaying correctly and clearly for the various products and their variations.
- Add products with different lead times to your cart to see how they behave.
- Make any necessary adjustments within the plugin’s global settings or individual product/variation settings.
Beyond the Basics: Tips for Maximizing Your Lead Times
To truly leverage the power of Yoohoo Lead Times and enhance your customer communication, consider these tips:
- Be Specific: Instead of just “3-5 days,” consider “Ships in 3-5 business days” or “Delivers within 7-10 working days” for clarity.
- Manage Expectations: If a product has an exceptionally long lead time, consider adding a small note in the product description explaining why (e.g., “Handmade to order, please allow 4-6 weeks for craftsmanship.”).
- Communicate Delays: If a lead time changes due to unforeseen circumstances, proactively inform your customers. A quick email can turn potential frustration into appreciation for your transparency.
- Combine with Shipping Info: Ensure your lead times complement your overall shipping policy.
Final Thoughts
The Lead Times for WooCommerce plugin by Yoohoo Plugins is an indispensable tool for any serious WooCommerce store owner looking to enhance transparency and improve customer satisfaction. Its intuitive interface and powerful features make adding clear product lead times a breeze.
By investing a little time in setting this up, you’ll not only reduce customer support headaches but also build a more trustworthy and professional online store.
See how the plugin works firsthand on our live demo site: demo.yoohooplugins.com
Ready to provide unparalleled clarity and confidence to your customers? Purchase Yoohoo Lead Times today!
Happy selling!